
Learn how to make one of these fun keyrings. Watch my appliqué keyring tutorial and learn new machine and hand sewing techniques, while creating a professional looking keyring in 15 minutes (longer with appliqué). Personalise your keyring with appliqué and decorative hand-stitching… whatever takes your fancy!
Watch the corresponding YouTube tutorial for more details: DIY Personalised Keyring (Appliqué).
What materials do you need?
– Fabric
– Interfacing
– Embroidery Thread (for appliqué)
– Wadding (we used 100% cotton wadding)
– Metal Ring
– Thread
– Template (download: Keyring Pattern)
What equipment do you require?
– Sewing Machine
– Scissors
– Pinking Shears (optional)
– Pins
– Needle (optional for appliqué)
– Removable Pen, Chalk, Pencil
– Ruler, Tape Measure
Start by choosing the fabric you wish to work with. I used a cotton fabric, however many fabrics will do; cotton, poly cotton, lightweight upholstery, linen etc. I recommend interfacing your fabric, I used a medium weight iron on interfacing (lightweight fabrics may require a heavier interfacing). Iron this onto the WRONG side of your fabric.
Draw a circle that measures 2″ (5cm) in diameter; or work with your own shape/size. I recommend drawing your template onto paper or card for ease.
Cut out 2 squares of fabric that are approximately 3″ (7.5cm) square. They MUST be larger than your chosen template size. Interface the fabric on the WRONG side.
Start by competing your appliqué design, this is an optional step. Complete this on the RIGHT side of one piece of fabric in the centre of the square. For details on how to complete the back-stitch appliqué, watch my YouTube video: Back Stitch (Hand Sewing, Embroidery / Appliqué).
You will need to cut out a smaller square for the tab that joins the keyring onto the metal ring. This square should measure 2″ x 2″ (5cm x 5cm). I did not interface the tab. If you are working with a lightweight fabric this may be required.
Position the tab with the WRONG side facing up. Fold two opposite edges to meet in the middle. Press in position.
Fold the tab in half again. The tab should now measure 2″ (5cm) by 1/2″ (1.25cm). Press in position and pin in place ready to sew.

Sew 1/8″ (3mm) away from the edge of the material on the long edge of the tab. Start by sewing the pinned edge of the tab and then sew the opposite side. Use a standard straight stitch and backstitch to secure the stitching at the start and end.
Sewing such a small piece of fabric can be difficult. Try turning the hand wheel on the sewing machine to walk a few stitches to get started, a walking foot can help with this. If you struggle to complete a backstitch at the start and end of the sewing, simply tie off the threads with a knot.
Trim threads. Fold the tab in half with the preferred side facing OUT. Position the metal ring in between the two layers of fabric so that it sits at the folded edge. If you would prefer you are welcome to add the metal ring onto the keyring at the end of making.

Sew along the raw fabric edge about 1/8″ (3mm) away from the edge of the material, to hold the layers together. This does not need to look pretty. Backstitch if possible to secure the stitching.

Now it’s time to start work on the keyring fob. Position the template onto the RIGHT side of the fabric (with appliqué design). If you have completed an appliqué design you will want to check that this is in the centre of the template.
TIP: To make this easier copy the template onto tracing paper so that you can see through the design to check the placement.
Draw around the template using a removable pen or chalk.


You should have 2 layers of interfaced fabric and some wadding. I chose a lightweight 100% cotton wadding. Thicker wadding will give a stiffer and more structured finish. Try testing different layers of wadding and interfacing on your fabric first?

Lay the bottom layer of fabric with the WRONG side facing up (this should be the interfaced side). Position the wadding onto the bottom layer. Cut the wadding to the same size.
Lay the top layer of fabric (with appliqué) onto the wadding with the RIGHT side facing up. This will create a sandwich.
You will need to add the metal ring and tab. This should sit at the top of the keyring in between the FRONT layer and wadding. You want to have approximately 1/4″ (5mm) of the tab sitting into the drawn template circle. You should be able to feel the edge of the tab below the drawn line.
This can be slightly confusing, if you need extra instructions check out our YouTube video: DIY Personalised Keyring (Appliqué).


Pin all of the layers together securely, especially the tab.

Sew around the drawn line on the sewing machine. Rather than completing a backstitch at the start and end of sewing, try sewing around the circle, sewing over the stitches by approximately 2-3 stitches when you return to the start. This will create a neater result as lots of backstitching can appear messy.
Be sure to hold the tab in place whilst sewing, so that it stays straight on the keyring. Try using a walking foot to improve the ease of sewing over this area.

Trim threads and knot at the back of the keyring (if required). Remove the pen or chalk marks.

Use pinking shears (or normal scissors if your fabric doesn’t fray) to cut around the sewn line.
If you're working with pinking shears try and keep the zigzags consistent by lining up the previous zigzags with the serration on the scissors. Try and position the point of the zigzag on the scissors about 1/16″ (2mm) away from the stitching line, be consistent. Work carefully, you do not want to cut through the stitching.
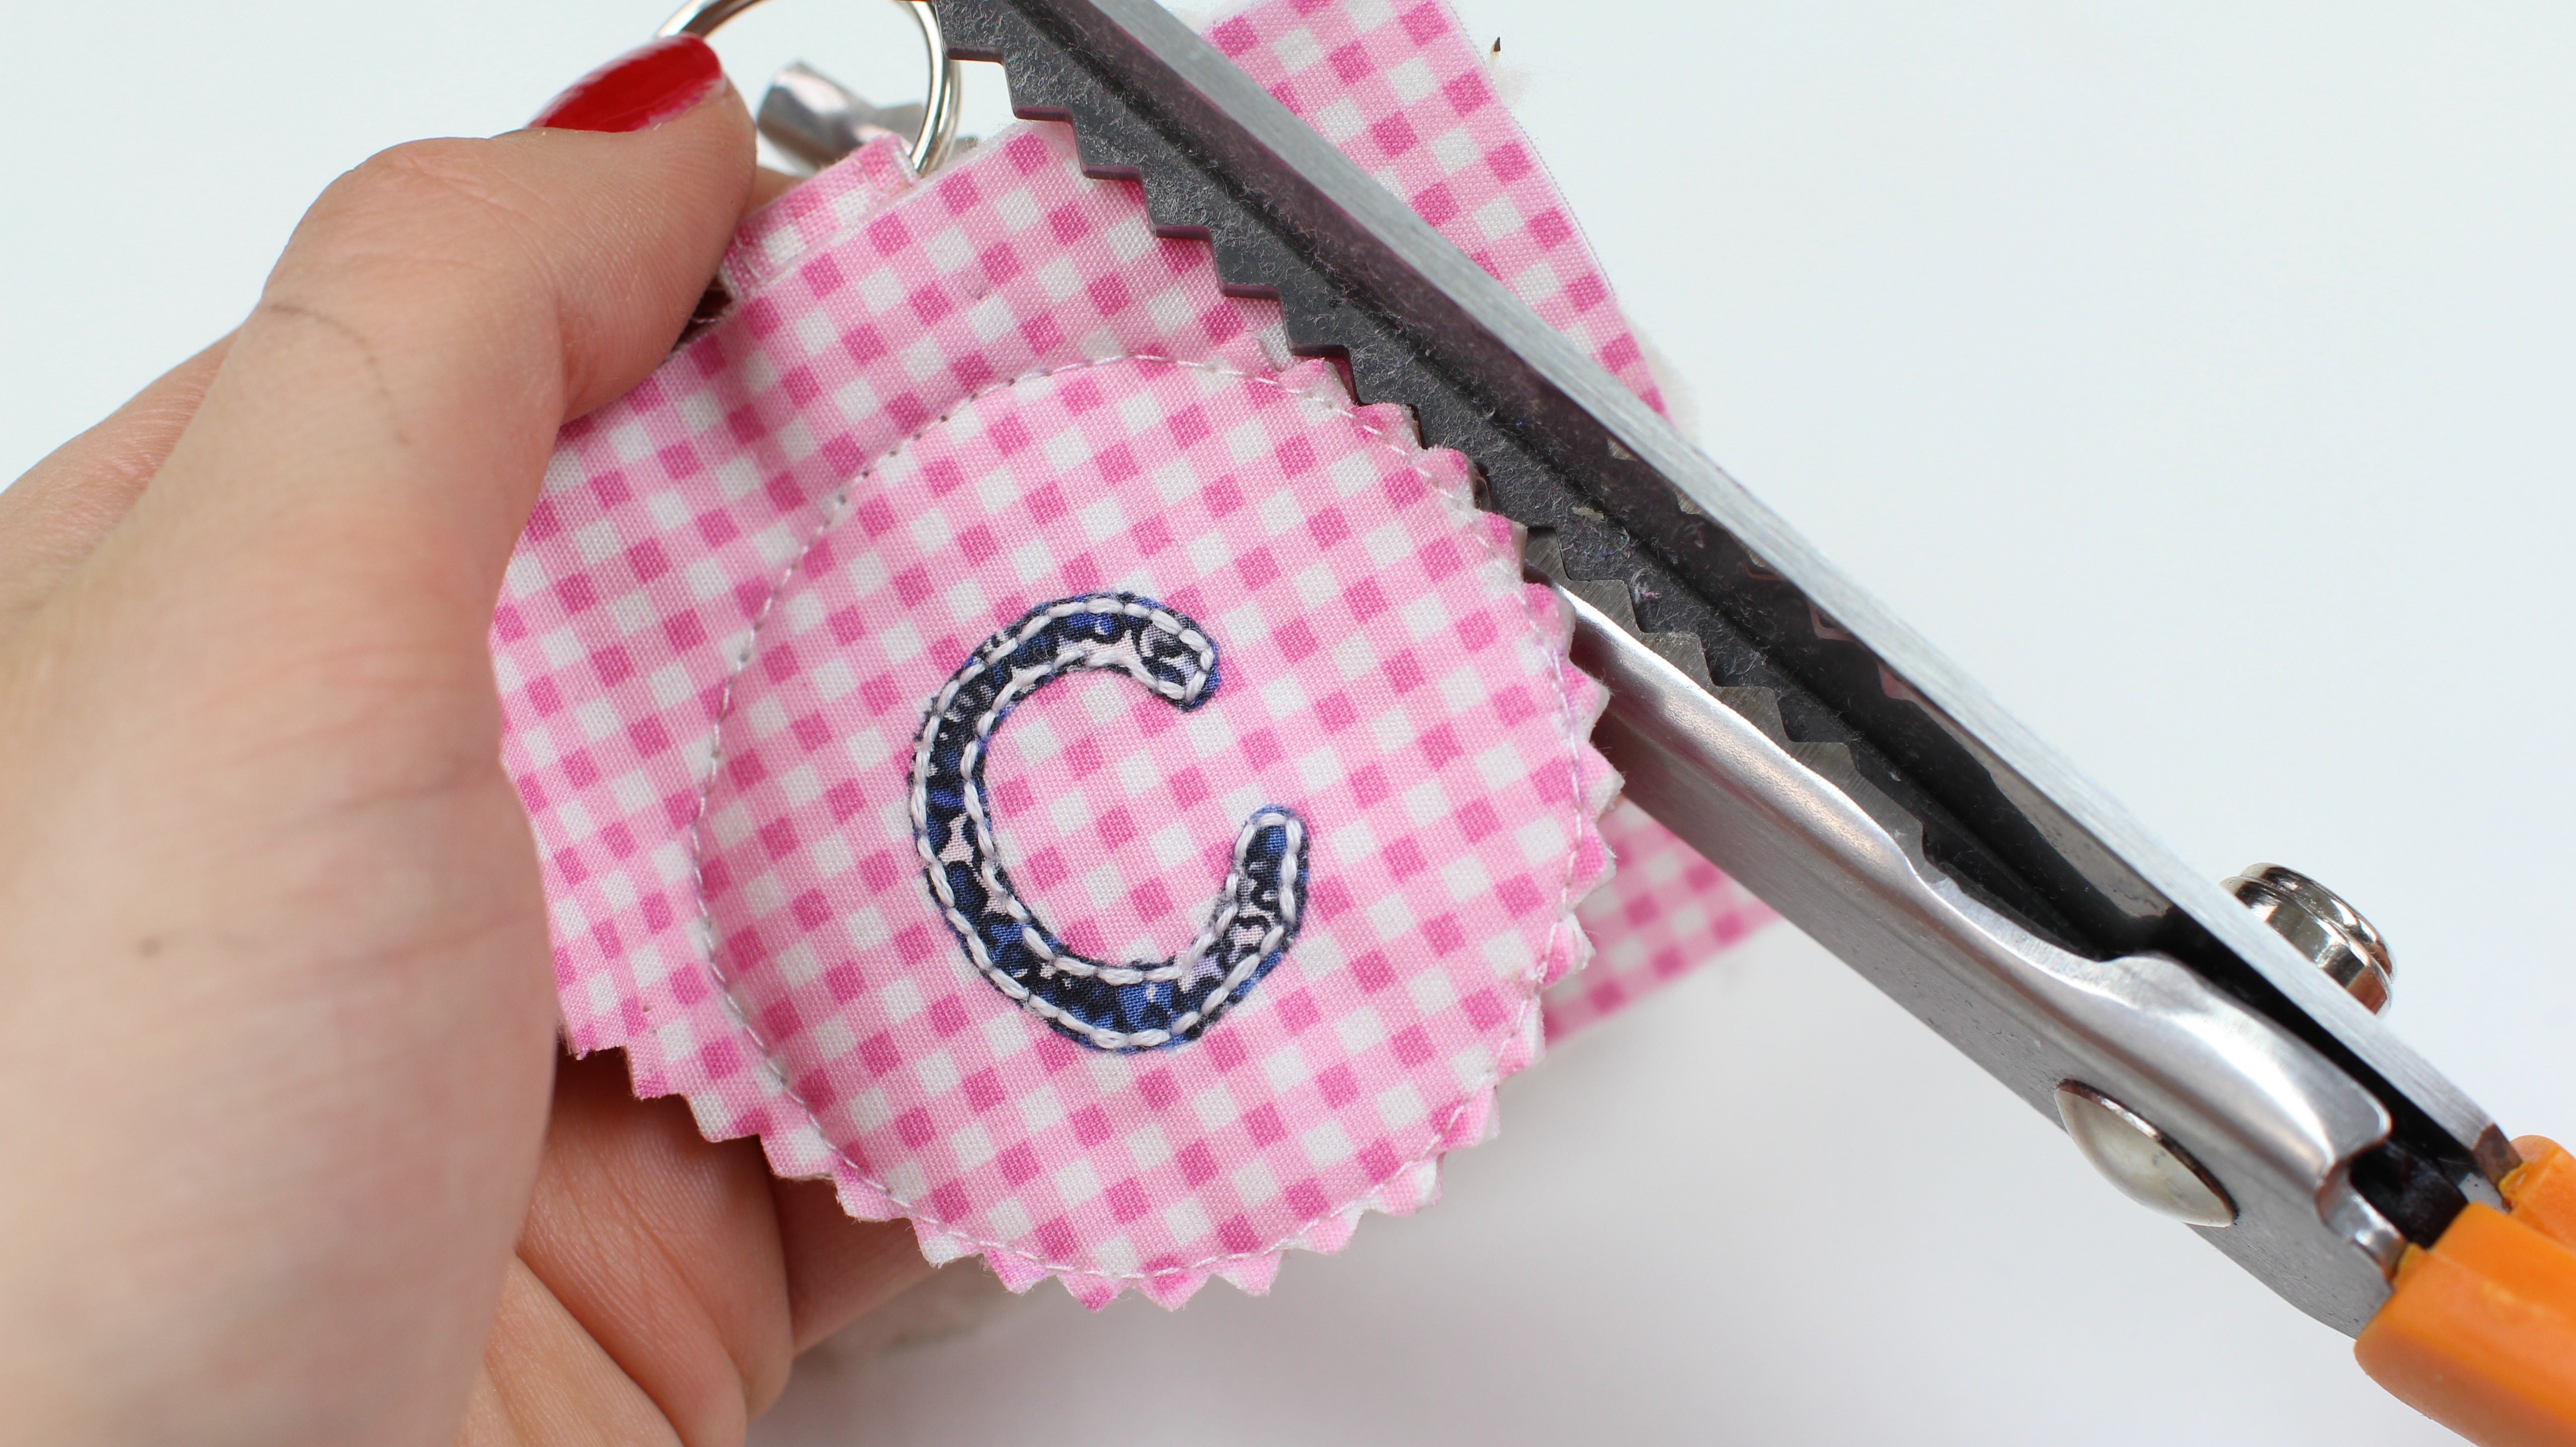
When you reach the tab at the top of the keyring you will need to cut through the front layer of fabric separately to the back layer and wadding. Do NOT cut through the tab.
Working with normal scissors? Trim the excess fabric 1/8″ (3mm) away from the stitching line.
Add the metal ring if you haven't already. You will need to open the ring and thread it onto the tab.
 Congratulations you have made a beautiful appliqué keyring, perfect to make as gifts for friends and family; have fun with different appliqué and embroidery details.
I would love to see how you get on; get in touch on Facebook and Instagram.