
Join in our fun tutorial and learn some new sewing tips and techniques whilst making a gorgeous quilted keyring. A quick and easy project to make as gifts for friends and family. Personalise with your own shape template and feel free to skip the quilting if desired. We look forward to seeing what you create.
Watch our corresponding YouTube tutorial for more details: DIY Quilted Keyring.
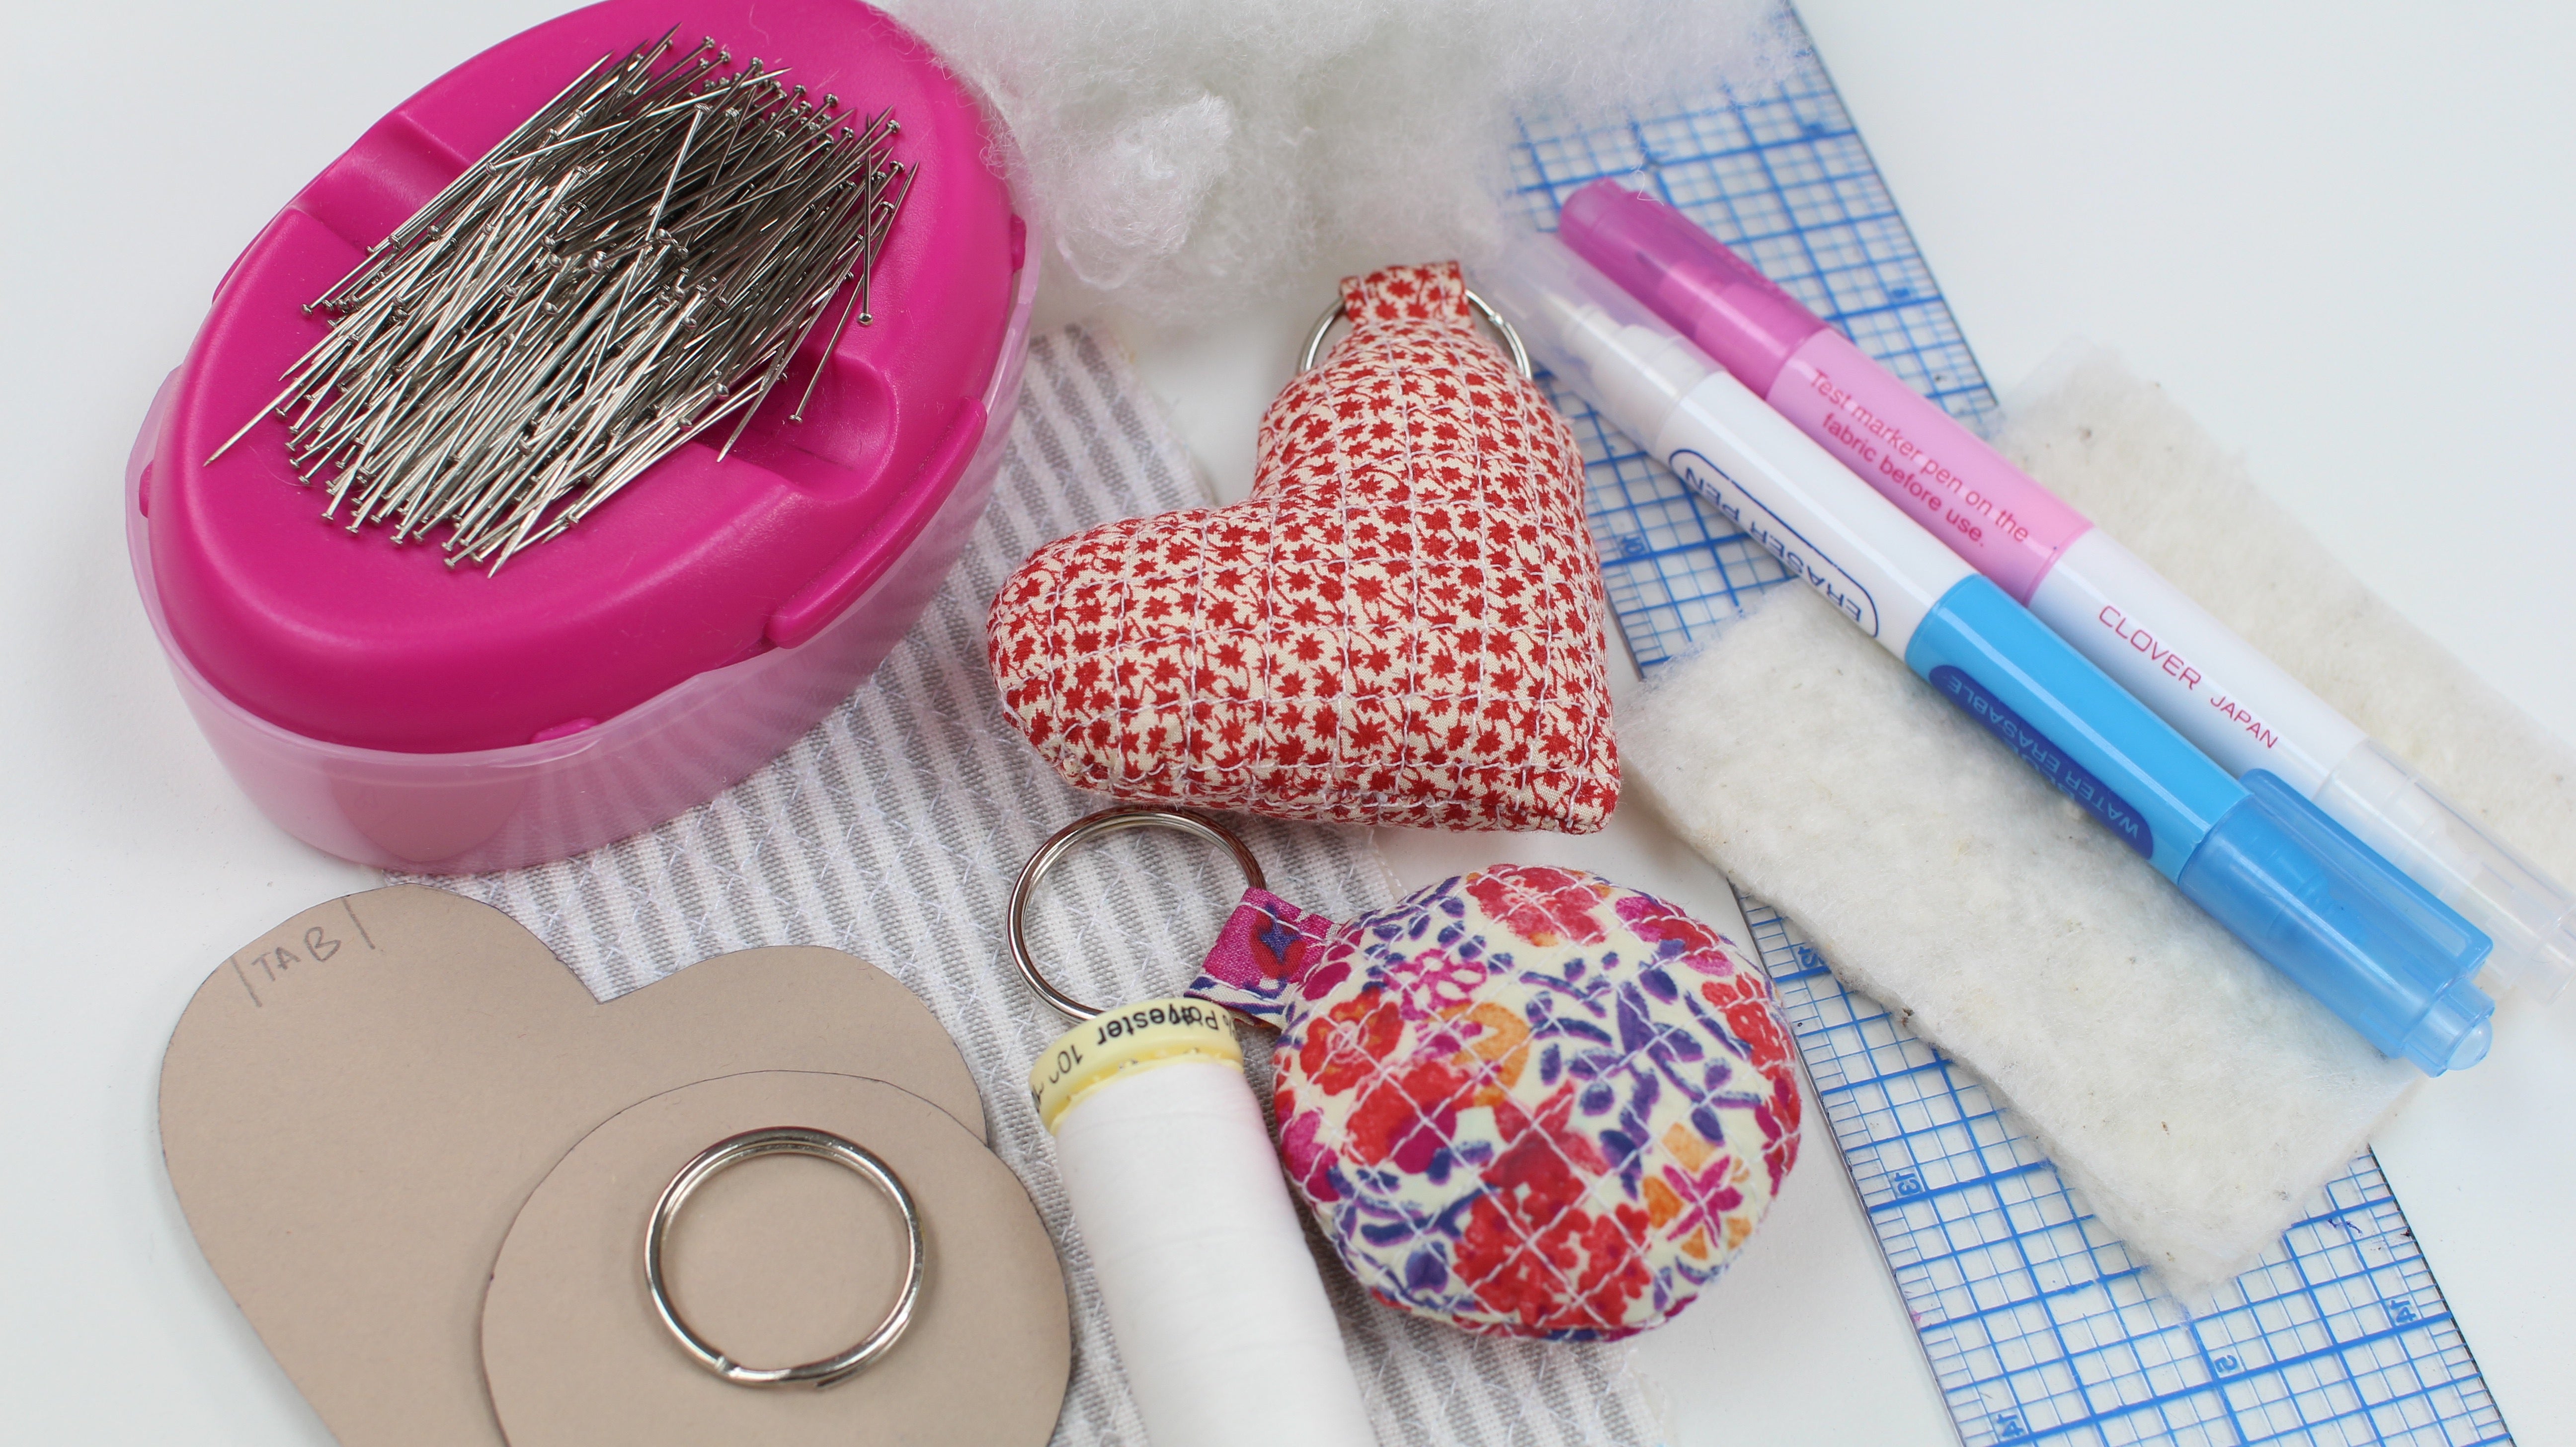
What materials do you need?
– Fabric
– Wadding (optional)
– Metal Ring
– Thread
– Stuffing
– Template (download from website: Keyring Pattern)
What equipment do you require?
– Sewing Machine
– Scissors
– Pins
– Needle
– Removable Pen, Chalk, Pencil
– Ruler, Tape Measure
Start by choosing the fabric you wish to work with. In the tutorial and attached images we used a Liberty Tana Lawn cotton and a linen upholstery fabric. A large variety of fabrics would be suitable for the project, however lightweight fabrics will perform better with the optional quilting. You may wish to test some samples of fabric with quilting before use.
If you wish to work with our circle or heart template you are welcome to download the pattern from our website: Keyring Pattern. Alternatively draw your own template, the circle measures 2″ (5cm) in diameter. Our patterns do NOT have seam allowances. We recommend drawing your template onto paper or card for ease.
Cut out a piece of fabric that is larger than 2 of your templates (front and back), with room to add a seam allowance of 1/4″ (5mm). It is always best to leave a little bit of extra room, so that your not struggling to fit your template onto your fabric. Quilting can shrink the fabric slightly, so it is better to be on the generous side if you choose to quilt your fabric.
Cut out 1 piece of fabric that measures a width of 2″ (5cm) and a length of 1 1/2″ (3.8cm) for the tab.
Quilting Fabric
Do you wish to quilt your fabric, this is an optional step?
If you would like to quilt your fabric cut out a piece of wadding the same size as your main fabric. We recommend quilting the whole piece of fabric and cutting it down to the template size. This is an accurate method as fabric can shrink slightly during quilting, and it can be difficult to quilt small pieces of fabric such as the template size.
Draw quilting lines onto the fabric, we drew lines 1/4″ (5mm) apart. Generally speaking smaller lines look better on smaller items, smaller lines also provide more support and structure.
If you do not know how to quilt fabric or would like to read more about this process. Check out our corresponding blog post: How To: Quilt Fabric.
You do NOT need to quilt the piece of fabric for the tab, that measures 2″ (5cm) by 1 1/2″ (3.8cm).
Position the tab with the WRONG side fabric up. Fold two opposite sides from the width measurement of 2″ (5cm) to meet in the middle. Press in position.

Fold the tab in half again so that it measures 1/2″ (1.25cm) in width, 1 1/2″ (3.8cm) in length. Press.


Pin the folded edge of the tab to hold in position.
At the sewing machine edge stitch 1/8″ (3mm) away from the long folded edge. Sew along the pinned edge first. Trim threads and complete the same on the other side.


Fold the tab in half (with the best side facing out). Position the metal ring in between the layers, to sit at the folded edge.
If you do not want to add the metal ring now you are welcome to add it at the end of making. However you will need to open the metal ring and slide it onto the tab, which can be tricky.
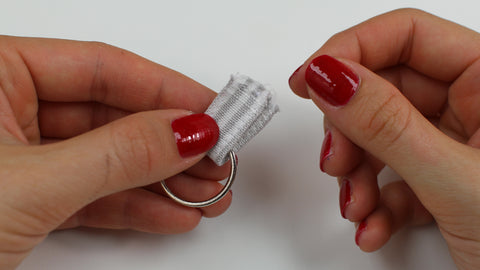
Edge stitch 1/8″ (3mm) away from the raw edge of the fabric. Due to the small size of the tab this can be tricky to complete, stitch backwards and forwards, using the hand wheel to walk the sewing machine if required. This does not have to look neat, you just need to hold the layers together.
 Take your main fabric, with or without quilting. Position your template onto the WRONG side of the fabric. Draw around the template using a removable pen or chalk.
If you are working with a patterned fabric you will need to think about the positioning of the template onto the pattern.
 Mark all of the notches from the pattern onto the fabric. There will be 2 notches for the positioning of the tab, if you are working with your own shape this should be central, however we found the heart shape looked best with these on one side.
There will also be 2 notches for the opening, the area between the notches will be left un-sewn, so that the shape can be turned to the right side after sewing. If you are working with your own template, we recommend positioning these on the least curved area (as with our heart template). This will make it easier to sew up the shape on finishing.
 The templates do not have seam allowances included, these will need to be drawn around the initial shape. Add seam allowances of 1/4″ (5mm) for ease.
 Once the seam allowances have been added cut around the outside line using a pair of scissors.
 You do NOT need to draw around the template on another piece fabric. Simply take a square of fabric larger than the shape you have cut out and position the two pieces of fabric together, with the RIGHT sides facing. The cut out, drawn shape should be facing UP, this will be your guide when sewing.
The tab must sit between the layers of fabric with the metal ring facing inside the shape and the raw edges lining up with the cut out shape. This will mean that when the shape is turned around to the right side after sewing the metal ring and tab will be on the outside.
Position the tab between the markings drawn onto the fabric previously. Pin securely in place.


 Position pins through the fabric layers to hold everything together.
 Sew around the shape, stitching along the inside drawn outline of the template. Start sewing at one side of the opening notch and stitch around the shape, finishing at the opposite side of the opening notch. Back stitch at the start and end of sewing.
Be sure to turn the corners accurately, position the needle into the fabric, lift the foot and turn the fabric. Be careful when sewing over the tab, check that it remains in the correct position; remove the pin at the last minute.
When sewing around the shape be careful that the metal ring (on the inside) does not get in your way. Move it with your fingers, so that you do not accidentally sew too close. If you find this difficult you are welcome to add the metal ring onto the tab once the keyring has been complete; you will have to open and thread the metal ring onto the tab.


 Trim the seam allowances of BOTH pieces of fabric to 1/8″ (3mm) away from the stitching line. Trim the tab to the same 1/8″ (3mm) distance from the sewing line.
DO NOT trim between the opening notches (the area left un-sewn) the seam allowance should be trimmed or left at 1/4″ (5mm). Solely trim the larger piece of fabric to match the cut out shape, 1/4″ (5mm) away from the drawn line. This larger seam allowance will aid with the hand sewing and finishing of the keyring.

 When working with a heart shape, or a different shape with points. Trim off the seam allowance at the point to remove extra bulk, this will create a neater point when turning the shape around. Cut 1/8″ (3mm) away from the point at the bottom of the heart, in a straight line.
If working with a removable pen, remove the pen at this stage.
 Turn the shape to the right side. Poke out any corners using a point turner or wooden dowel.
 Stuff the shape compactly, we used a 100% polyester toy stuffing.
 Turn under the seam allowances at the opening and pin the edges together.
Sew the opening closed using a slipstitch, ladder stitch. If you are unsure how to complete a slip stitch, ladder stitch, follow the link to our blog post: How To: Invisible Stitching.
Add the metal ring if you decided to add it at this later stage. You will need to open the ring and thread it onto the tab, as you would complete for standard keys.

 Congratulations you have made your very own quilted keyring. Hopefully you have enjoy this tutorial and learned some new sewing techniques along the way.
We would love to see how you get on; get in touch with us on Facebook and Instagram.