
Bunting with a difference… Learn how to make your very own Lavender Filled Bunting. Watch the corresponding YouTube Tutorial, DIY Lavender Filled Bunting.
What materials do you need?
– Fabric 1/4 metre of 4 different fabrics to create 12 pennants, 3 of each colour way. You may need more fabric if you wish to make more pennants or use fewer colour ways.
– Bias Binding (2.5 metres x 1″ (2.5cm))
If you wish to work with more pennants you may require a longer length of bias binding.
– Thread
– Template: Bunting Pattern
The template size is 4″ (10cm) in width and 4″ (10cm) in length (from top to point). I recommend cutting this out in card to make the process easier.
– Lavender (or alternative filling)
What equipment do you need?
– Sewing Machine
– Scissors
– Chalk, Pencil, Removable Fabric Pen
– Pins
– Ruler, Tape Measure
Start by collecting the required material and fabric for the project.

Position the template onto the WRONG side of the fabric. Draw around the template using a removable fabric marker or chalk.

Draw seam allowances around the traced template. I find it easier to work with a small seam allowance of 1/4″ (5mm), this also reduces fabric wastage. Use a removable pen and ruler to work your way around the traced template, drawing on the seam allowance.
Completing the process of drawing the stitching line and seam allowances onto the fabric works well for beginners. The process does take slightly longer, but you will receive more accurate results; all of the pennants will be the same size with symmetrical points, you will be proud of your beautiful handiwork.

Use scissors or a rotary cutter to cut out the pennants. Cut around the outermost line.

Complete the above steps of drawing around the template, adding a seam allowance and cutting out the triangle for each of the pennants. You will need 2 triangle shapes for each pennant that you wish to create. I am working with a total of 12 finished pennants, 3 in each of the 4 gingham colour ways. Therefore I will cut 6 triangles in each gingham fabric.
Position 2 pennants RIGHT sides together. Start by pinning the top point together, check that the pin enters the fabric at the same drawn point on both sides. Position pins around the rest of the triangle, matching the drawn lines together. This will make sure that you get perfect sized pennants with symmetrical points.


Take the pennants to the sewing machine and sew along the drawn line. Start at one end with a backstitch and sew down to the point, removing pins as you sew. Be sure to position the needle into the fabric at the point, if you are worried about sewing too far, turn the hand wheel on the sewing machine to walk the stitches forwards until you reach the marked point. Position the needle into the fabric, lift the foot of the sewing machine and turn the fabric to allow you to sew the other side. Remember to put the foot back down before sewing again.
Continue sewing down the other side of the pennant, back-stitch at the end. Complete for all of the pennants.

Once the pennants have been sewn the seam allowances must be trimmed to reduce bulk. Trim down the seam allowances to 1/8″ (3mm). Cut off the seam allowance at the point to ensure a neat point when the pennants are turned to the right side. Be careful and do not cut through the stitching.


Turn the pennants to the RIGHT side, poke out the point using a point turner, wooden dowel or pencil. Don’t use scissors as they can cut through the stitches. Press the pennant flat.

Open the triangle and fill with lavender (or an alternative filling), use approximately 1 teaspoon per pennant.

Stitch the top edge of the pennants closed to hold the lavender inside. Stitch 1/4″ (5mm) away from the top edge on the sewing machine using a basting stitch (4mm length); backstitch at both ends. This can be completed by hand should you prefer and is simply to hold the lavender inside the pennant. Complete for all pennants.

Decide on the order of the pennants, this is completely up to you and will depend on the patterns and colours you are working with.

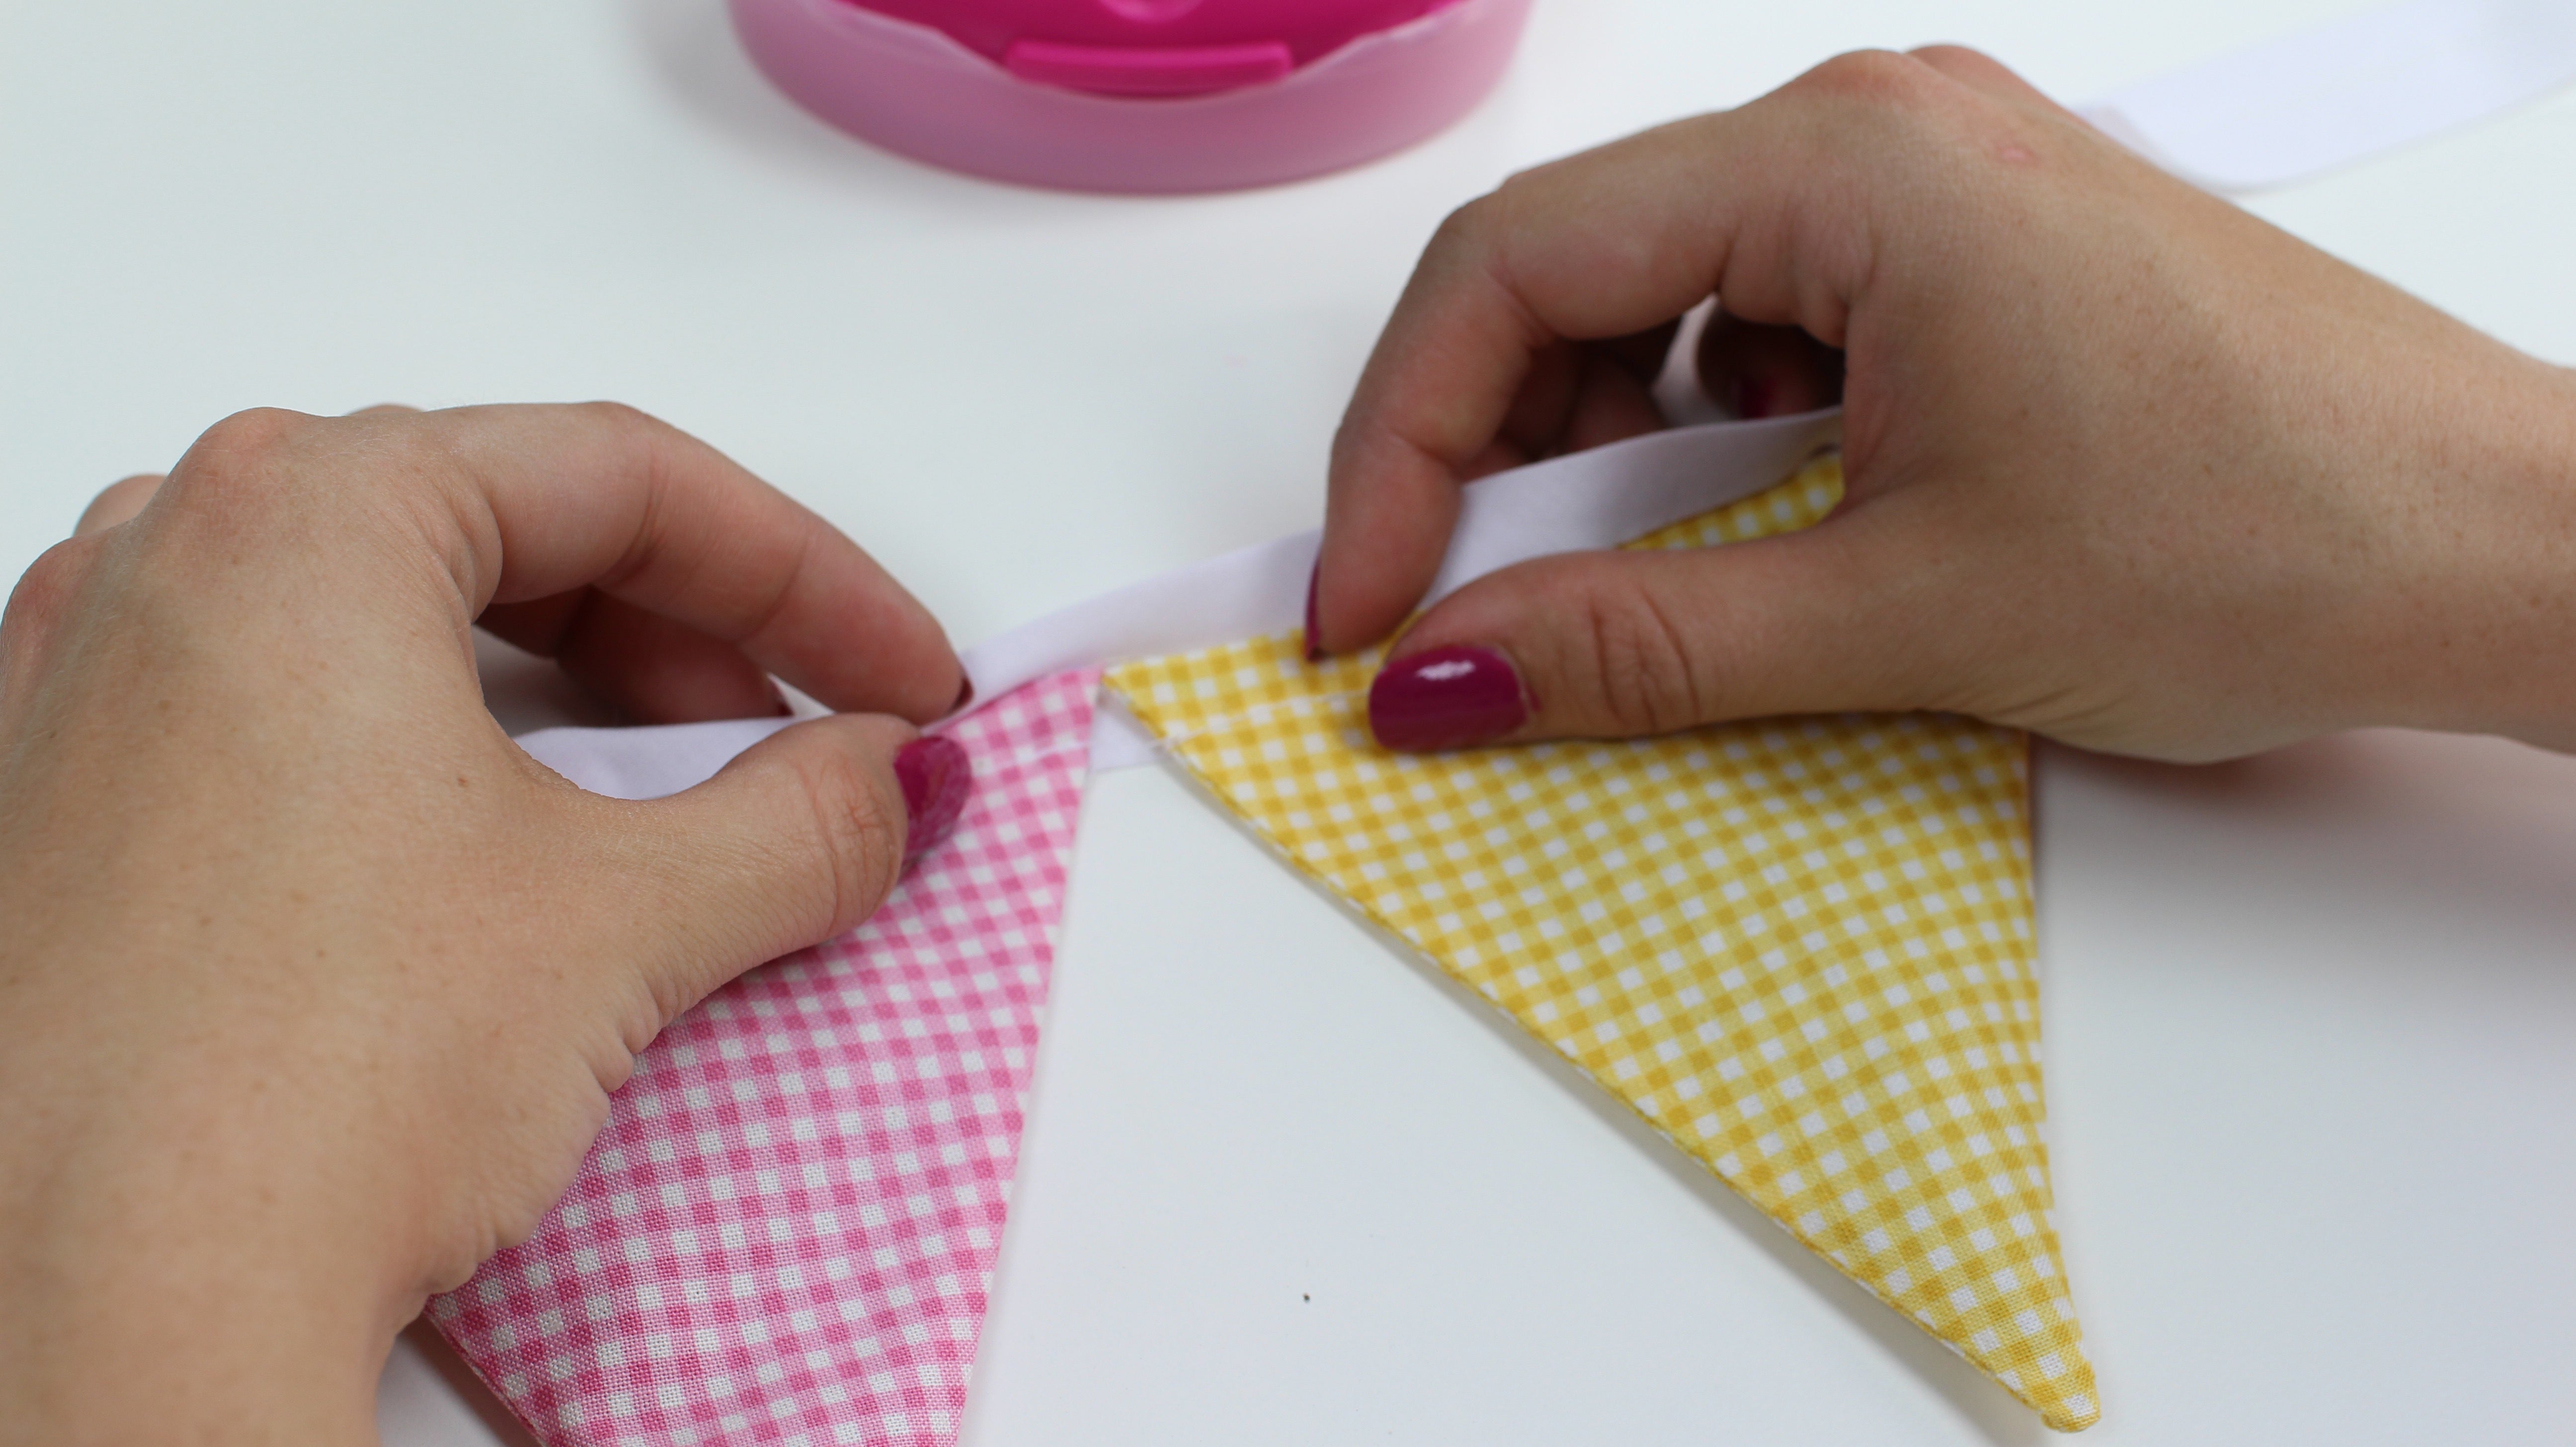
Now it’s time to attach the bias binding. Firstly find the centre of the bias binding, fold the binding in half lengthwise and mark the central fold with a pin, or a removable fabric marker. You must also find the centre of the bunting, lay out the pennants in the correct order to find the centre, this can be between two pennants or the centre of one pennant, depending on the number of pennants you are working with.
I am working with an even number (12) pennants and therefore my centre is in between two different pennants (blue and green). If you are working with an odd number the centre will be the middle of one pennant, mark this with a pin or removable pen.
Work from the middle of the bunting, match the centre of the bunting to the centre of the binding. Place the top raw edge of the pennants (RIGHT side facing up) on the WRONG side of the bunting, the top edge of the pennant should sit in the middle of the binding. Wrap the binding so that it covers the edge of the triangle on both sides (half of the binding will be seen from the front, half from the back).
Position pins approximately 1/8″ (3mm) away from the edge of the binding. The pins should pin through the bias binding the same distance from the edge on the other side, this will produce a professional finish.
Decide on the distance between the pennants, I am working with the pennants touching (at the top corner) inside the binding, however this is completely up to you and your bunting design.
Continue pinning all of the pennants into the bias, work from either side of the central point.

Once you arrive at the last pennant fold the bias binding in half and continue pinning 1/8″ (3mm) away from the edge. The left over bias binding will be used to hang the bunting. Be sure that both sides of the binding meet together, or that the front is very slightly longer than the back. Most importantly you DO NOT want to see the back of the binding from the front.

Create a neat end to the bias binding by folding in approximately 1/2″ (1cm) of the raw edge, and then folding the bias binding in half as completed for the rest of the bunting. Be sure to tuck in any of the raw edges at the end to create a neat finish.


Finally it will be time to sew the pennants into the bias binding. Sew 1/8″ (3mm) away from the edge of the bias binding, in the same location as the pins. If your pins are in the correct position (the same distance from the edge on both the back and front of the binding) your stitching should be neat and very similar on both sides.
I am using a mark on the foot of my sewing machine to line up the edge of the binding and sew 1/8″ (3mm) away consistently. Have a look at your sewing machine foot to use a consistent mark for sewing. If you haven’t got a foot that makes this easy, try moving the needle on your sewing machine and lining the edge of the binding against something else. As long as you’re consistent it will look good.
Start sewing at the end of the binding, where you folded in the raw edge to create a neat finish. It can be tricky starting, as the sewing machine may find it hard to start sewing such a small amount of material. If you have a walking foot for your sewing machine this can help.


Once the stitching has been completed trim threads and prepare the bunting for hanging and displaying in your home. Have fun playing with different designs, patterns, colours and fillings. Use it to decorate a children’s or new born babies room, or simply make your home smell delightful.
I would love to see how you get on; get in touch on Facebook and Instagram.