
Learn how to make these quick and easy stuffed fabric pumpkins, perfect for the Autumn season. A suitable tutorial for those with or without a sewing machine.
I have created three different sized patterns for you to make, alternatively learn how to make your own pattern. Check out our corresponding YouTube tutorial: DIY: Easy Fabric Pumpkin Tutorial.
Start by collecting the materials and equipment you need to create the pumpkins:
– Fabric (cotton or lightweight upholstery)
– Felt
– Embroidery Thread
– Stuffing (100% Polyester)
– Scissors
– Pins & Needle
– Ruler
– Chalk or Removable Fabric Pen
– Glue Gun or Fabric Glue
 Draw out the pattern on paper or card. I am working with the medium sized pumpkin in this tutorial.
Small: Height 5″ (12.5cm), Width 10″ (25cm)
Medium: Height 7″ (18cm), Width 14″ (36cm)
Large: Height 10″ (25cm), Width 20″ (50cm)
If you would prefer to make your own pattern for the pumpkin you must draw out a rectangle shape, where the width (horizontal) measurement is double the height (vertical) measurement.
You will need to cut the pumpkin on the bias of the fabric. The bias of the fabric is the 45 degree grainline and will allow the fabric to have some stretch, which will create a smoother finished pumpkin.
To mark the bias grainline onto the pumpkin template. Draw a line down the centre of the width and height of the template. You will then be able to draw a right angle that measures 1″ (2.5cm). This right angle will allow you to draw an accurate grainline through the centre of the (horizontal and vertical halfway lines) and the corner of the right angle.
Draw the grainline onto the pattern piece and mark with arrows.
 Position the template onto the RIGHT side of the fabric. Measure from the selvage edge to the grainline (drawn on the pattern piece). Take a measurement at the top and bottom of the grainline to check that it is straight and in line with the fabric selvage. This will be certain that the pattern is cut on the bias.

 Draw around the pattern using a removable pen or chalk.
 Cut around the drawn line.
 Fold the fabric in half, with the RIGHT sides together, allowing the short edges to meet.
 Pin and stitch along the short edges using a 1/4″ (5mm) seam allowance, back stitch at the start and end of sewing to secure the seam.
If you don’t have a sewing machine you can sew this by hand using a running stitch or back stitch. If you are new to sewing check out my tutorial on how to sew a back-stitch: How To: Back Stitch (Appliqué).

 You will need to complete a gathering stitch along the bottom edge of the pumpkin. This can be sewn on the sewing machine or by hand. If you are working on the sewing machine sew 1/4″ (5mm) from the edge of the fabric using a stitch length of 4mm.
Sew all the way around the circle and back to the start of the sewing, do NOT backstitch, leave long tails of thread.
If you are working with a directional print, complete the gathering at the bottom of the print, as this will be the bottom of the pumpkin.
 It is necessary to complete more than one row of gathering stitches to create an even gather. Complete another row of stitches, 3/8″ (1cm) from the edge of the fabric. Do NOT backstitch and leave long tails of thread.

 Should you prefer to complete the gathering stitch by hand, sew using a running stitch, 1/4″ (5mm) in length. Secure the stitching by knotting the thread and sewing over yourself to start, stitch 1/4″ (5mm) from the edge of the fabric. Leave a long tail at the end of the stitch.
Complete another row 3/8″ (1cm) away from the raw edge of the fabric. Ideally the gathering stitches should be unevenly spaced, helping to create an uneven gather.
 Pull on the threads to gather the fabric. You will need to pull on TWO threads from the same side; either the two starting or ending threads from both rows of stitching (from the right or wrong side of the fabric). If you have sewn this on the sewing machine I recommend working with both the two starting stitches, to gather fabric and then working with the two ending stitches to gather fabric in the opposite direction, this will stop you from pulling the gathering stitches out from the other end. Alternatively position a pin in the fabric next to the end of the thread (that you are NOT pulling) and wrap the thread around the pin in a figure of eight to secure.
If you had decided to hand sew the gathers you would only have tails at the end of the stitching row (because the start of the stitch must be secured so that you don’t pull the stitches out as you gather the fabric). The tension in a hand sewn gathering stitch is looser (than the sewing machine) and therefore it is easier to pull the stitches out of the fabric, be sure that you fasten the stitches well when you start sewing. Pull on both tails from one side of the fabric (right or wrong side of the fabric).
 Once the fabric has been gathered you will need to sew through the gathered area to avoid a hole at the bottom of the pumpkin. Use a needle and thread to stitch through the gathered layers of fabric and fasten the gap. This does not need to be pretty.
Check from the RIGHT side that you have caught everything inside the stitching.
 Turn the fabric around to the RIGHT side.
 Stuff the fabric using a 100% polyester stuffing. Stuff the pumpkin about 3/4 full so that you can complete another row of gathering at the top edge.

Complete a gathering stitch around the top edge of the pumpkin, sewing two rows; 1/4″ (5mm) and 3/8″ (1cm) from the edge of the fabric. This can be completed on the sewing machine or by hand, as worked previously. You may find that you are unable to complete this on the smaller sized pumpkin on the sewing machine, you may also need to remove the stuffing to get the foot of the sewing machine inside the circle.
On the sewing machine use a 4mm stitch length and remember NOT to back stitch, leave tails. Stitch 1/4″ (5mm) away from the edge of the fabric and then again 3/8″ (1cm) away from the edge of the fabric.
To hand stitch secure the stitching by knotting the end of the thread and stitching over yourself for security. Complete a 1/4" (5mm) length stitch around the top of the pumpkin, 1/4″ (5mm) away from the raw edge of the fabric. Leave a long thread tail at the end.

 Complete another row 3/8″ (1cm) away from the raw edge of the fabric. The stitches should not mirror those completed 1/4″ (5mm) away from the edge of the fabric, you will create a better gather if they are different and uneven.
 Pull on the threads and manipulate the fabric around the top of the pumpkin, using the same technique completed previously. As you are gathering the fabric gradually add more stuffing to create a firmly stuffed pumpkin.
Be careful not to pull the threads really tight as this can cause them to snap (especially hand stitches). You will need to slowly move the fabric around the thread until you have fully gathered the fabric.


Stitch through the gathers to fasten the hole at the top of the pumpkin, as completed on the bottom.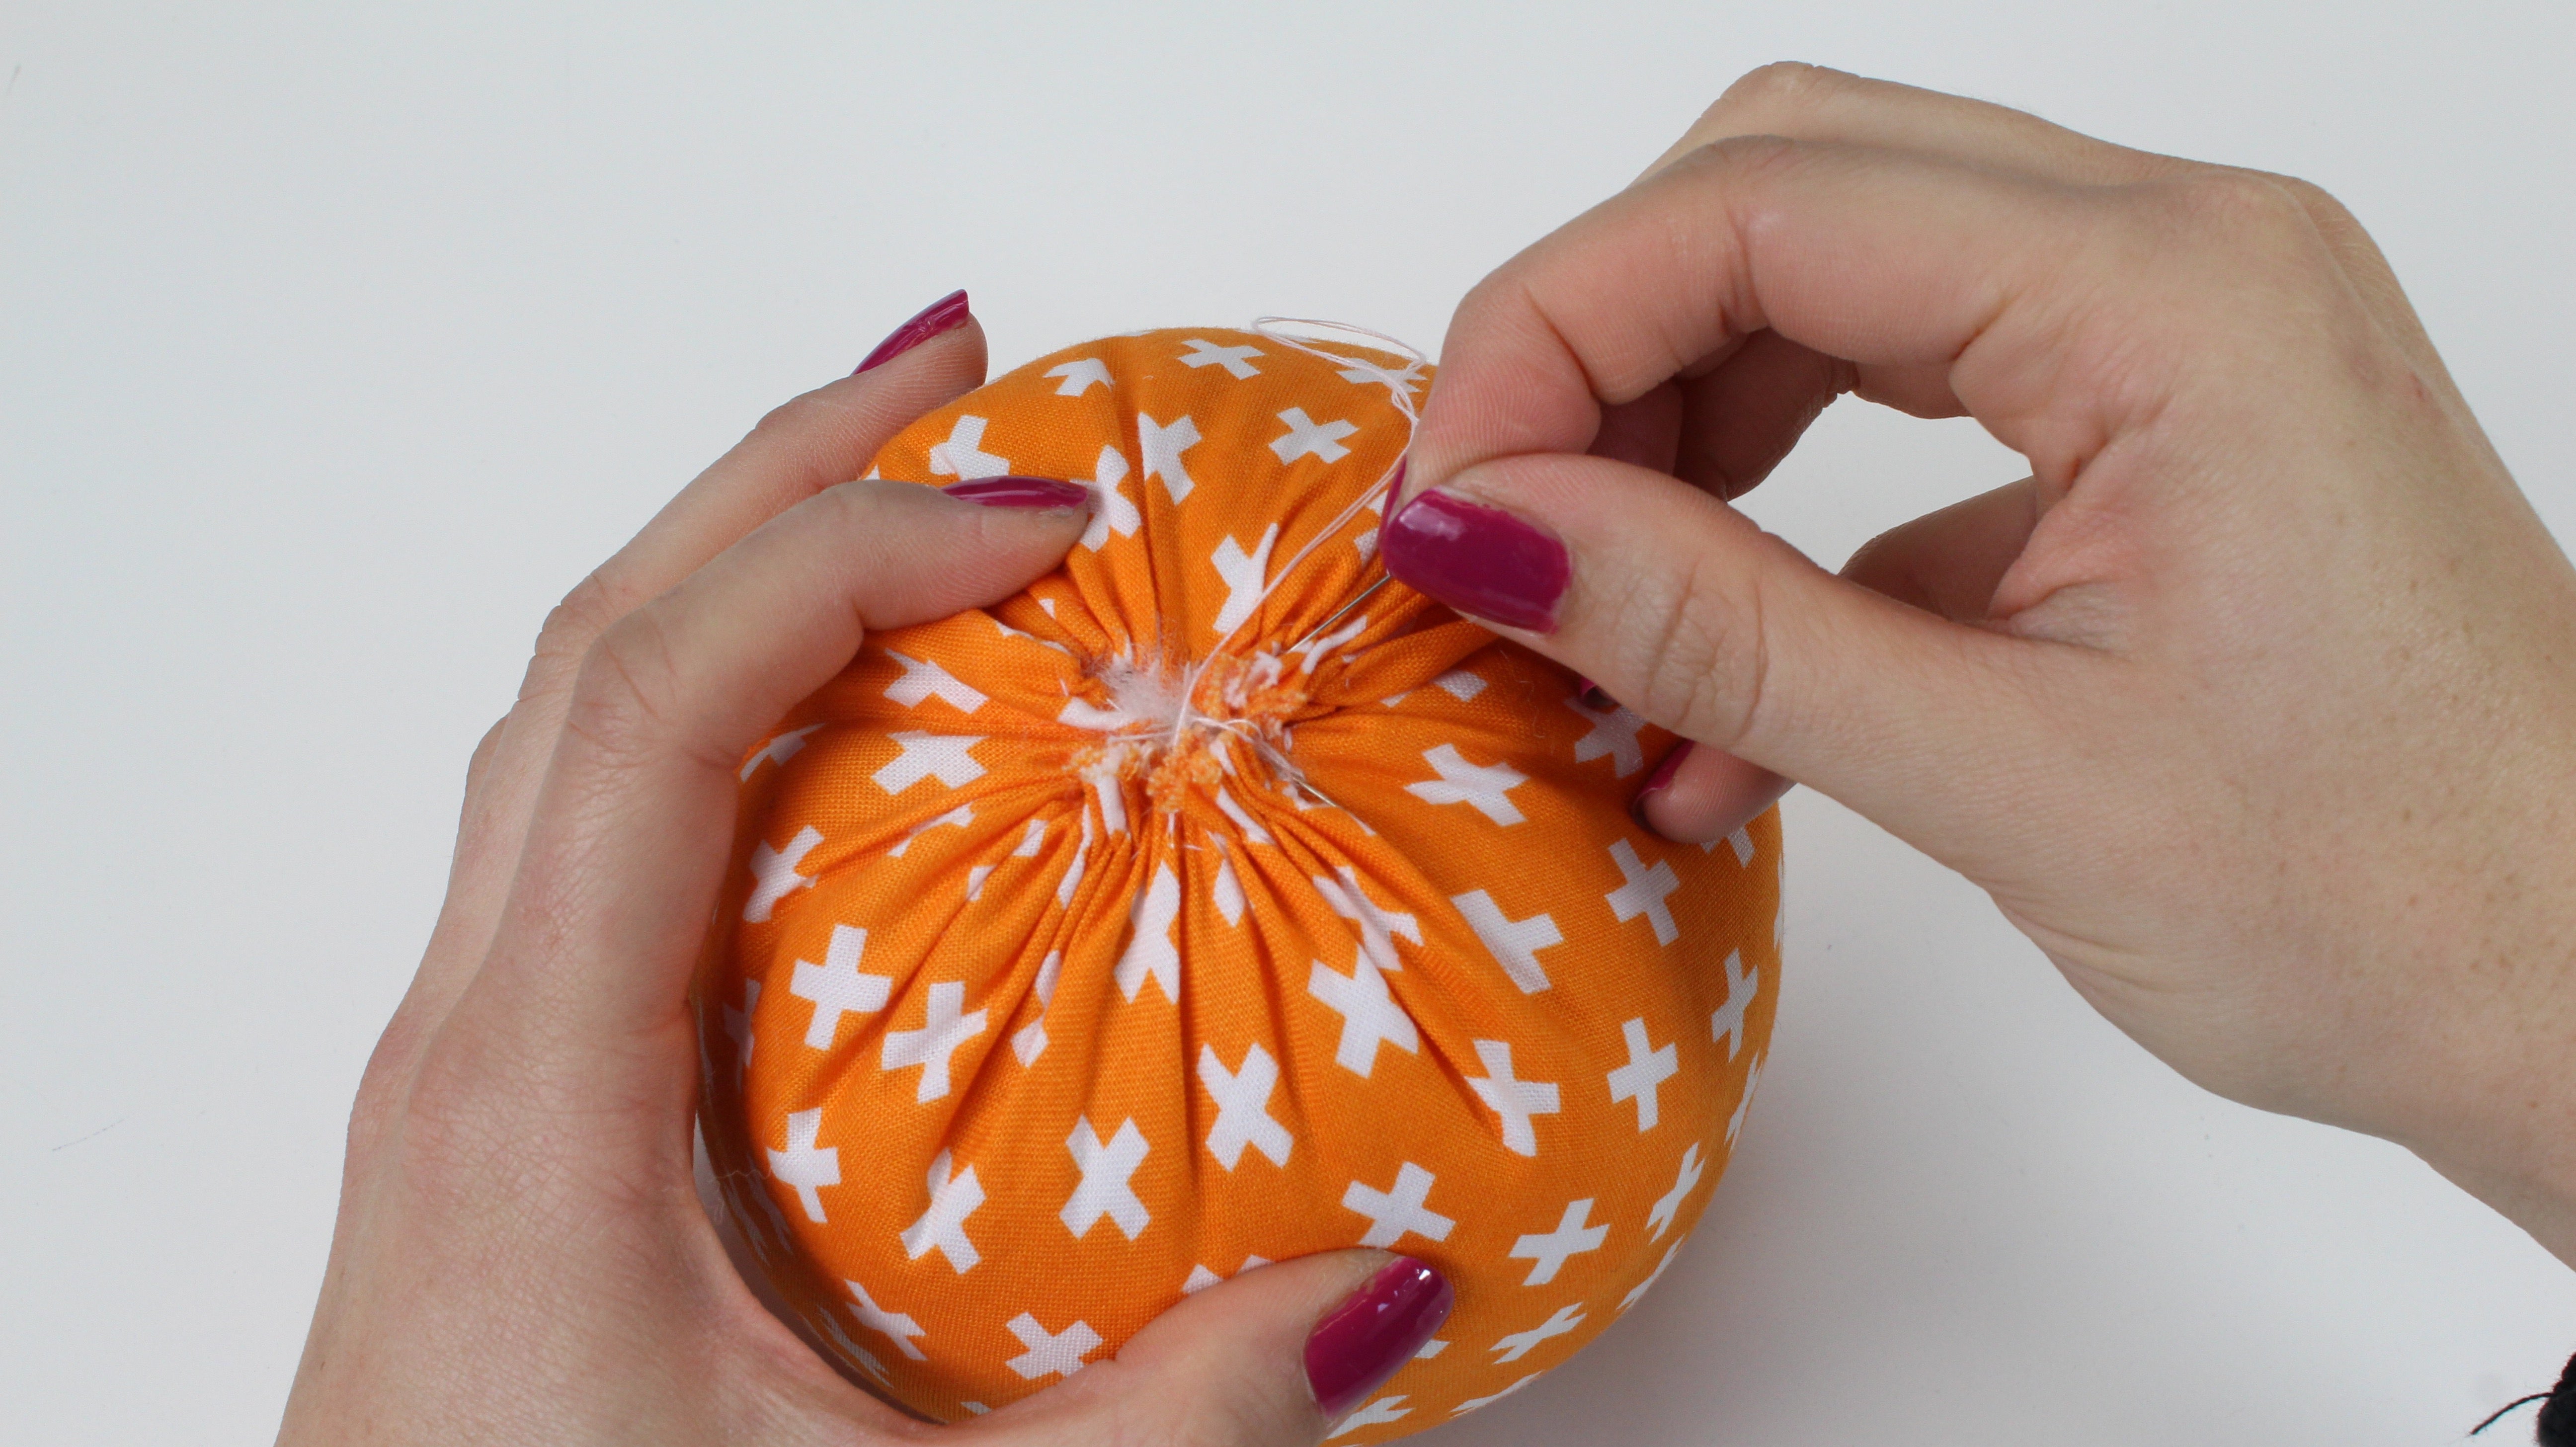 Now you can start to create the pumpkin segments using embroidery thread (6 strands, not separated).
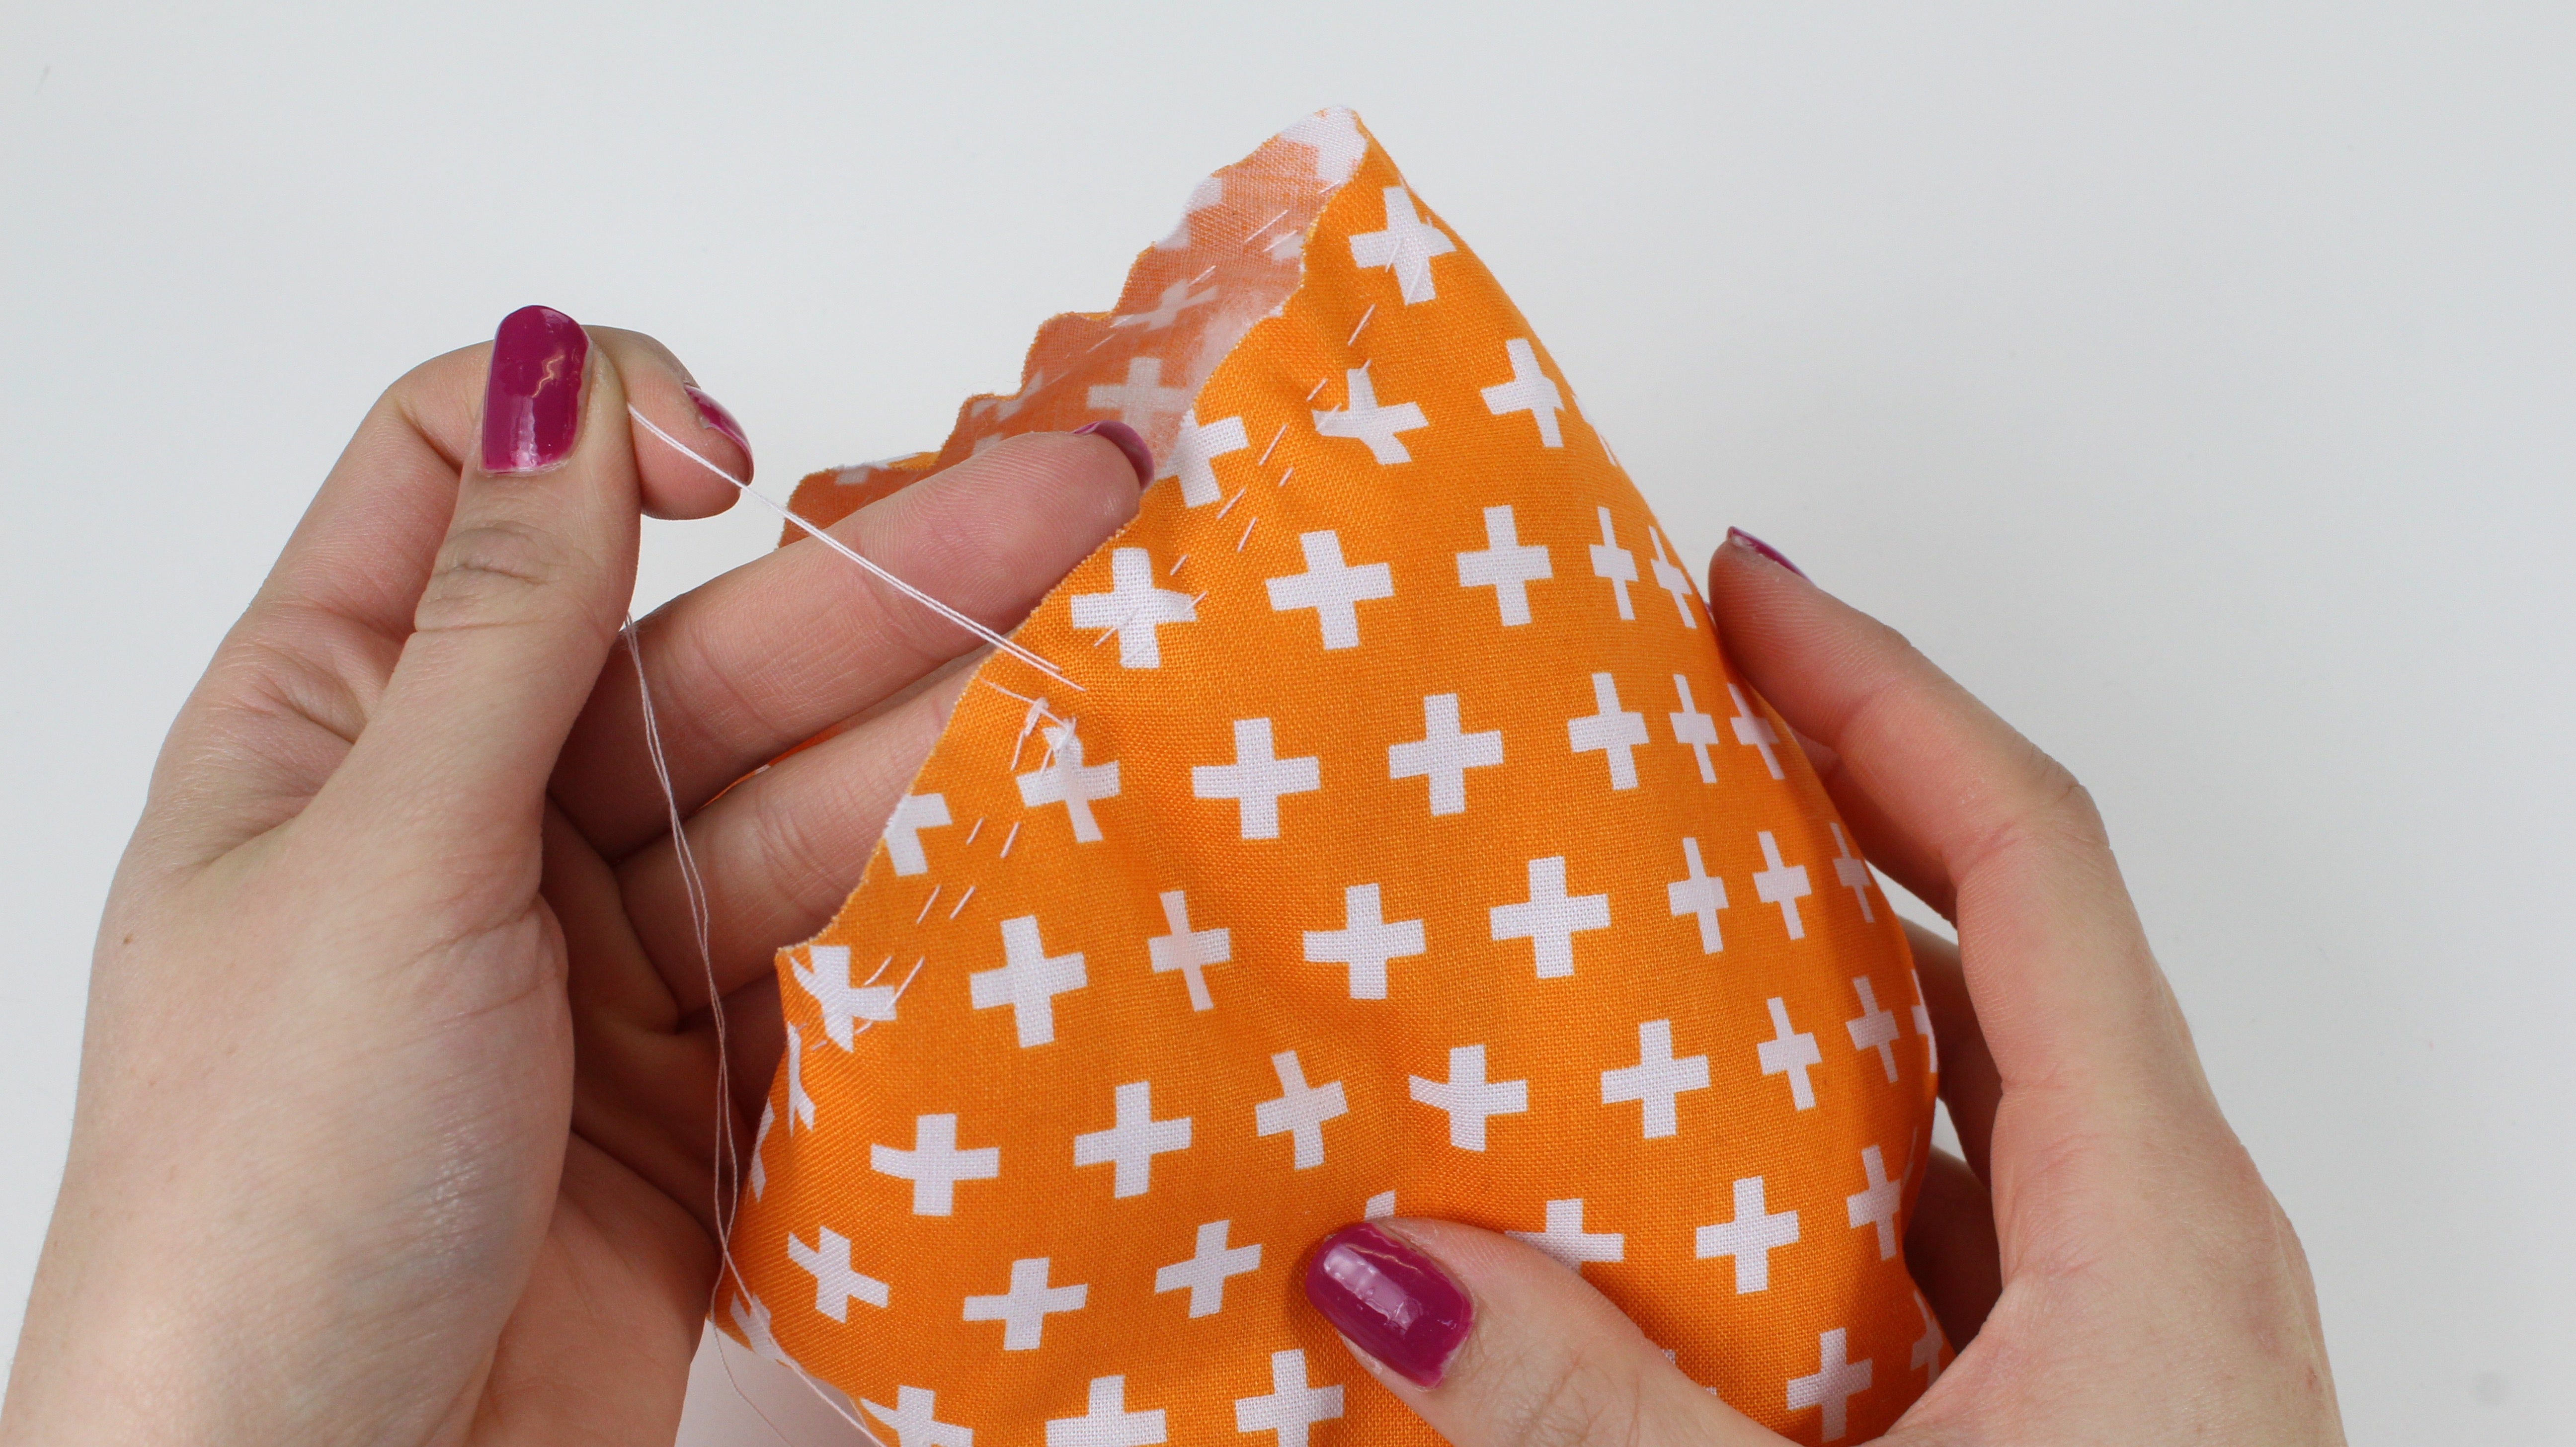
Thread a needle with a large eye and take the needle from the centre bottom through to the centre top of the pumpkin. Leave enough thread to work all of the way around the pumpkin, tie off the thread at the centre bottom securely.
 It can be difficult to grab the needle through the pumpkin, especially with the larger pumpkin sizes. Ask a friend to help pull the needle through as you squeeze the fabric, or use a pair of pliers.
Wrap the thread around the outside of the pumpkin, start by covering the side seam sewn in the first step. Then work the needle from the bottom to the top of the pumpkin again. Complete this until you have created as many pumpkin segments as you require.

The final step is to create the pumpkin stem, I chose to work with felt because it doesn’t fray or require finishing. Cut out the following sizes or design your own.
Small & Medium: Height 1″ (2.5cm), Width 2 1/2″ (6cm)
Large: Height 2″ (5cm), Width 5″ (12cm)
Draw the stem shape onto felt with a chalk pen and cut out.
Roll the felt along the longer (width) measurement. Glue the felt with a hot glue gun or fabric glue to hold the roll closed.


Position a small amount of glue onto the bottom of the stem to attach it to the pumpkin. Use a hot glue gun or fabric glue.

Position in place in the centre of the top of the pumpkin.
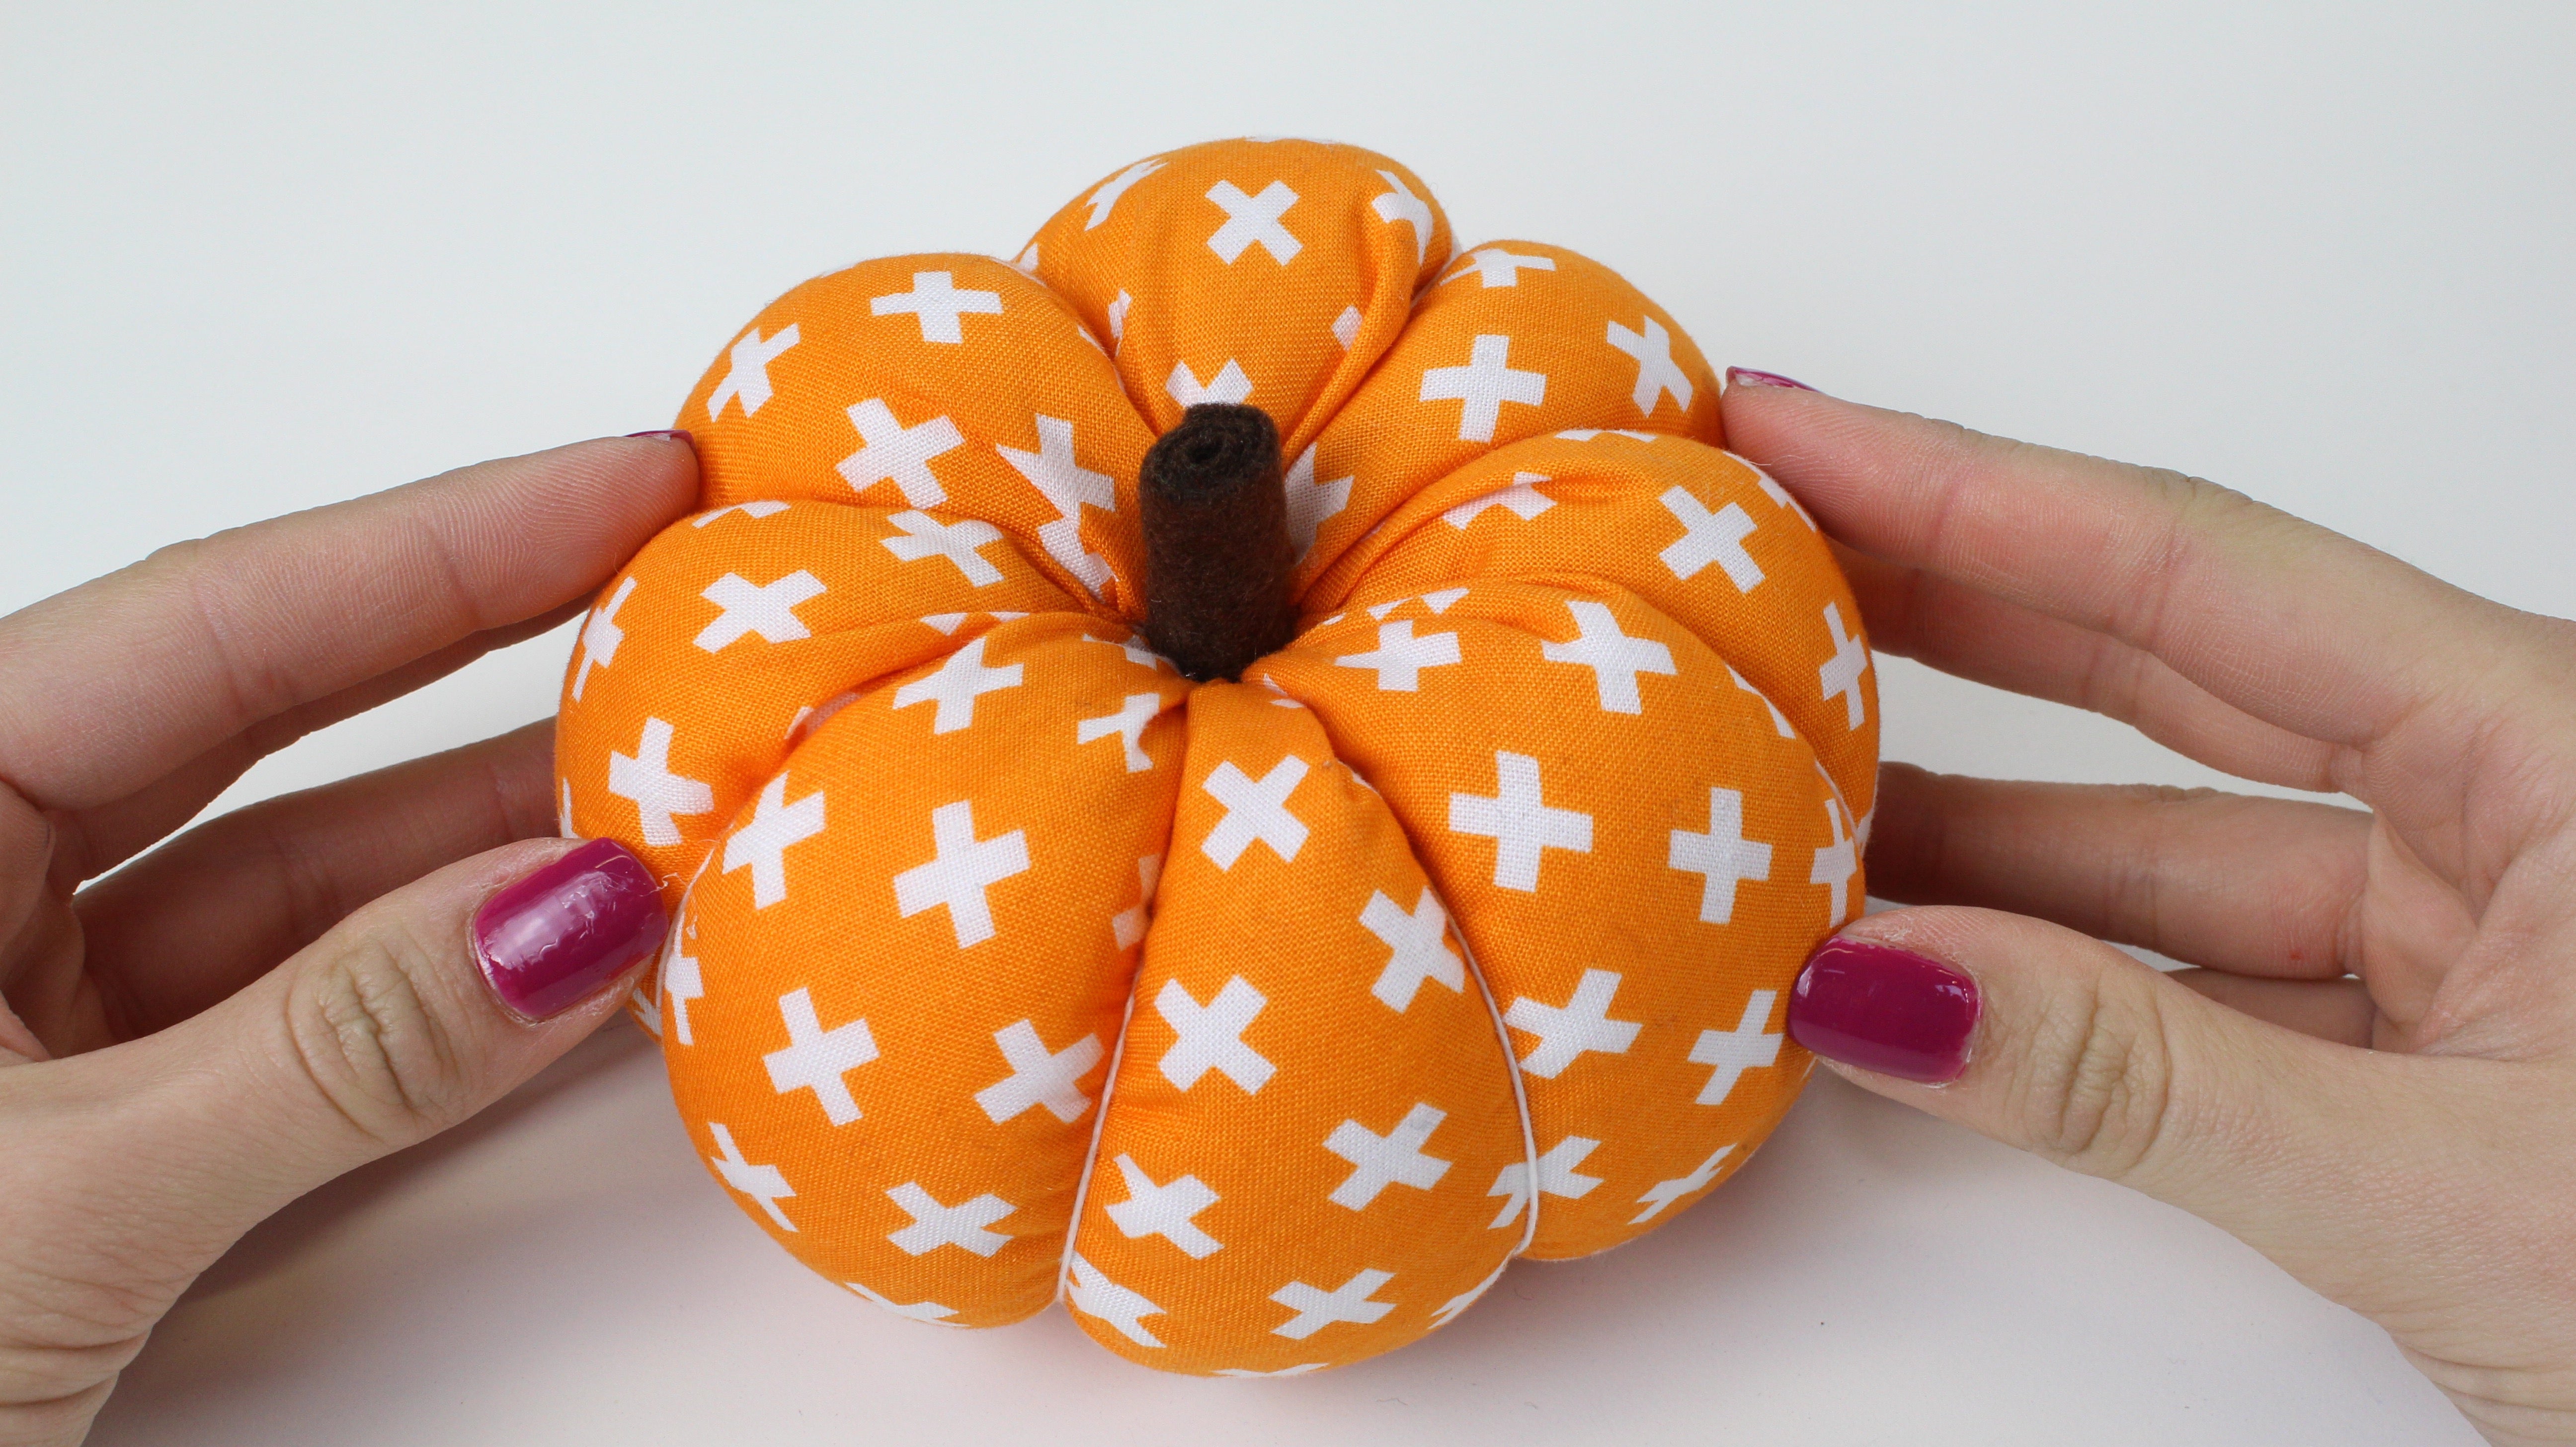
Congratulations you have created a fabric pumpkin. Hopefully you enjoyed the tutorial and learned some new tips and techniques. Why not share your makes with me on Facebook and Instagram.