Learn how to add waist darts to a dress pattern or bodice block to improve fit through the waist, bust and hips using simple pattern drafting techniques.
Waist darts are one of the most useful pattern adjustments when you want to improve the fit of a garment. In this tutorial, I will show you how to add waist darts to a dress pattern or bodice block so you can shape the fabric smoothly between the bust, waist and hips.
Understanding how to add waist darts will help you create garments that are more fitted and flattering, particularly when working with woven fabrics.
You may want to add waist darts to a garment if you would like to improve the fit around the waist area.
A waist dart removes excess fabric from the waist so the garment can follow the natural shape of the body. This allows the garment to fit neatly from the bust down to the hips.
Without darts, garments such as shift dresses or loose bodices can sometimes feel boxy, as they have a looser fit around the waist. There is nothing wrong with this, it simply depends on the look you are going for.
By adding waist darts you can create a more shaped silhouette while still keeping the overall design of the garment.
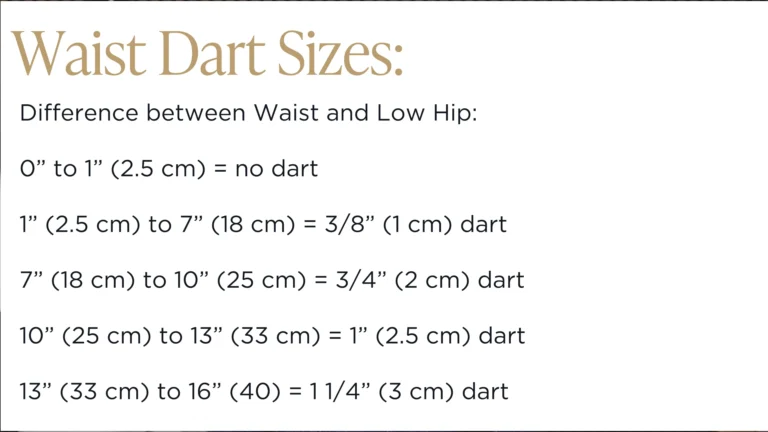
The size of the waist dart you add will depend on your individual figure.
A useful starting point is the difference between your waist measurement and your low hip measurement.
Generally speaking:
The larger the difference between your waist and low hip measurements, the larger the darts you may require.
If the darts are too large they can appear pointy or create an unnatural shape.
If the darts are too small they may not improve the fit enough.
When fitting woven garments, it is important to distribute shaping between the side seams and darts.
As a general guideline:
Around 60% of the shaping can be taken through the two side seams.
Around 40% of the shaping can be distributed through darts.
This 40% is usually shared between four darts; two on the front and two on the back.
This guideline works well for woven fabrics and ensures the side seam isn’t too shaped or curved. A very curved side seam in a woven fabric can result in a difficult to sew seam, that shows drag lines.
If you are working with knit fabrics or stretch fabrics, you may not need darts at all, as the side seam can be very shaped without these issues.
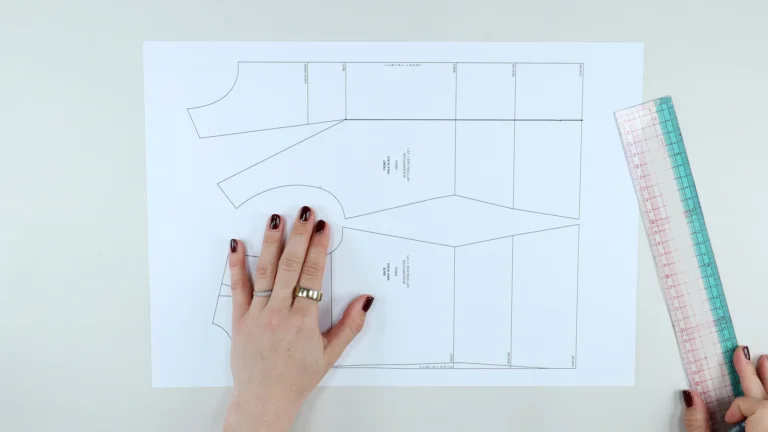
To add a waist dart to the front of your pattern, begin by identifying the bust apex.
The front waist dart should point towards the fullness of the bust, so it needs to align with this point.
Step 1:
Draw a line from the bust apex down towards the waist and low hip. This line should be parallel to the centre front.
Step 2:
Decide on the width of the dart you would like to use.
Mark half of the dart width on either side of the central line at the waistline.
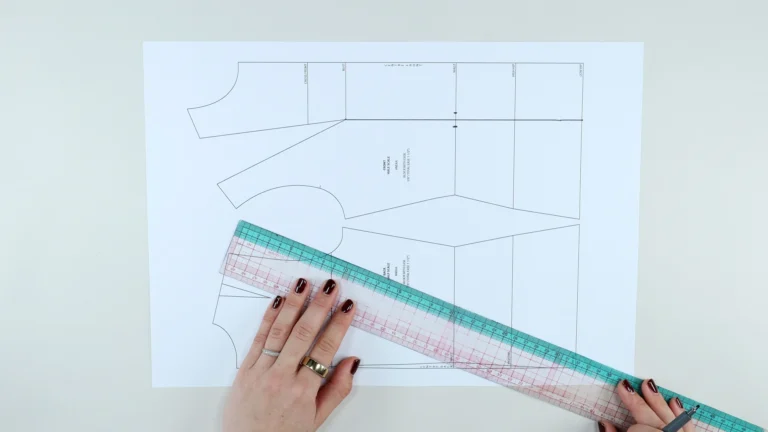
Step 3:
The top of the waist dart should stop slightly before the bust apex. I usually position the dart point about 2 cm (¾ inch) away from the apex so the dart does not travel directly over the bust.
Step 4:
Draw the dart legs from the waistline to the dart point.
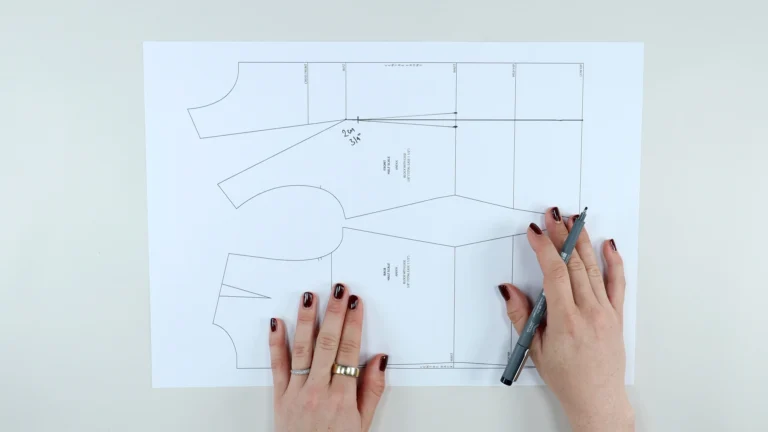
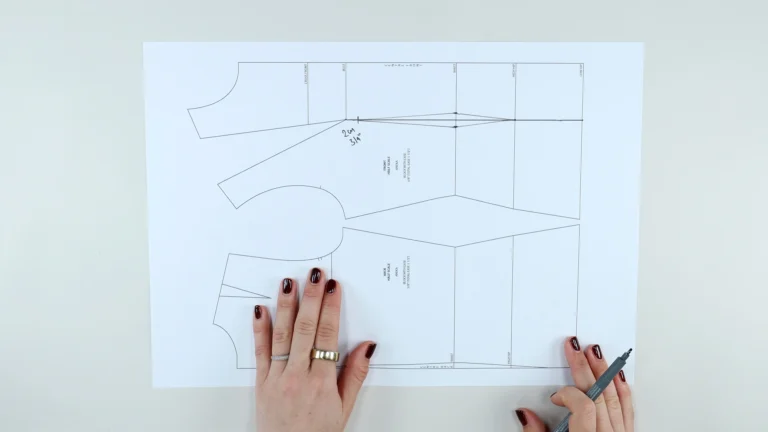
Step 5:
For the bottom of the dart, extend the lines downwards so that the dart points towards the fullness of the abdomen. This is often around the high hip, approximately halfway between the waist and the low hip.
You can draw the dart lines as straight lines or soften them slightly using a French curve.
Back waist darts are usually positioned near the centre of the waistline.
Step 1:
Find the centre of the back waistline.
Draw a line through this point that is parallel to the centre back.
Step 2:
Mark the width of the dart evenly either side of this central line.
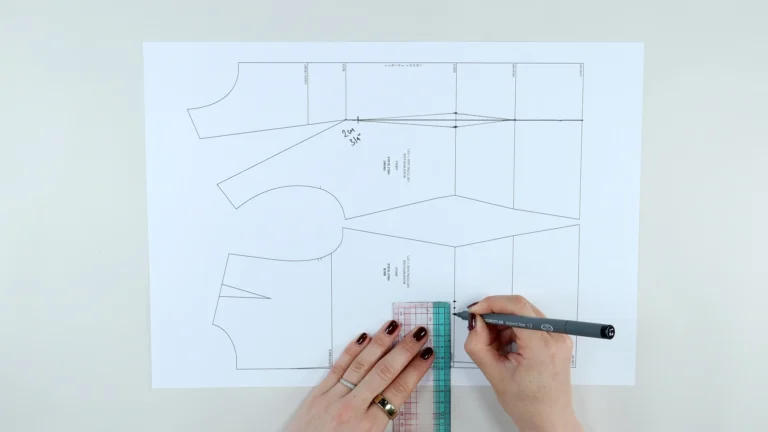
Step 3
The top of the back dart is often positioned in line with the bust guideline, roughly aligned with the front bust apex.
Draw the dart legs from the waistline up to this point.
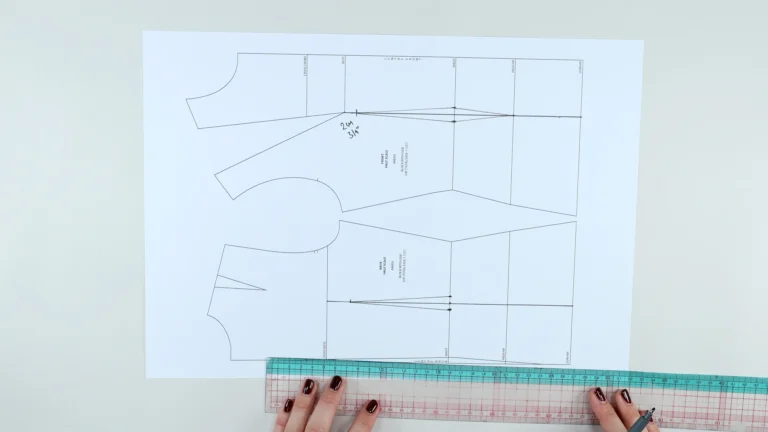
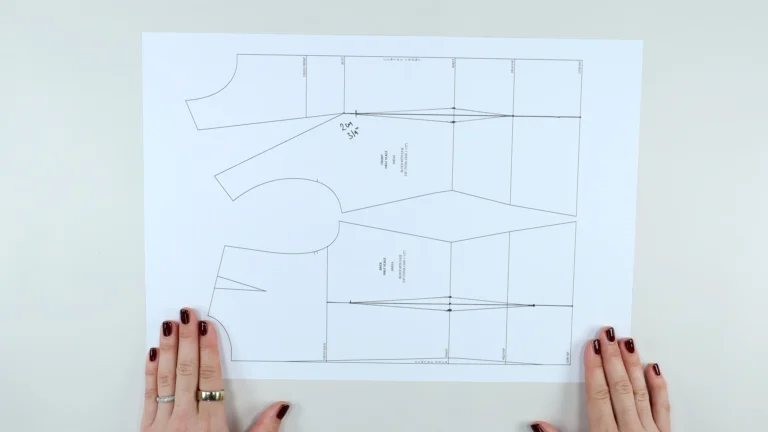
Step 4:
The base of the back dart will usually be longer than the front dart.
A useful starting point is to measure the distance between the waist and the low hip at the side seam, and divide this measurement by three.
Measure up from the low hip by this amount and use this point as the base of the dart.
Connect the dart legs from the waistline down to this point.
Some patterns use slightly angled back waist darts rather than darts that run perfectly parallel to the centre back.
For example, you may choose to align the waist dart with the shoulder dart so that the darts sit along a similar line.
This can sometimes improve the shaping of the garment, depending on the pattern design and the figure you are fitting.
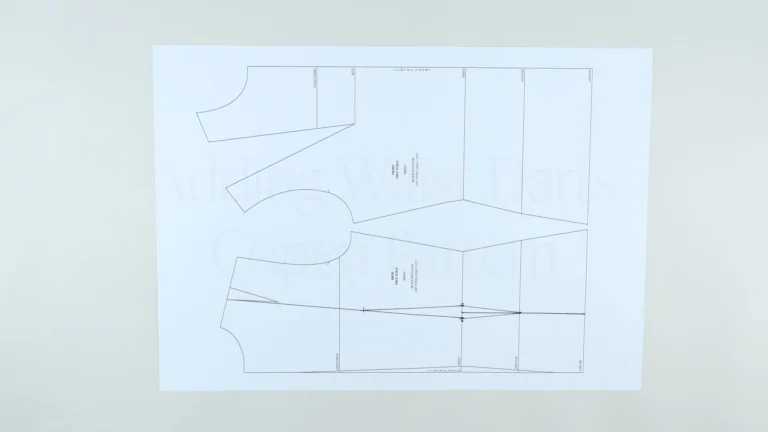
You can also add waist darts to existing dress patterns.
For example, if you are working with a simple shift dress pattern such as my Copen Dress, adding waist darts can help create a more fitted silhouette.
To do this:
Identify the correct bust apex for your size.
Draw a line from the bust apex towards the waistline.
Add the dart width at the waistline.
Position the dart point approximately 2 cm below the bust apex.
Extend the dart downwards towards the high hip.
When working with an existing pattern, it is also helpful to remove seam allowances while making adjustments so that measurements are more accurate.
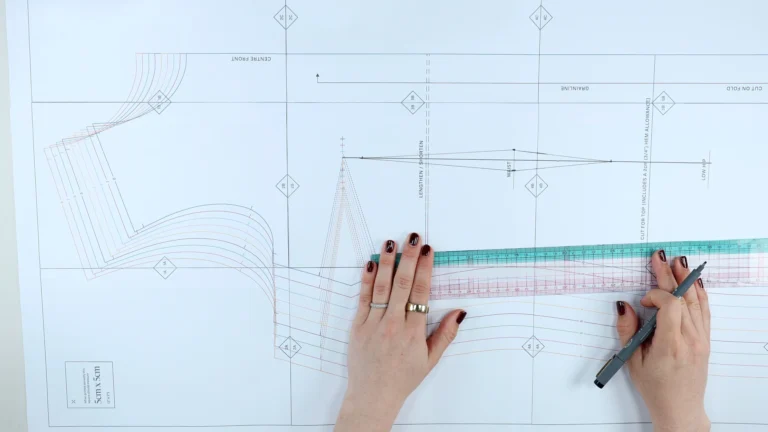
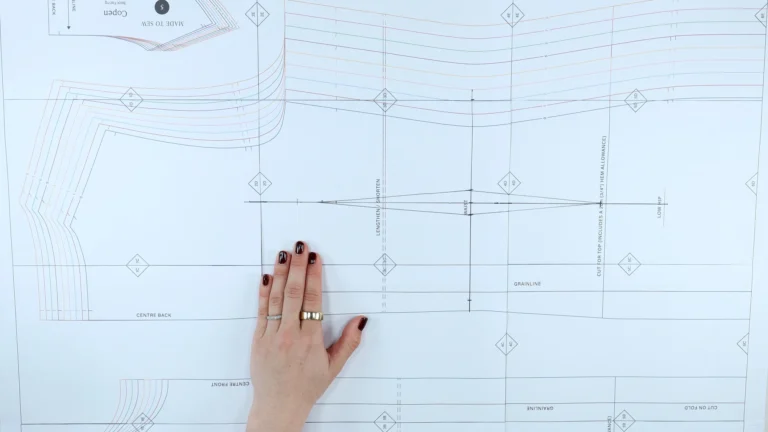
Once you have added darts to your pattern, I recommend making a test garment or sample.
This allows you to check:
the dart placement
the dart length
the overall fit of the garment
The good thing about waist darts is that they are relatively easy to adjust. If necessary, you can extend or shorten the darts during the fitting process in the final fabric.
How do you add waist darts to a dress pattern?
To add waist darts to a dress pattern, mark the dart position on the waistline, align the front dart with the bust apex, decide on the dart width, and draw the dart legs towards the fullest curves above and below the waist. The exact dart size and placement will depend on your figure and the amount of shaping required.
Where should a front waist dart point?
A front waist dart should point towards the bust apex, but it should stop slightly before it. A good starting point is around 2 cm (¾ inch) back from the bust apex.
How long should a waist dart be?
The length of a waist dart depends on the figure and the pattern. Front waist darts usually finish before the bust apex and extend down towards the high hip (fullest part of the individuals abdomen). Back waist darts are often longer than front darts, pointing towards the fullness of the seat.
Can I add waist darts to an existing sewing pattern?
Yes, you can add waist darts to an existing sewing pattern, including simple shift dress patterns, if you want to improve the fit through the waist.
If you found this tutorial helpful, you may also enjoy: