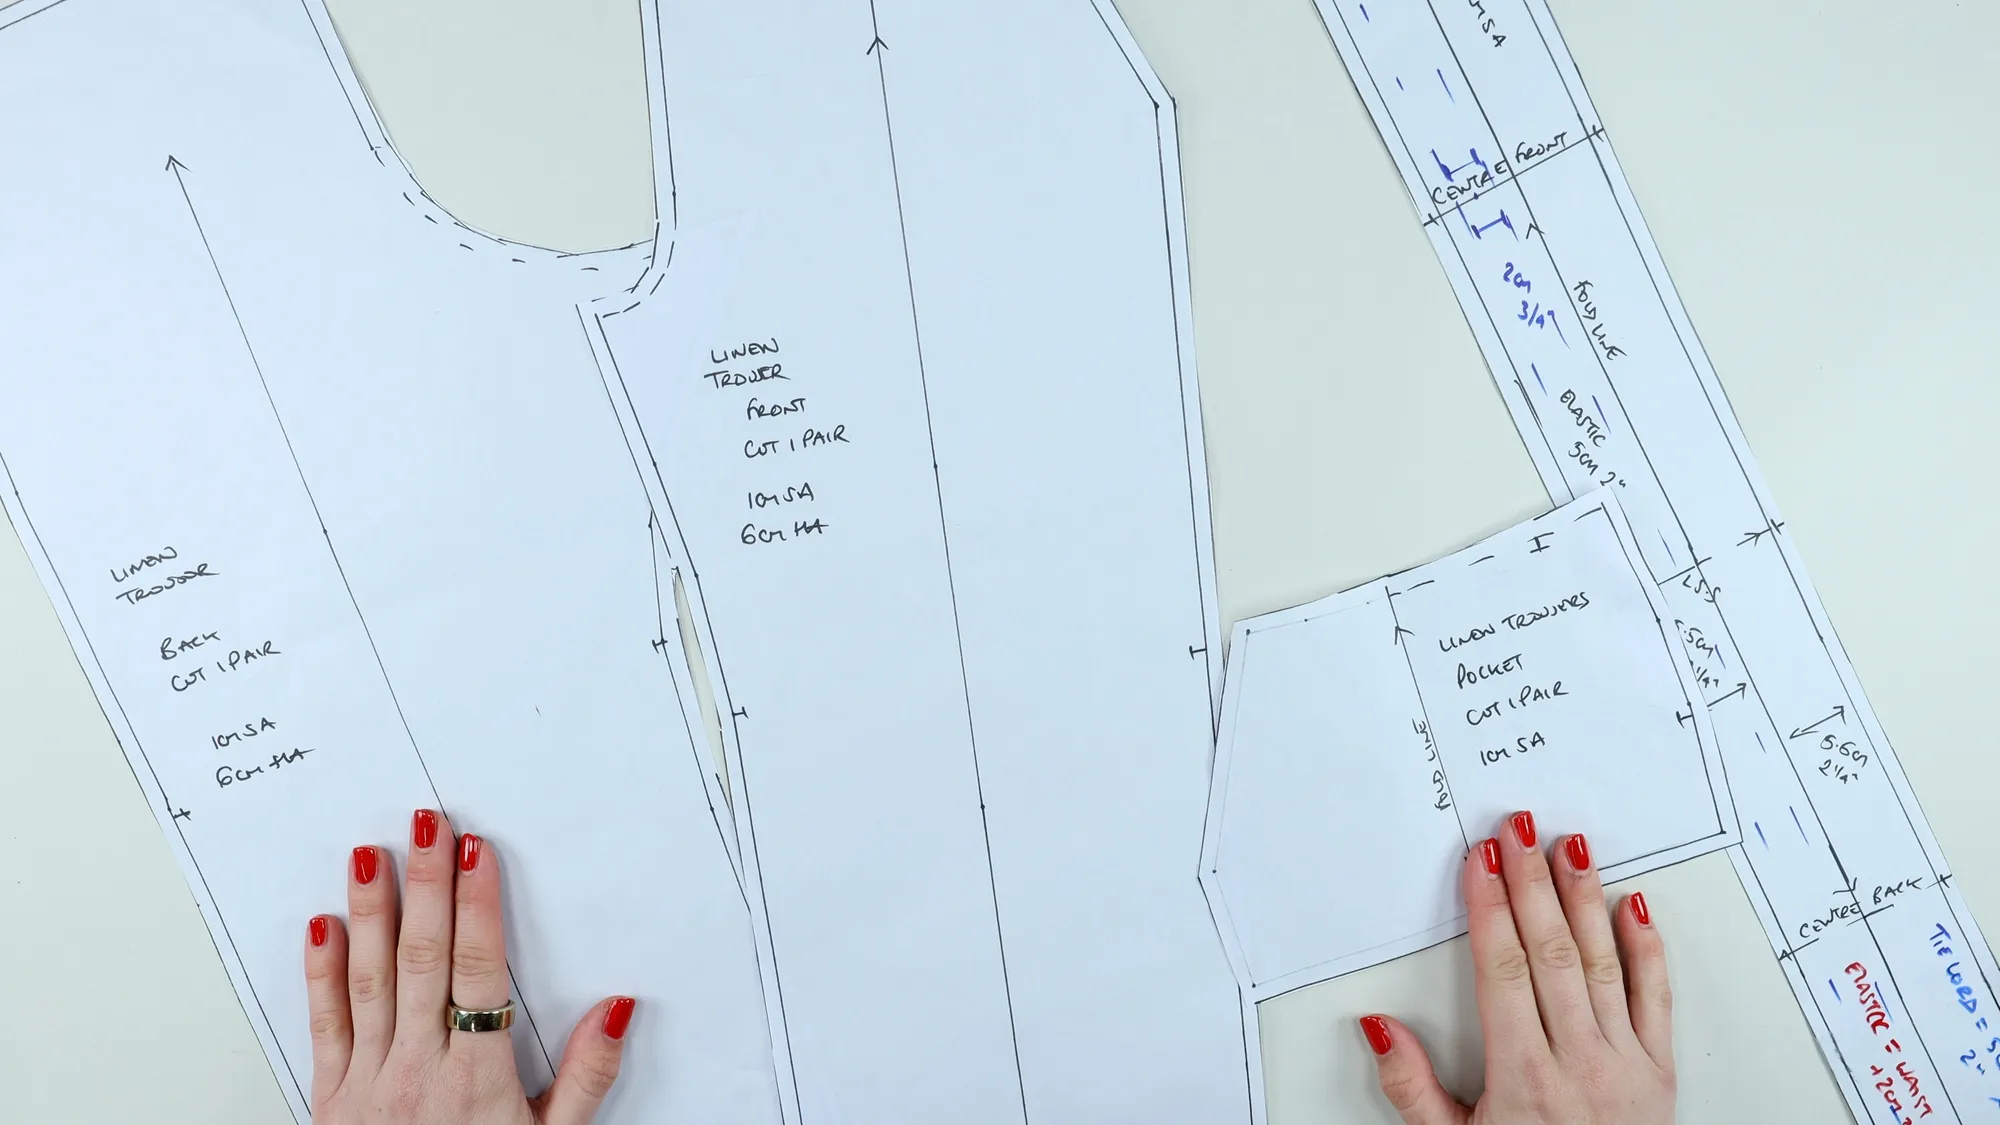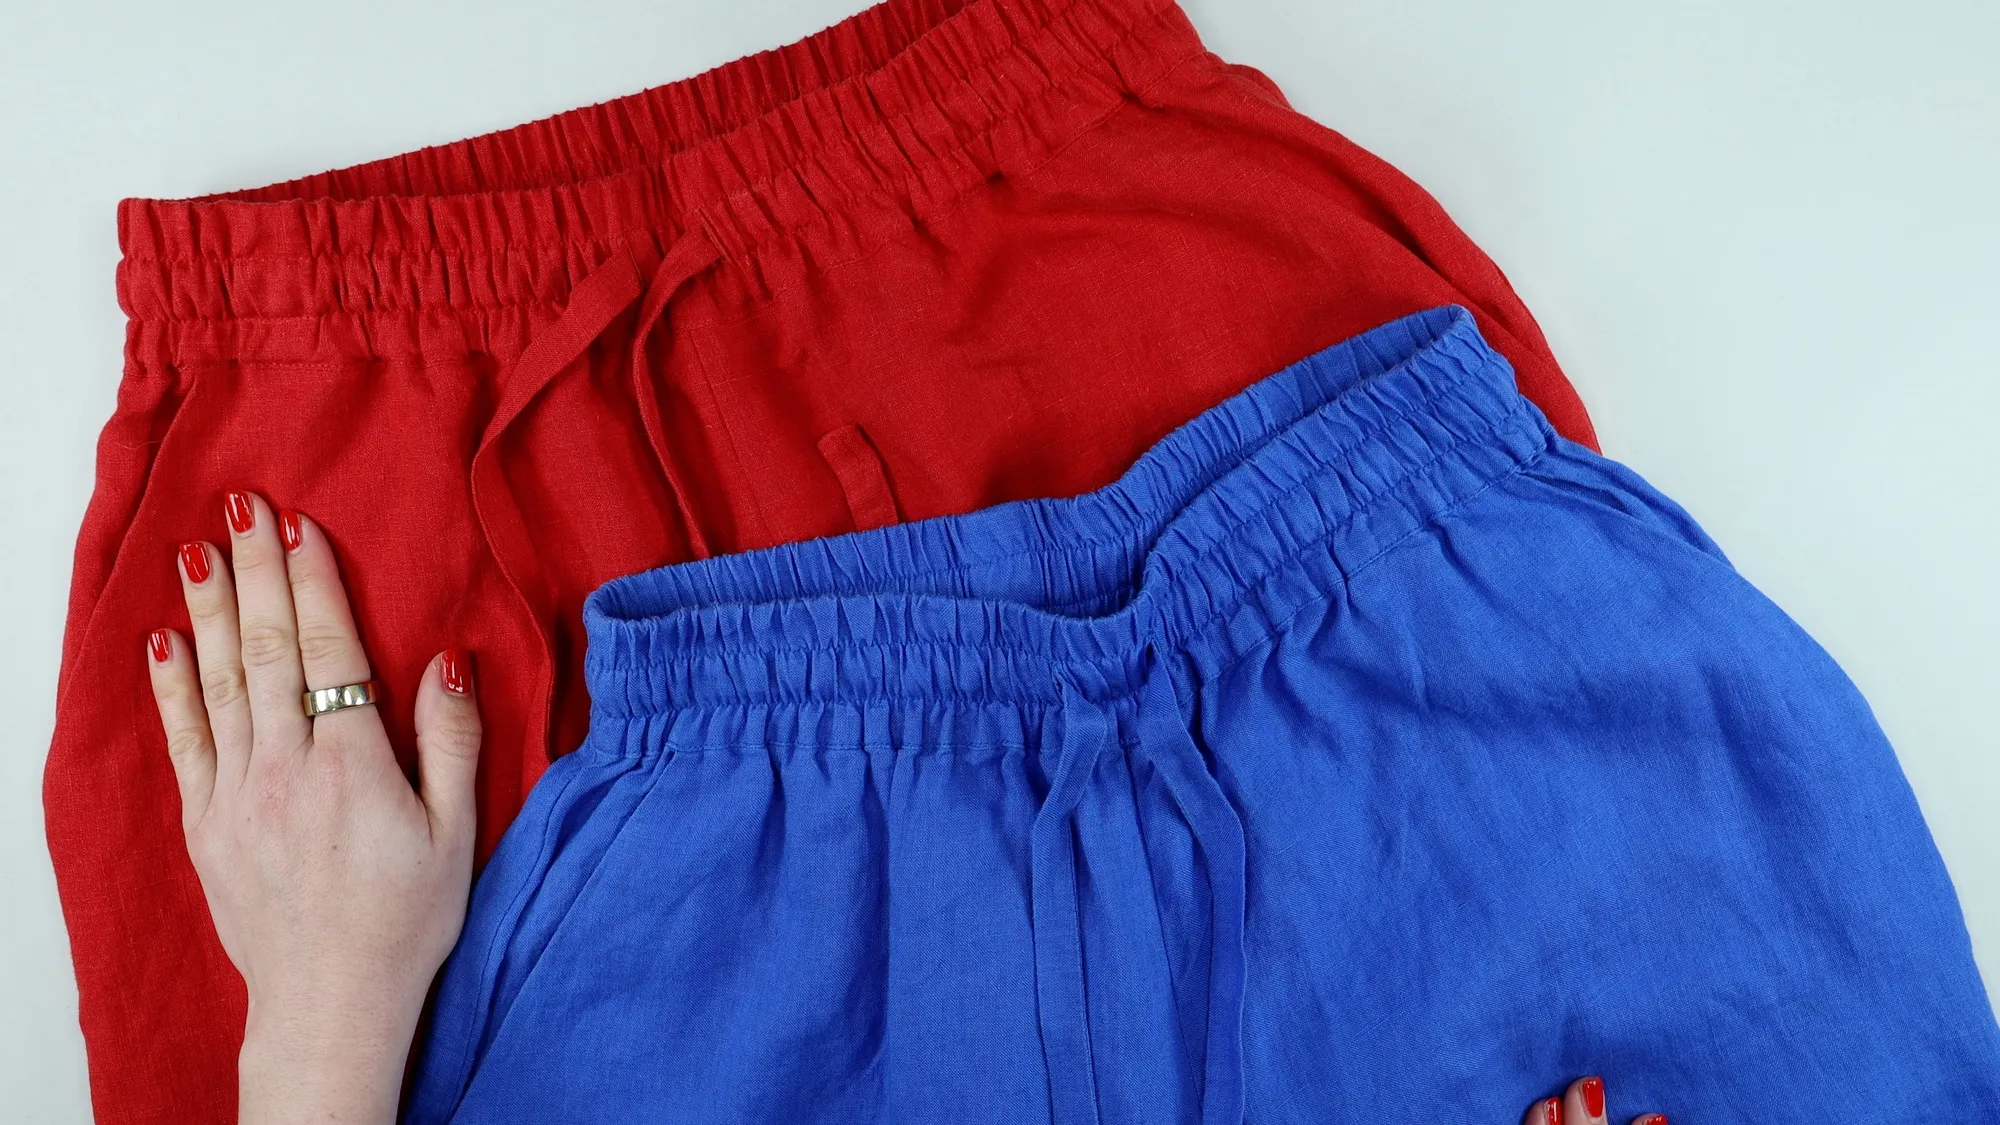
Learn how to draft a pair of relaxed linen trousers from an existing trouser block or close-fitting trouser pattern.
In this tutorial I’ll show you how to adapt the width, crotch, waist and leg shape to create an easy-fitting pair of trousers with side seam pockets, an elasticated waistband and a drawcord tie.
This is Class One in my Linen Trouser series. Once your pattern is complete, continue to Class Two – How to Sew Linen Trousers, where I take you through the full construction process.
These trousers can be adapted to suit your own style. You can change the leg width, finished length, rise, waistband and pocket size depending on the look you want to achieve.
Watch the Full Tutorial – How to Draft Linen Trousers
Finished drafting?
Continue to Class Two: How to Sew Linen Trousers
*affiliate links below
To follow this tutorial you will need:
I work with a half-scale trouser block during this tutorial, but all measurements given are full-scale measurements.
Begin by deciding how wide you would like the finished trouser leg to be.
You can measure an existing pair of trousers that you like, or decide on the circumference based on the silhouette you want.
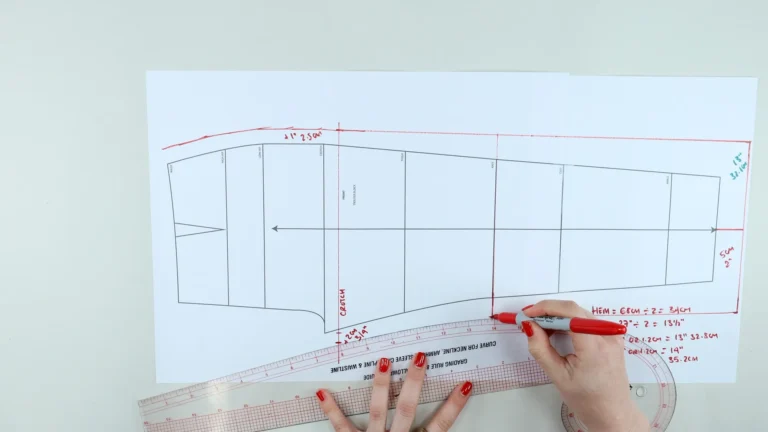
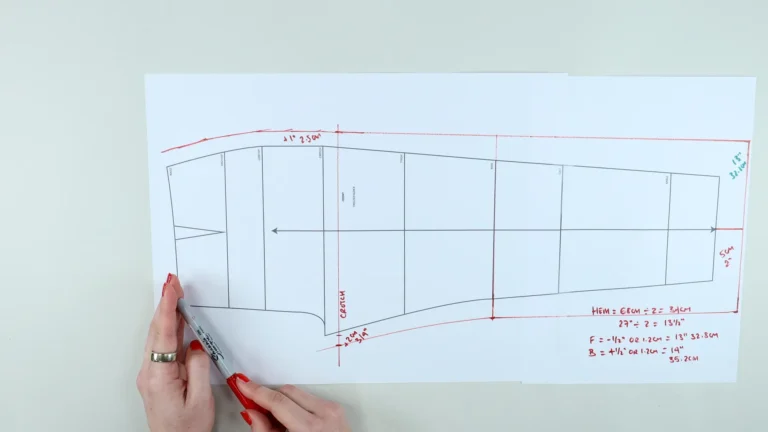
For my trousers, I chose a finished hem circumference of: 68cm / approximately 27″
Rather than divide this equally between the front and back, I make the back trouser leg approximately 2.5cm / 1″ wider than the front. This follows my standard trouser block draft and allows a little more room for the volume at the back of the body through the buttocks, thigh and calf.
Start by dividing your total hem circumference in half.
For my 68cm hem: 68cm ÷ 2 = 34cm
Then add approximately 1.2cm / ½″ to the back and remove the same amount from the front.
My finished measurements were approximately:
Together, these create the full 68cm circumference while giving slightly more width to the back.
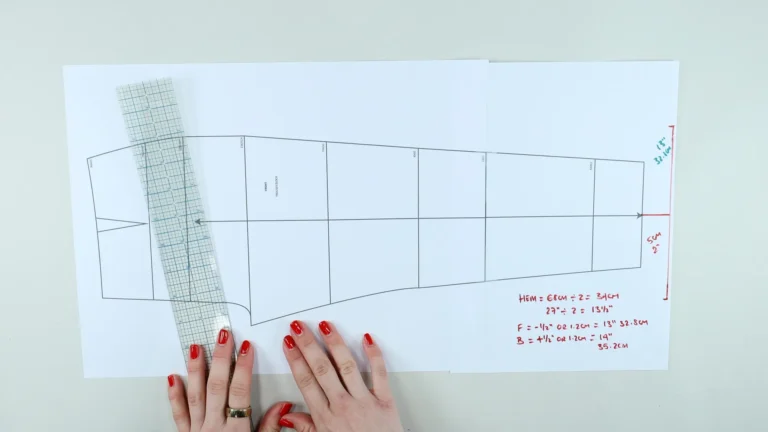
Decide where you want your trousers to finish.
My original block wasn’t long enough for the relaxed full-length trouser I wanted, so I extended the hem by approximately: 5cm / 2″.
Square across from the existing hem and extend the grainline down to meet your new hemline.
At the new hem, mark half of your required front or back measurement either side of the grainline.
For example, if your front trouser hem measures 32.8cm overall, divide this by two and position half on either side of the grainline.
These trousers are designed to have a relaxed rather than closely fitted silhouette.
I lowered the crotch line by: 2.5cm / 1″.
Square down from the original crotch point onto the new lowered crotch line.
I then extended the front crotch point by 2cm / ¾″ to provide additional room through the crotch.
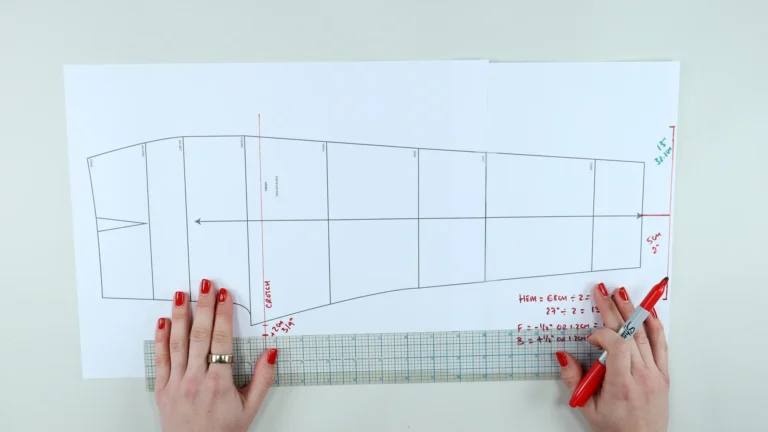
I also added ease through the side seam from the low hip up through the waist and down towards the crotch. I added: 2.5cm / 1″.
Follow the general shape of your original side seam as you add the ease, then use a metre ruler to connect from this extended area down towards the new hem.
On my pattern this new outseam is almost straight, narrowing only very slightly towards the hem.
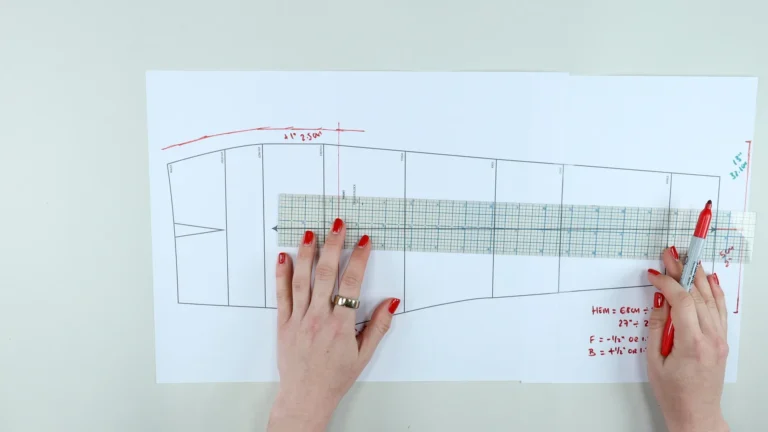
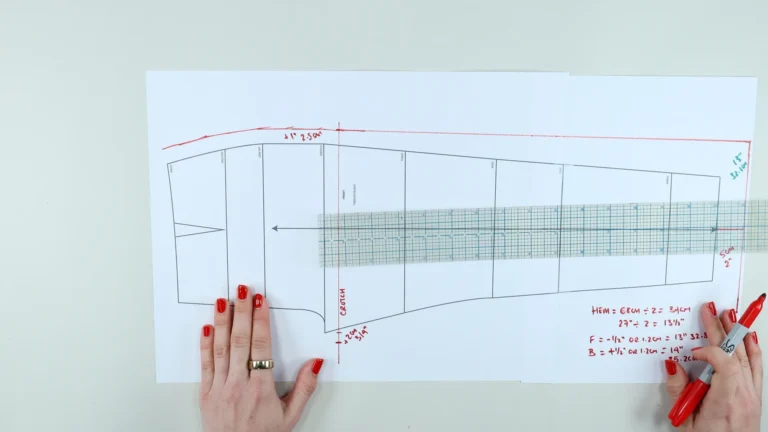
Extend the knee line across the pattern.
If your existing block doesn’t have a knee line, measure from your waist to your knee on the side of your body and transfer that measurement to the pattern; keep the knee line at a right angle to the grainline.
Measure how much width you have added between the original side seam and the new side seam at the knee.
Add the same amount to the inseam at the knee. This distributes the additional width more evenly around the trouser leg.
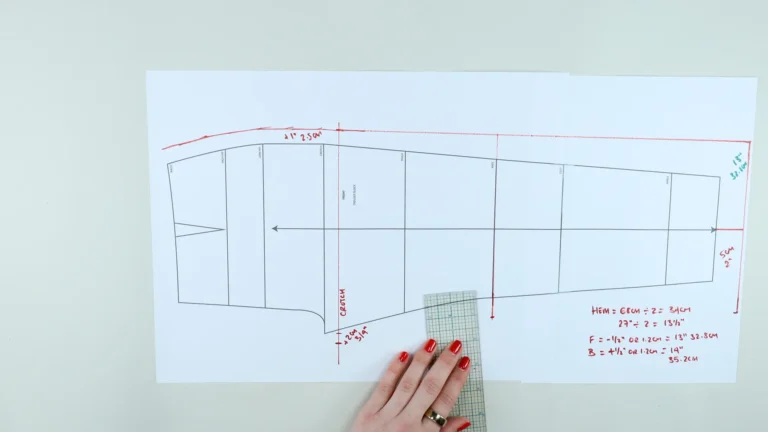
Connect from the new knee position down to the hem.
Finally, use a French curve to blend the inseam from the knee up towards the new crotch point.
Next, decide where the finished top edge of your trousers will sit.
I wanted mine to sit at the natural waist. So I will remove the waistband measurement from the top of my trouser block.
My elastic measures: 5cm / 2″ wide. I drafted a waistband measuring: 5.5cm / 2¼″ finished width. The additional 5mm allows for turn of cloth and gives a little extra room when constructing the waistband.
Measure down from your existing trouser waist by the finished waistband width and redraw the new waistline.
You can ignore the original waist dart because these trousers are intentionally loose through this area and the elasticated waistband will control the finished fit.
Continue the new waistline out towards the additional side-seam ease.
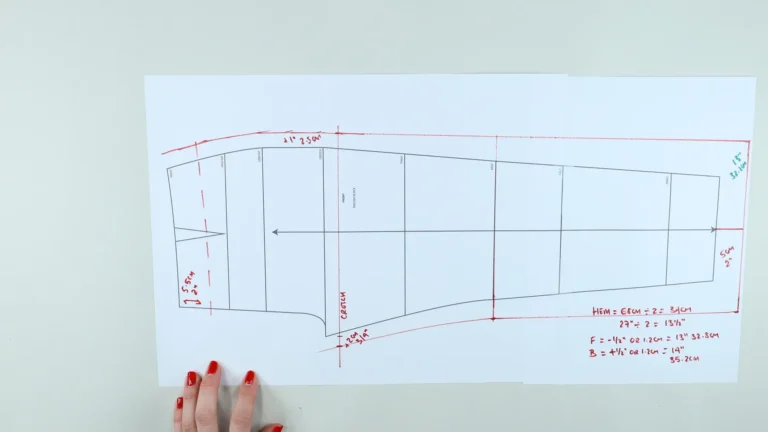
Redraw the front crotch using a French curve. The front crotch should have a shorter, neater hook shape than the back crotch.
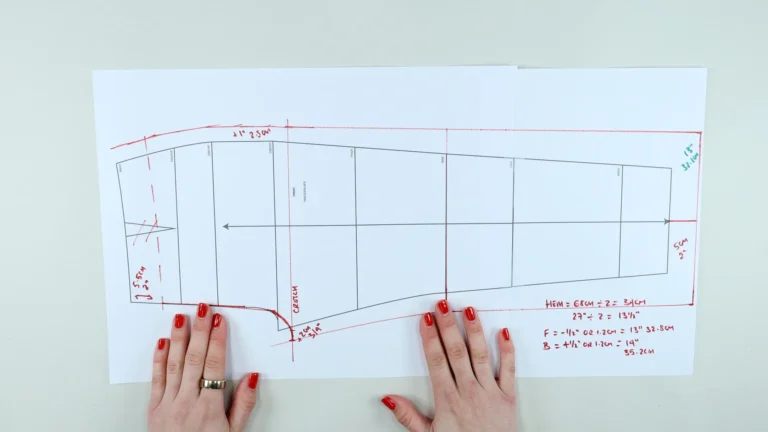
Repeat the same general process for the back pattern.
Extend the hem to your desired length and extend the grainline.
For my trousers the finished back hem width is: 35.2cm / 14″. Divide this measurement by two and mark half on either side of the central grainline.
Add the same ease at the side seam as you used for the front. I added 2.5cm / 1″ from the low hip through the waist and crotch area.
Lower the crotch by 2.5cm / 1″, matching the adjustment made to the front.
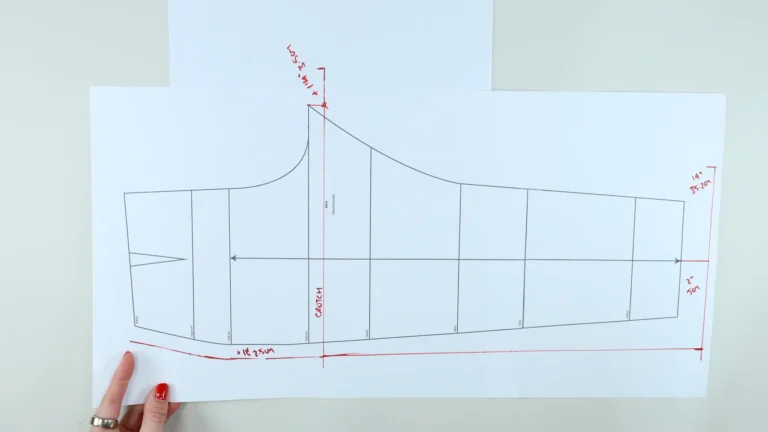
The back requires more crotch extension than the front. My front crotch extension was: 2cm / ¾″.
For the back, I used approximately: 3.5cm / 1 ¼”. This consists of the same 2cm added at the front, plus approximately 1.2–1.5cm / ½″ additional room at the back.
As you did for the front:
The back crotch will have more curve than the front. Aim for a smooth line without any sharp transition into the knee.
Redraw the top of the trousers using your selected waistband depth, again ignoring the original dart.
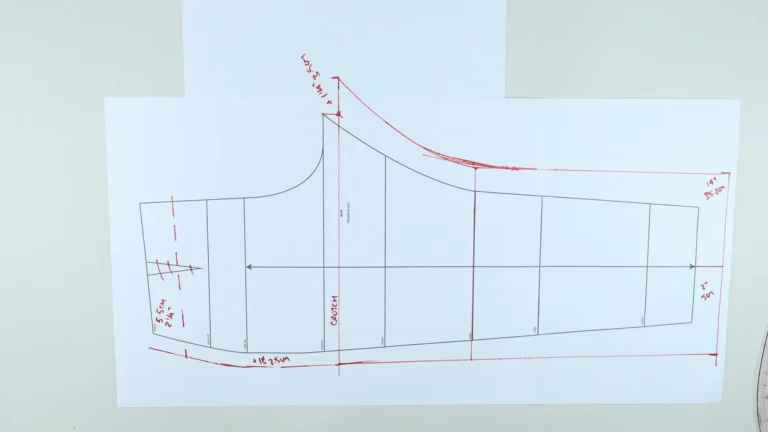
Before tracing the patterns, check that the front and back inseams will sew together correctly.
Align the patterns and check that they match from the hem to the knee.
Then walk the inseam curves from the knee towards the crotch, or measure both seams with a tape measure.
Ideally, they should measure the same.
The back can be slightly shorter between the knee and crotch – approximately 0.5 – 1cm / ¼ – ⅜″ – but you don’t want the front inseam to be longer than the back.
If necessary, make a small adjustment to your crotch point to correct the seam lengths.
Use your front trouser pattern to determine the pocket position.
I positioned the top of my pocket opening: 5cm / 2″ from the side seam along the waist.
I then measured down the side seam: 17cm / 6¾″.
Connect these two points to create the angled pocket opening.
For the inside edge of my pocket bag, I used the trouser grainline (centre of the trouser hem, extended towards the waist). I used the new crotch line as the bottom edge of the pocket.
The most important thing is that the pocket is large enough to comfortably fit your hand, so alter these measurements to suit you if necessary.
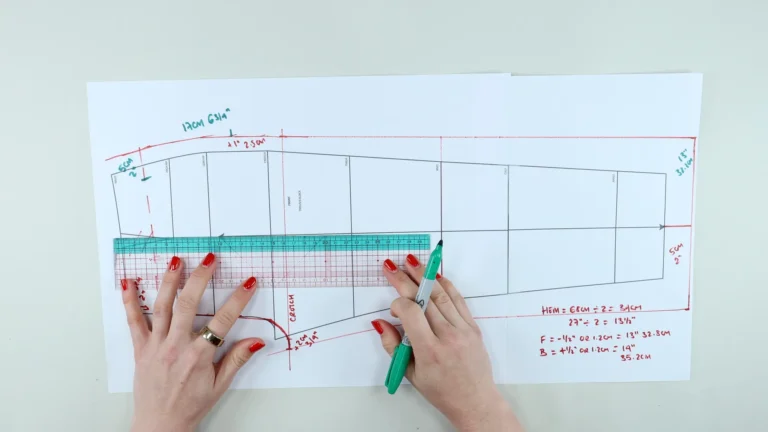
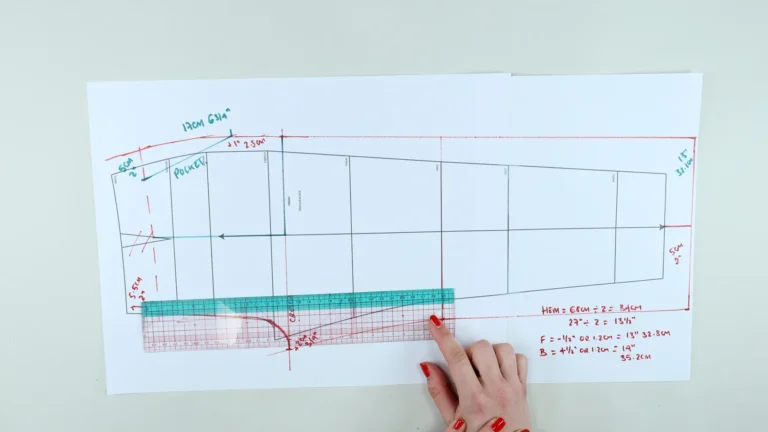
Trace the final front trouser shape onto fresh pattern paper.
Include:
Label the pattern and indicate that you will cut one pair.
I used a seam allowance of: 1cm / ⅜″ around the pattern, with a: 6cm / 2⅜″ hem allowance.
Repeat for the back.
Before cutting out your final paper pattern, true the hem.
Fold the paper along the finished hemline as though the hem were being pressed into position.
Trace the side-seam and inseam shape through the folded hem allowance.
This ensures the hem remains wide enough to fit neatly inside the trouser leg when it is turned up.
It makes relatively little difference on a very straight trouser leg like this one, but becomes increasingly important as the trouser leg narrows.
Trace the pocket shape from your master pattern.
Begin by tracing:
Mark notches at the waist and where the pocket opening finishes on the side seam.
Turn the paper over around the central fold line and complete the opposite half of the pocket, including the angled pocket opening.
The resulting piece folds along the inside edge and forms both sides of the pocket bag.
Add your seam allowance around the outer edge – I used 1cm / ⅜″ – and label the fold line.
Cut one pair from the same fabric as the trousers.
Measure the complete waistline of the finished trouser pattern.
For the front, make sure your measurement includes the section incorporated into the pocket.
You can draft the waistband directly onto your fabric, but I prefer to create a paper pattern.
Start with a straight line to mark the centre front, then square across to create the top fold line of the waistband.
Mark your centre-front-to-side-seam measurements on either side of the centre front.
Then add the back measurements from side seam to centre back and centre back to the remaining side seam.
You can construct your waistband in several ways:
For my trousers, I used one seam at the right side seam.
Your waistband depth is determined by your elastic. I used: 5cm / 2″ elastic and drafted each half of my folded waistband at: 5.5cm.
This gives an extra 5mm for turn of cloth and construction.
Because the top edge is a fold line, mirror this measurement to the opposite side.
Add a 1cm / ⅜″ seam allowance around the remaining edges and mark useful notches at the centre front, centre back and side seams.
My finished drawcord measures approximately: 1.5cm / ⅝″ wide. You could use a narrower drawcord if you prefer, or use eyelets rather than buttonholes.
Mark the vertical centre of the waistband at the centre front. I positioned my buttonholes: 2cm / ¾″ either side of the centre-front line.
The central drawcord channel is approximately: 2cm / ¾″ wide. The channel needs to be slightly wider than your finished drawcord.
My 1.5cm drawcord uses buttonholes approximately 1.7cm long / ¾”, allowing a small amount of extra room for the cord to pass through.
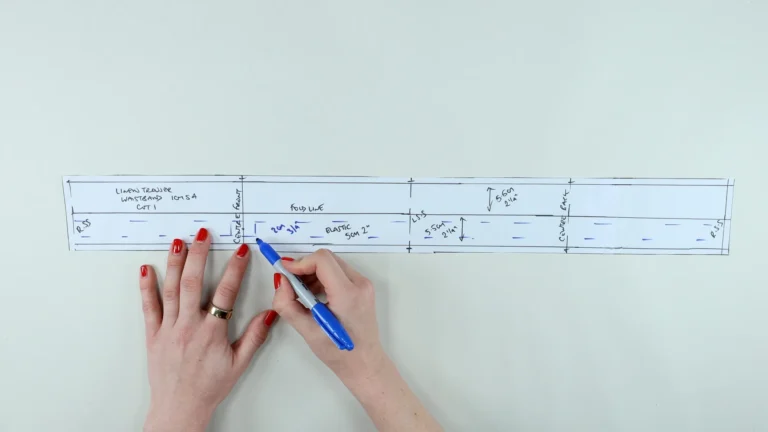
I didn’t make a paper pattern for the drawcord; I marked it directly onto the fabric.
My finished tie measures approximately: 1.5cm wide.
With a 1cm seam allowance, I therefore cut the strip approximately: 5cm / 2″ wide.
The length should equal the waistband circumference plus however much tie you want hanging at the centre front.
Mine extends approximately 30cm / 12″ beyond each buttonhole, giving an overall length of about: 190cm / approximately 2 yards.
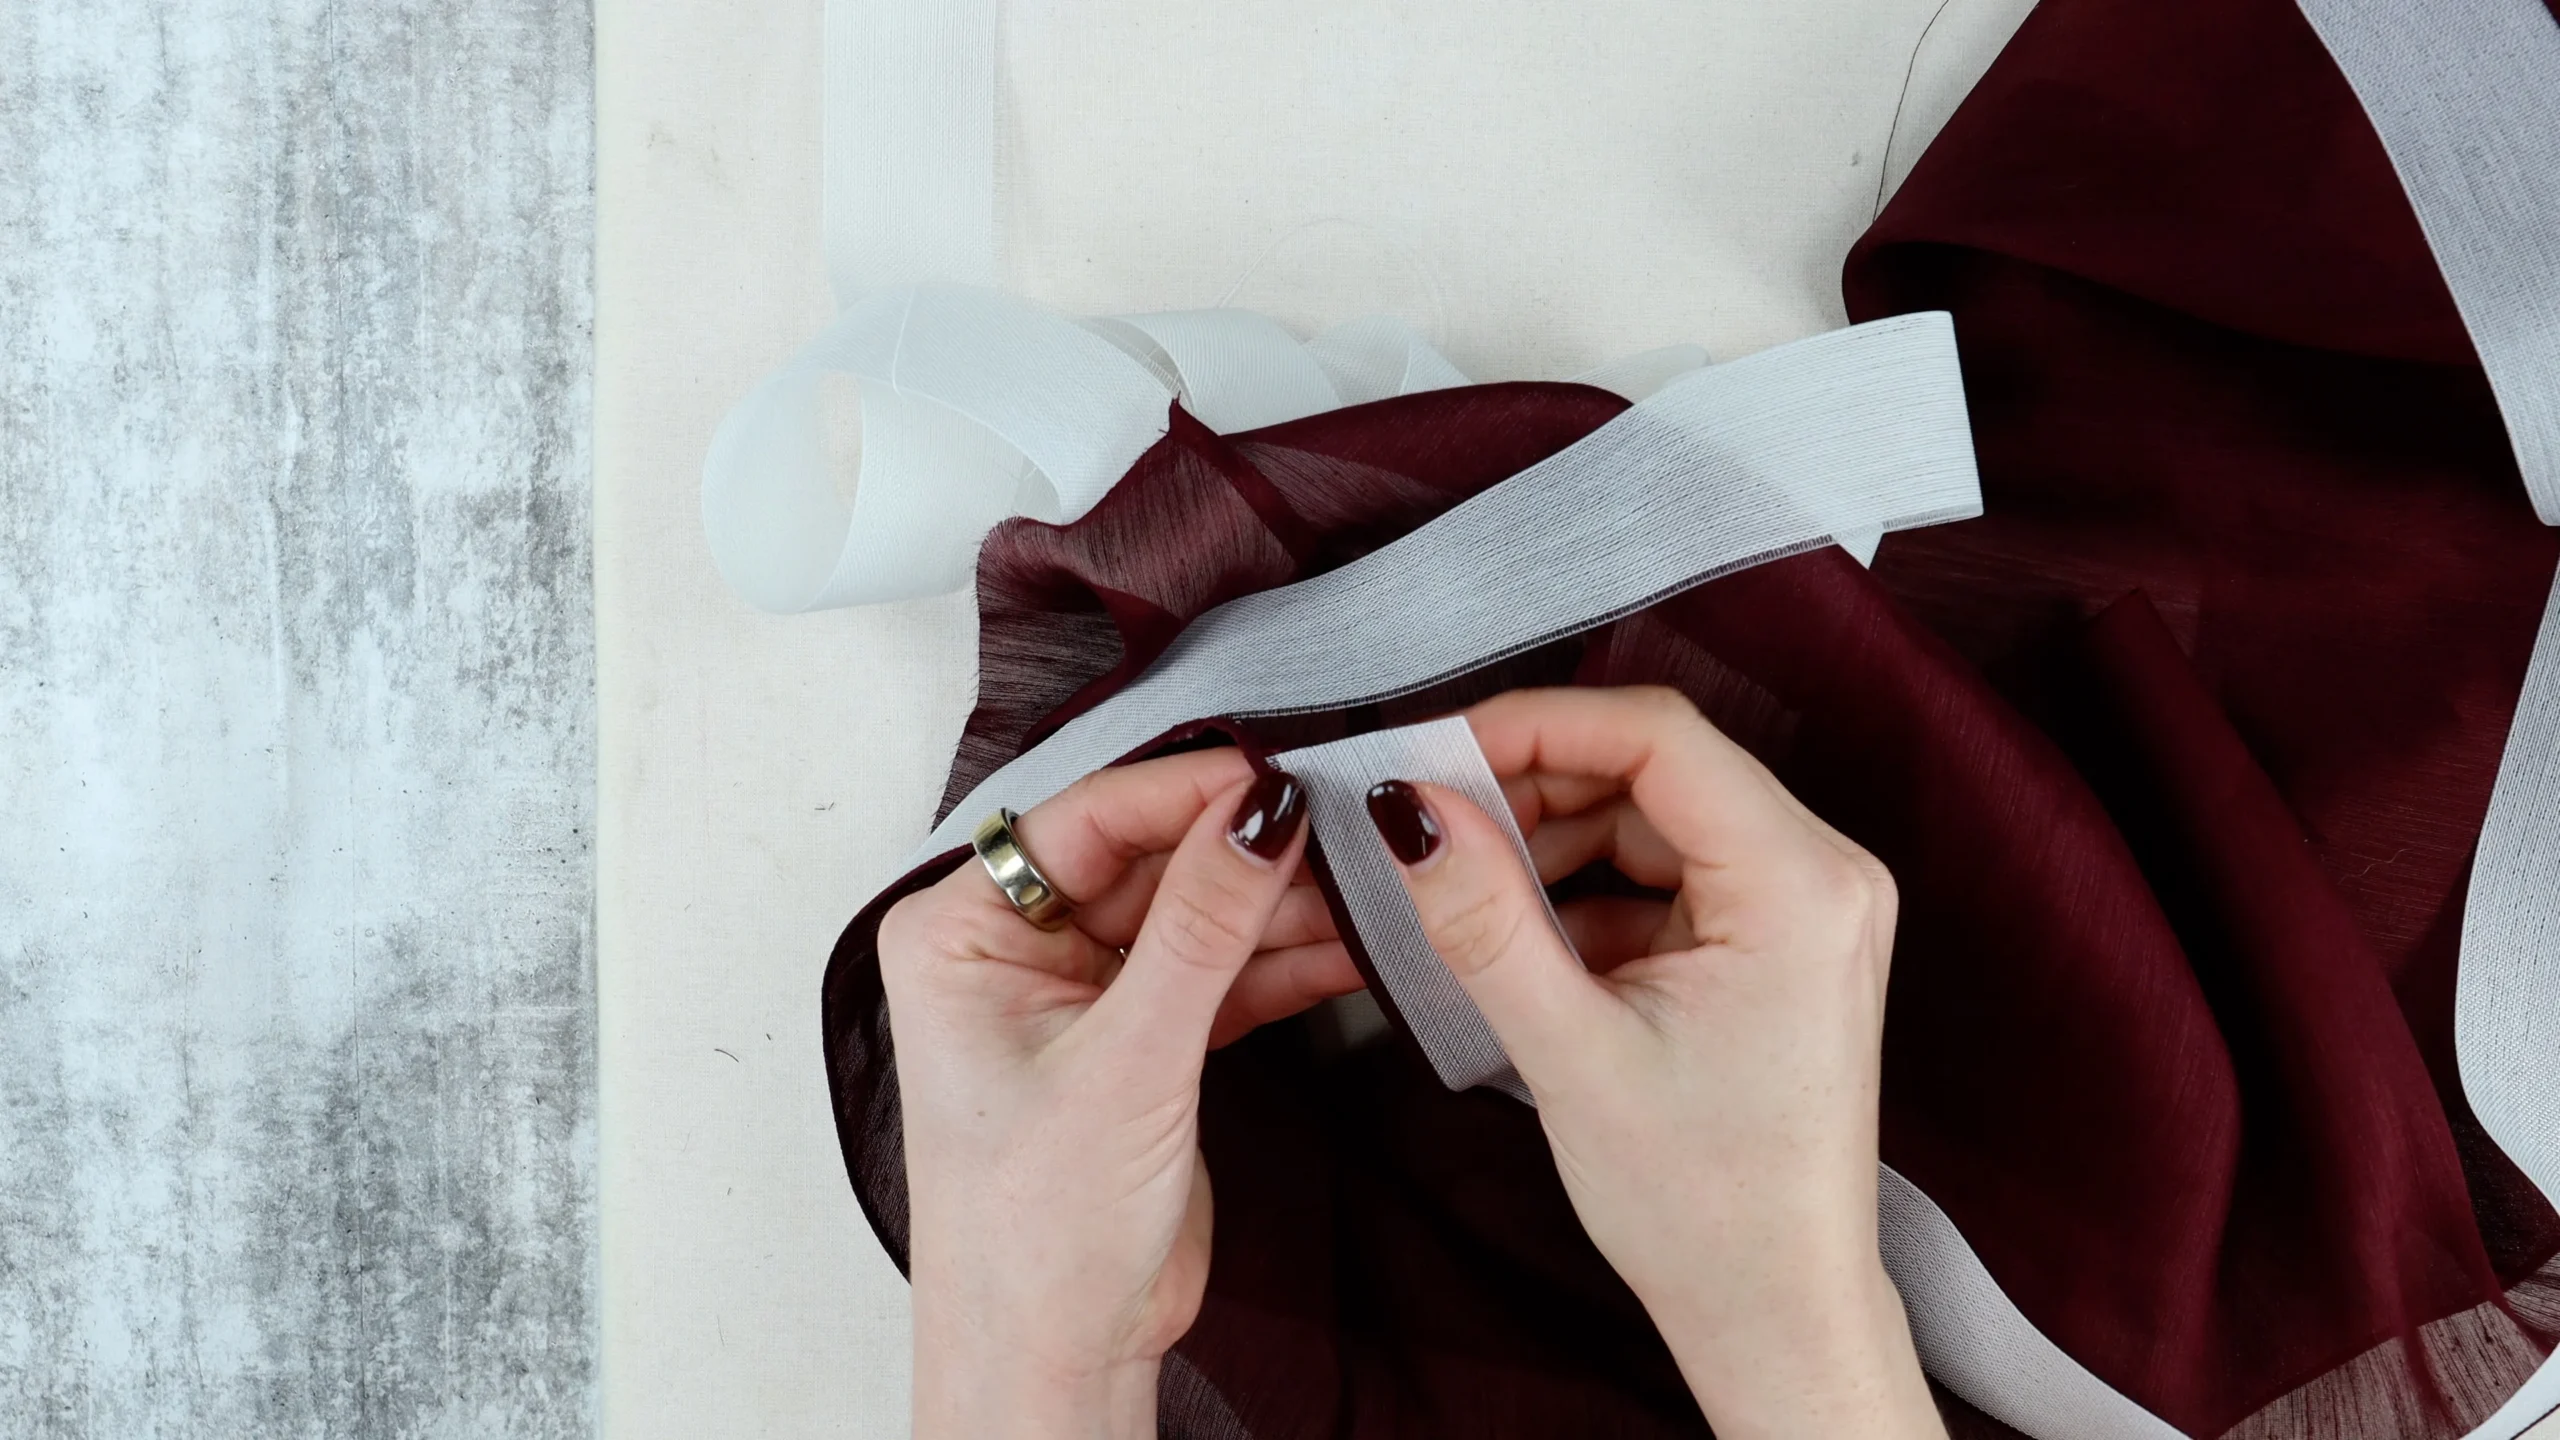
Finally, determine the elastic length.
I used my actual waist measurement with no negative ease, plus: 2cm / ¾″ to provide an overlap when joining the elastic.
Elastic preference is very personal, so wrap it around your waist at the position where the trousers will sit before cutting it. Adjust until it feels comfortable and secure.
Your finished pattern should now include:
All fabric pieces can be cut in linen, cotton or another suitable woven fabric.
Once your pattern is complete, continue to Class Two: How to Sew Linen Trousers.
In the sewing tutorial I show you how to construct the side seam pockets, sew the trouser legs and crotch, create the elasticated waistband, stitch the elastic into position and make and insert the drawcord.
Do I need a trouser block to follow this tutorial?
A fitted trouser block is ideal, but you can also start from a relatively close-fitting trouser pattern. The important thing is that the starting pattern already fits you reasonably well.
How wide should I make linen trousers?
That is a design choice. I used a 68cm / approximately 27″ finished hem circumference. Measuring a pair of trousers you already like is a useful way to determine your preferred width.
Why is the back trouser leg wider than the front?
The back of the body generally requires more room through the buttocks, thigh and calf. I therefore distribute slightly more of the finished circumference to the back leg.
Why do you lower the crotch?
Lowering and extending the crotch creates a more relaxed fit compared with the fitted trouser block used as the starting point.
Can I make the waistband narrower?
Yes. Your finished waistband depth should suit the elastic you plan to use. I used 5cm elastic and drafted a 5.5cm finished waistband.
Can I make these trousers without a drawcord?
Yes. The drawcord is a design feature rather than the main means of fitting the trousers. You could omit it and use just the elasticated waistband.
Can I use eyelets instead of buttonholes?
Yes. The tutorial specifically allows either buttonholes or eyelets for the drawcord openings.