
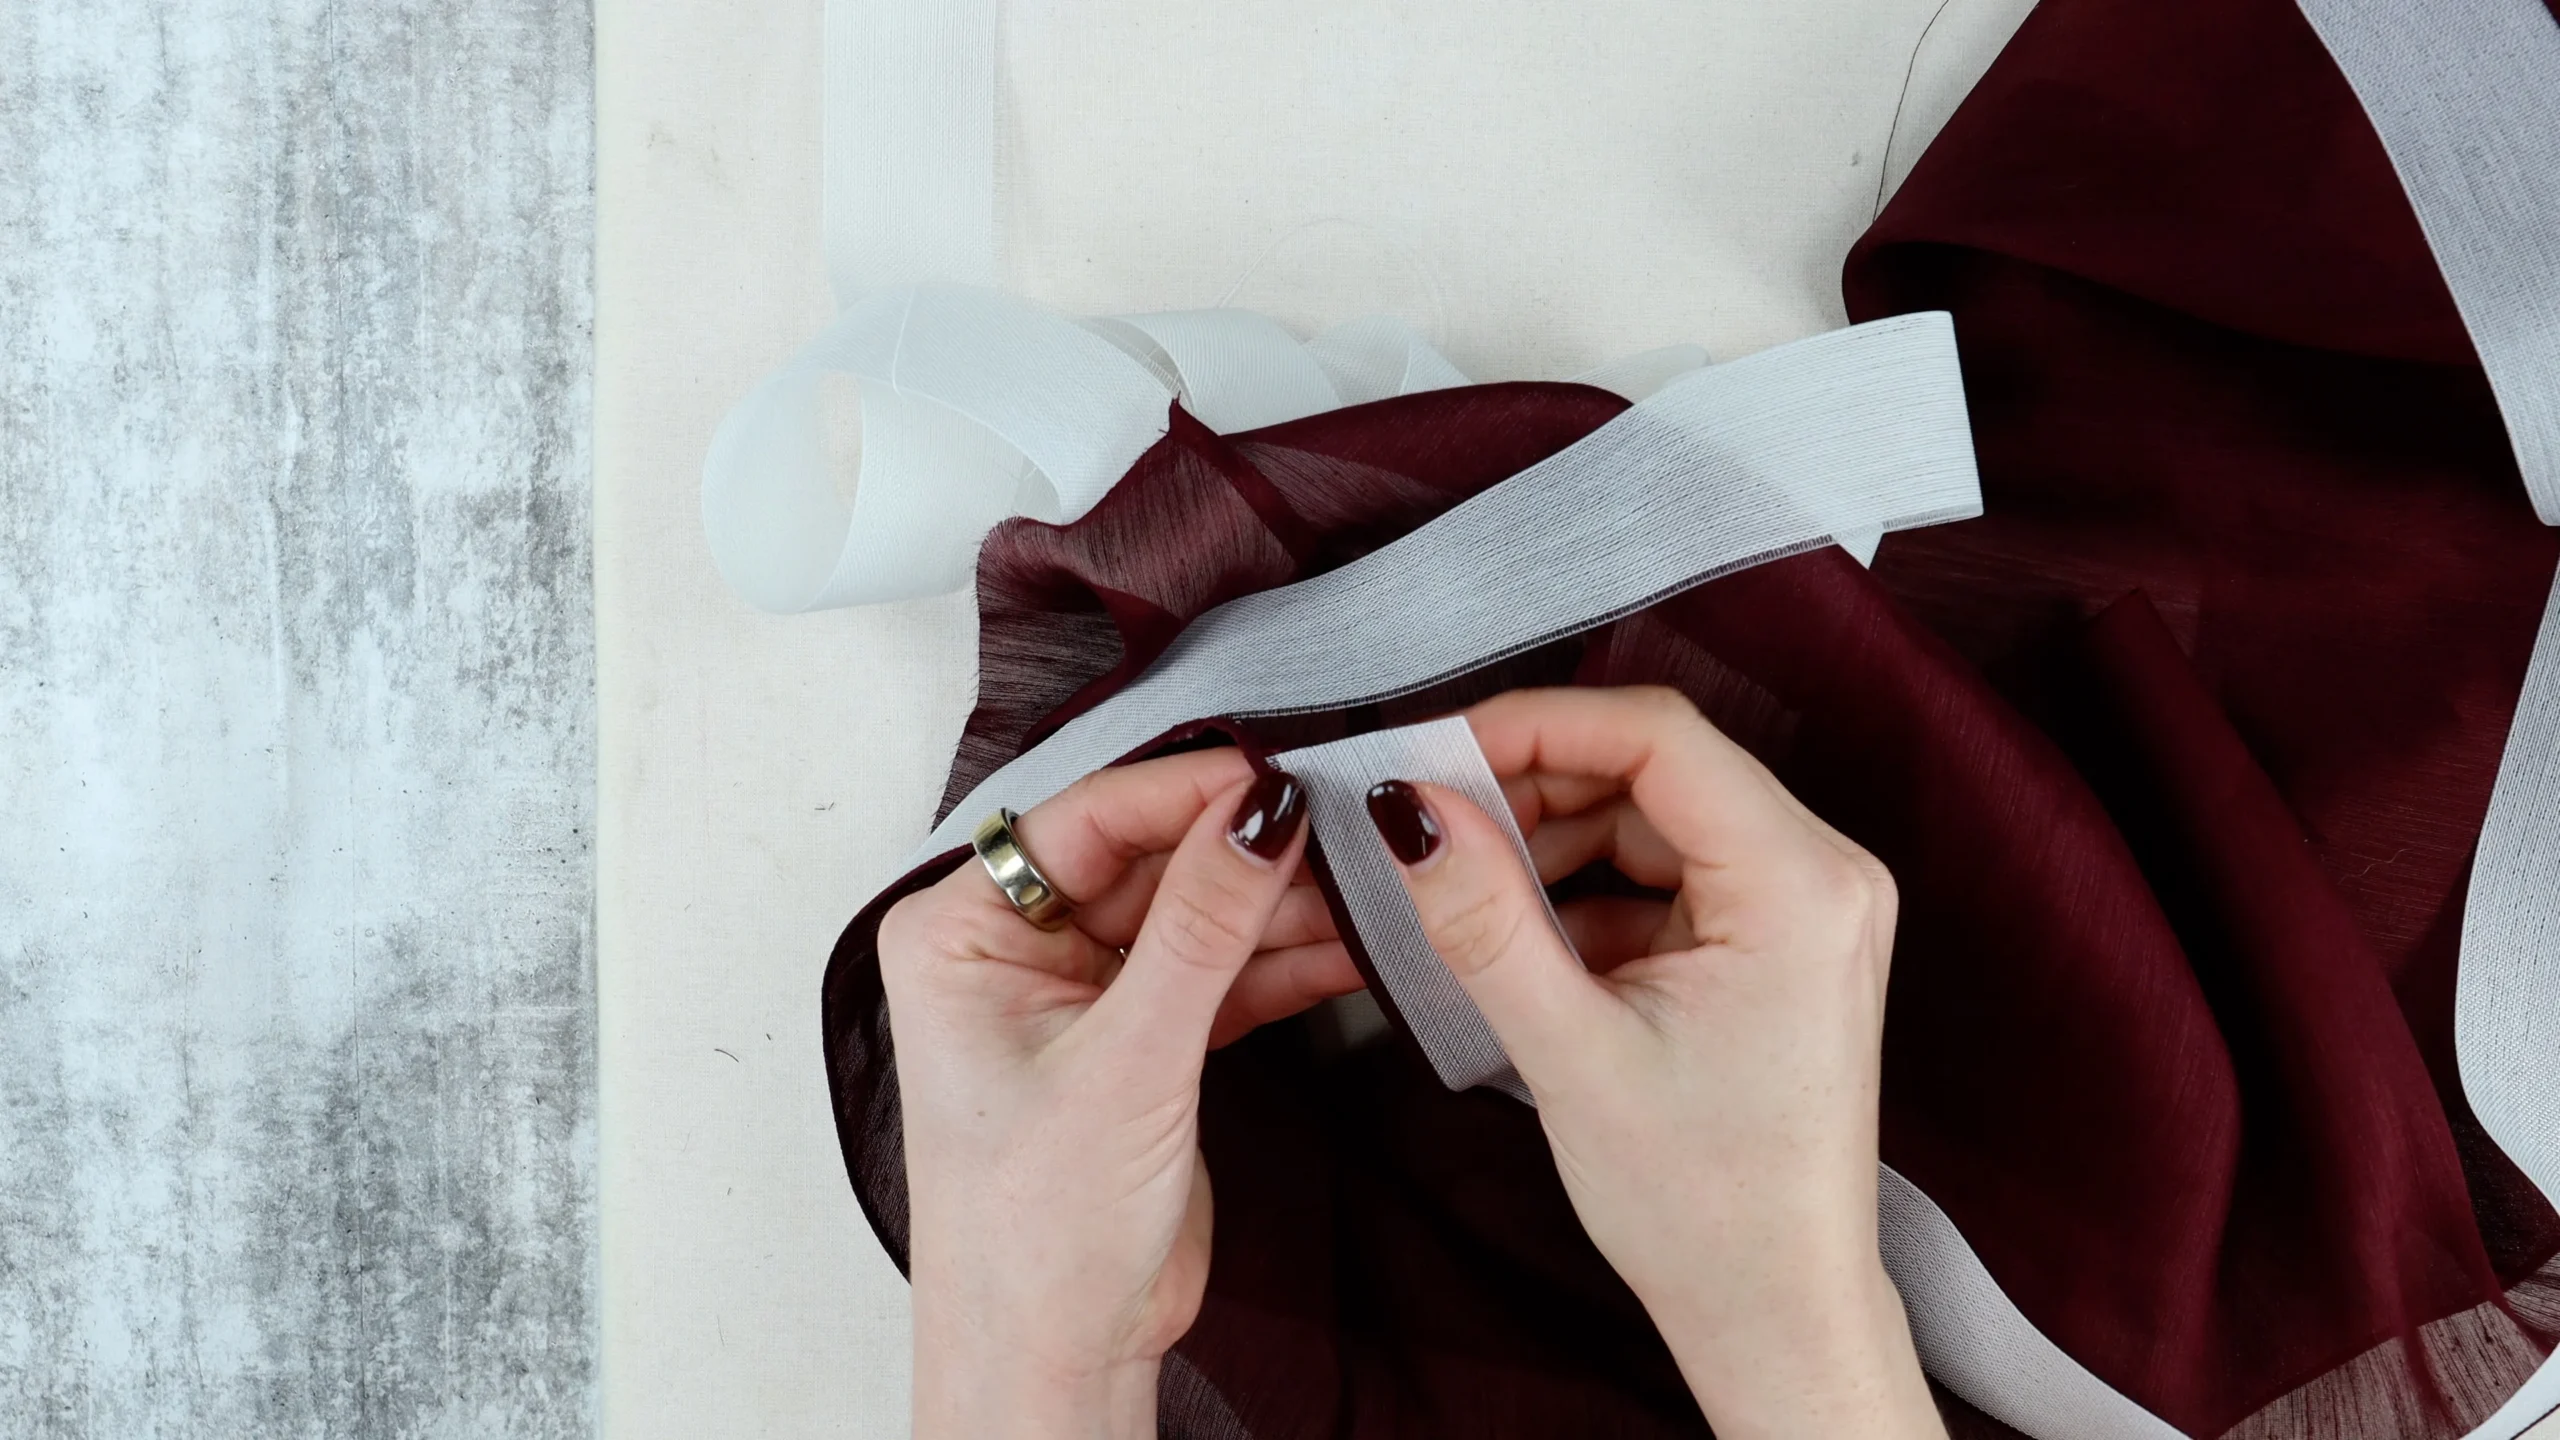
Learn how to draft a tie neck halterneck top pattern drafting tutorial walks you through the complete process step by step, from your existing bodice block.
This is Class One in the Tie Neck Halterneck Top series. Here we focus entirely on the pattern drafting. The sewing tutorial follows in Class Two – Link.
You can make this top:
Watch the Full Tutorial – How to Draft a Tie Neck Halterneck Top
*affiliate links below
To follow along with this tutorial you will need:
I work with a half-scale bodice block in this tutorial. All measurements I share are full scale, given in both centimetres and inches.

This is the first and most important decision when adapting a bodice block for a halterneck garment.
Shoulder Dart – In a halterneck garment you do not want any extra ease across the shoulder, so if your block has a shoulder dart it must be removed entirely. Cut along one dart leg at the shoulder, cut along one side dart leg, and rotate the shoulder dart into the side dart. Tape the shoulder dart closed and redraw the shoulder line.
Armhole Dart – To achieve a good fit in a sleeveless halterneck, you will most likely need to take a small dart at the armhole. The size will depend on your cup size – I recommend creating a sample and checking the fit in this area before finalising.
A Cup = 1 cm (3/8″) | B Cup 1.2cm (1/2″) | C Cup 1.5 cm (5/8″) | D Cup 2 cm (3/4″)
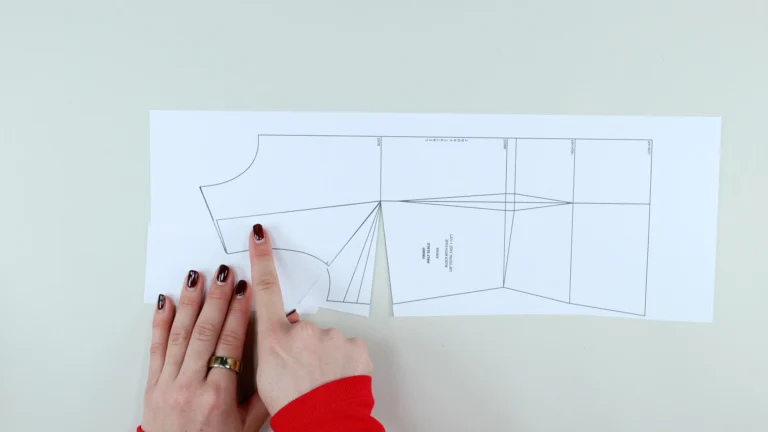
Side Dart – You can choose to keep or remove the side dart depending on your preference and bust size. I chose to remove it for design reasons, but if you have a fuller bust you may prefer to keep it.
To remove the side dart: cut up the central line of the waist dart (or a line drawn from the bust apex parallel to the centre front), and along one of the side dart legs to the bust apex. Raise the side section of the pattern until the side dart is completely closed. Redraw the waistline across.
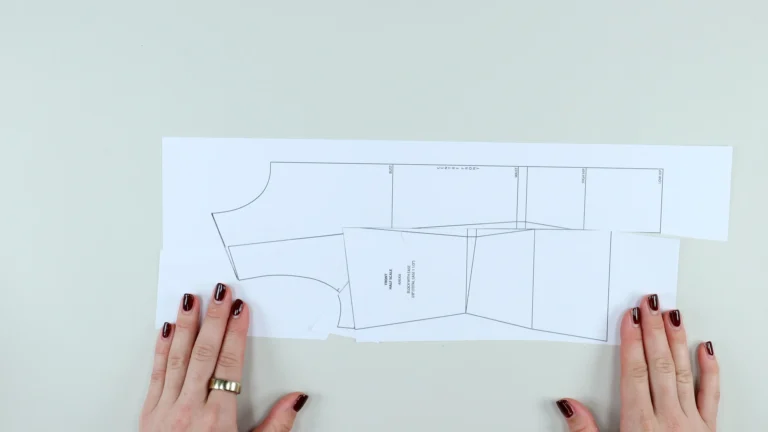
For the tie to work well, the neckline needs to sit close to the neck. Depending on where your block finishes, you may need to raise it.
My adjustments:
Use a French curve to redraw the neckline smoothly after making these adjustments.
Lower the underarm by approximately 2cm (¾”). Because this is a halterneck, you may also want to reduce the ease at the underarm – I removed 1cm (⅜”) of ease from my pattern.
Important: if you plan to wear a bra with this garment, make sure the side of the bra will be covered when deciding how far to drop the underarm.
Once you are happy with the underarm placement, connect the halterneck shape: ensure a flat section of at least 1.5cm (⅝”) at the side seam of the underarm, then connect in a soft curve up to the high shoulder point.
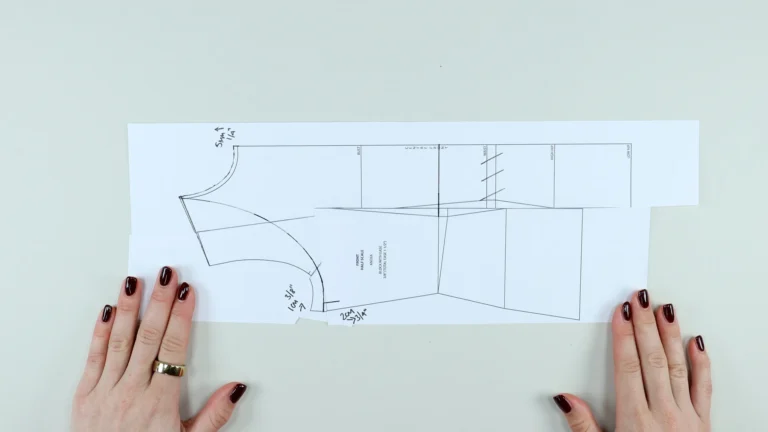
This technique can be used any time you want to draft a trapeze-style garment – it works for swing coats and flared dresses too.
Mark the cross front – draw the cross front line approximately midway in the armhole, or 7.5cm (3″) down from the centre front neck.
Measure from the centre front to the armhole edge and divide by five.
Mark this measurement from the centre front toward the armhole, then mark again at double that distance. The remaining gap between the second mark and the armhole edge should equal the same doubled measurement – you are dividing the cross front into 2 1/2 parts.
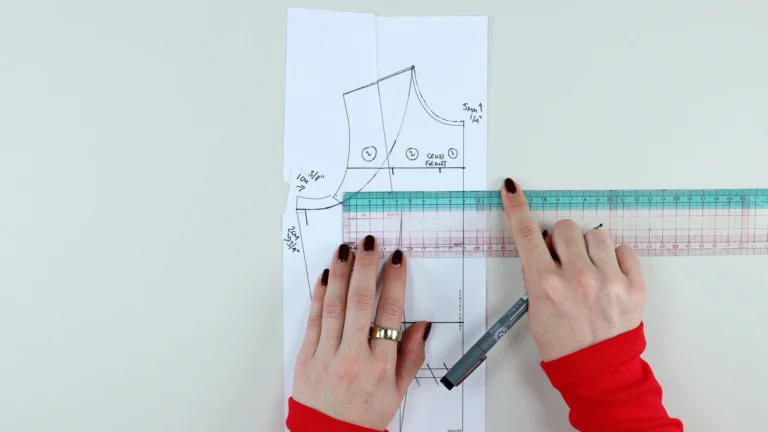
Mark the hem – decide on your hem length.
I lowered the hem at the side seam by 2cm (¾”) from my block.
Measure from the centre front to the side seam at the hem and divide by five, marking in the same way as the cross front.
Connect the lines – draw lines connecting the cross front marks down to the hem marks.
Measure 2.5cm (1″) down from the cross front on each line to establish your pivot points, then draw an angled line from each pivot point back to where the cross front line connects to the new armhole.
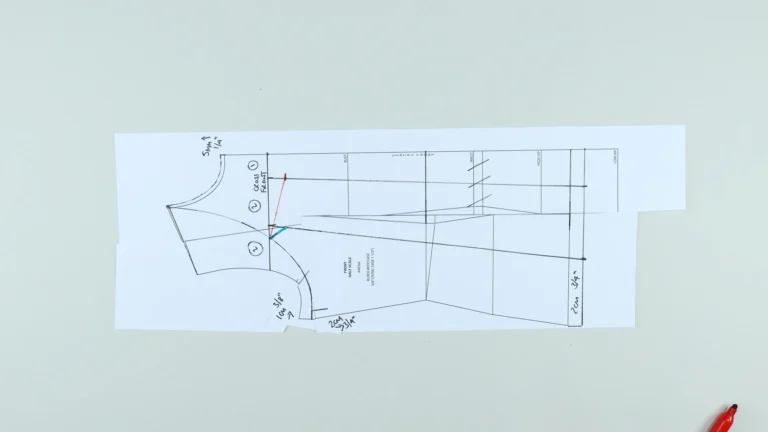
Slash and spread – cut from the hem up to the pivot point on the first line, then along the angled line toward the armhole, leaving approximately 3mm (⅛”) of paper attached at the armhole as a pivot point.
Open the hem and insert pattern paper.
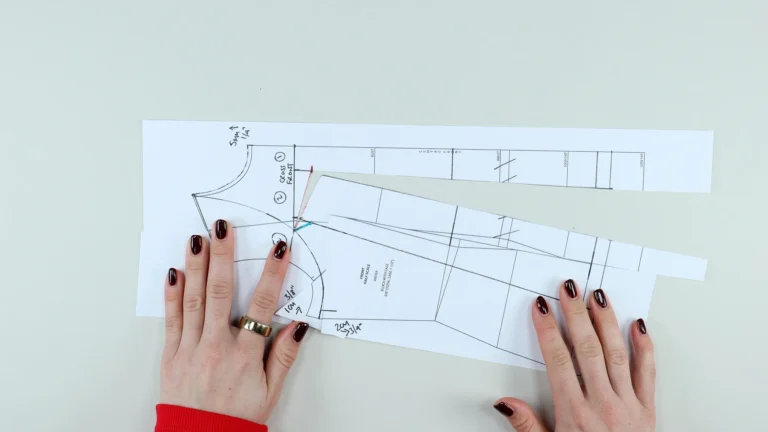
I added 9cm (3½”) at each insertion, measured along the new hemline. Tape in place and repeat for the second line.
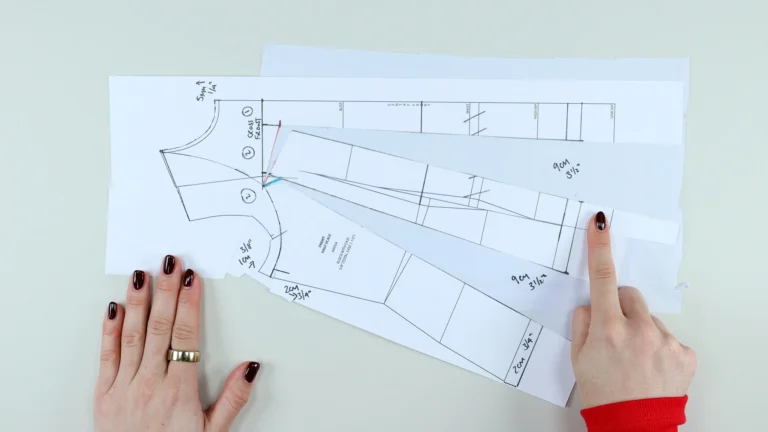
Connect the underarm point down to the new side seam hem.
If you removed the side dart, you may need to lower the centre front hem to account for the bust volume – measure your original side dart and lower the centre front hem by this amount.
Square off the hem at both the centre front and side seam, then use a French curve to blend a smooth hemline between the two points.
Use a French curve to blend and re-true the armhole where the insertions were made.
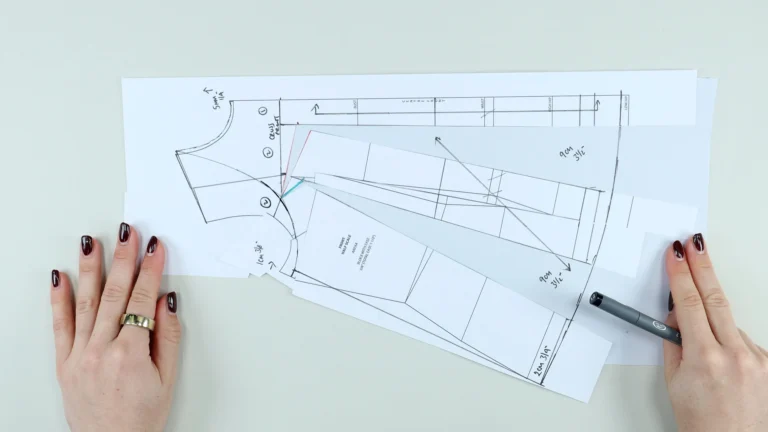
Repeat the same process for the back pattern piece:
Add a notch for the centre back opening – I measured 16cm (6¼”) down from the neckline. The section above this notch will be left open.
Blend the hem and re-true the armhole with a French curve.
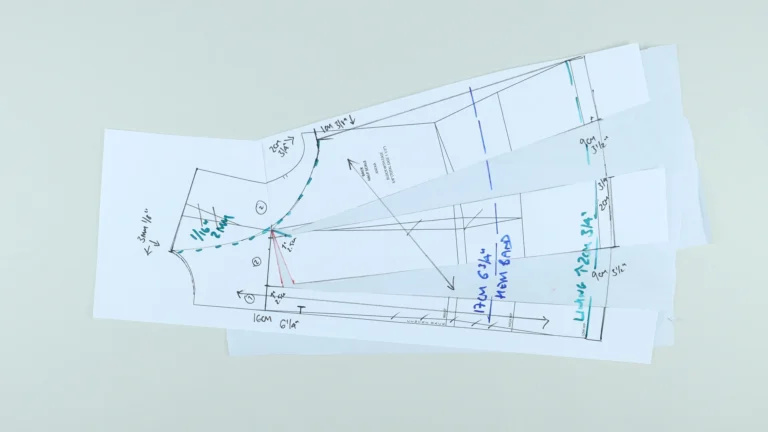
Measure the neckline of both the front and back pattern pieces using the edge of a tape measure and record these measurements.
Draw a long rectangle. Find the centre of the long edge – this is your centre front. Square off a line at the centre front.
My necktie width is 13cm (5″). Add seam allowances before cutting.
The necktie can be cut on the bias, on the straight of grain, or with the centre front on the fold.

This garment has a hem band on both the front and back exterior. I positioned mine 17cm (6¾”) up from the hem, measuring along the curve of the hem to ensure an even distance all the way around.
For the lining, shorten the hem by 2-2.5cm (¾-1″) so it sits above the exterior hem and is not visible from the right side.
Take a small amount of favoring (2-3mm / ⅛”) at the armhole on the lining to ensure the lining sits just inside the garment.
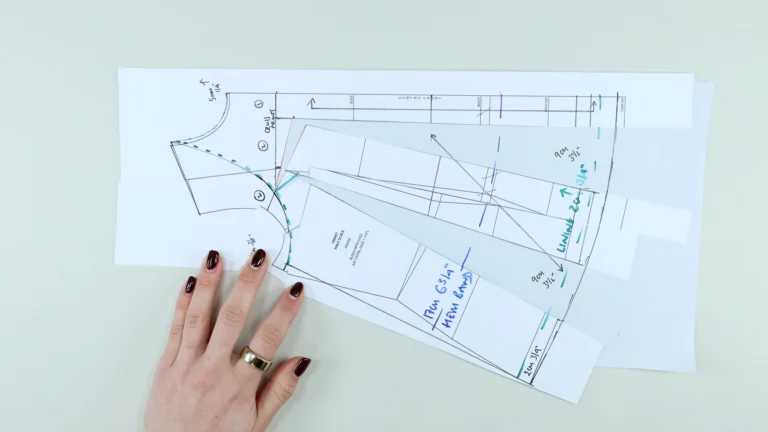
Once all drafting is complete, trace each piece from your master pattern onto fresh pattern paper. Add seam allowances – I work with 1cm (⅜”) – and record grainlines as you go.
Your final pattern pieces should include:
Exterior fabric:
Lining:
Make sure all notches are clearly marked – especially the shoulder point notch and centre back notch on the necktie.

Do I need a bodice block to draft a tie neck halterneck top pattern? Yes – this tutorial works from a fitted bodice block. If you don’t have one, you can adapt my Copen pattern as a starting point, ideally fitted to your measurements first. If you’d like to learn how to draft your own bodice block from scratch, that’s something I teach in my Online Class.
What fabric works best for this top? Woven fabrics work beautifully – I used a silk-cotton blend in this tutorial. Lightweight woven fabrics such as silk, cotton voile, or crepe de chine are ideal. The necktie in particular benefits from being cut on the bias for a softer drape.
Can I cut this garment on the bias? Yes – both the front and back pattern pieces can be cut on the bias if you prefer that look. The necktie can also be cut on the bias, or on the straight of grain with the centre front on the fold.
What is the slash and spread technique? Slash and spread is a pattern drafting technique used to add volume to a garment. You cut along marked lines and spread the pattern open by a set amount, then fill the gap with paper. It’s one of the most useful techniques in pattern making and can be applied to any garment where you want to add fullness – trapeze tops, swing coats, flared skirts, and more.
Do I need to make a sample first? It is up to you. If you are working from a perfectly fitted bodice block then creating a sample is more about the design of the garment, rather than the fit. This means you can make up the garment without creating a sample, but I wouldn’t use your favourite or most expensive fabric in case you want to change one of the design details.

