Sew an all-in-one facing using this step-by-step tutorial to achieve a clean, professional finish on sleeveless garments, neatly enclosing both the neckline and armholes.
In this tutorial, I’ll show you two different methods for sewing an all-in-one facing:
Method 1: With a centre back seam

Method 2: Without a centre back seam (cut on the fold)
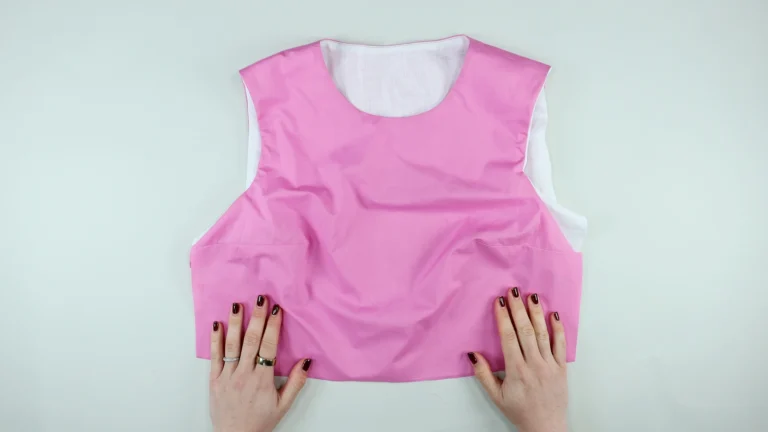
An all-in-one facing finishes:
The neckline
The armholes
… in one continuous construction.
It’s commonly used in:
Sleeveless dresses
Tops and blouses
Lined or partially lined garments
You will need:
Your outer garment pieces (front + back)
Your facing pieces
Interfacing (lightweight recommended)
If you don’t have an all-in-one facing pattern, see: How to Draft an All-in-One Facing
Watch the ‘How to Draft an All-in-One Facing’ class on YouTube: Click Here.
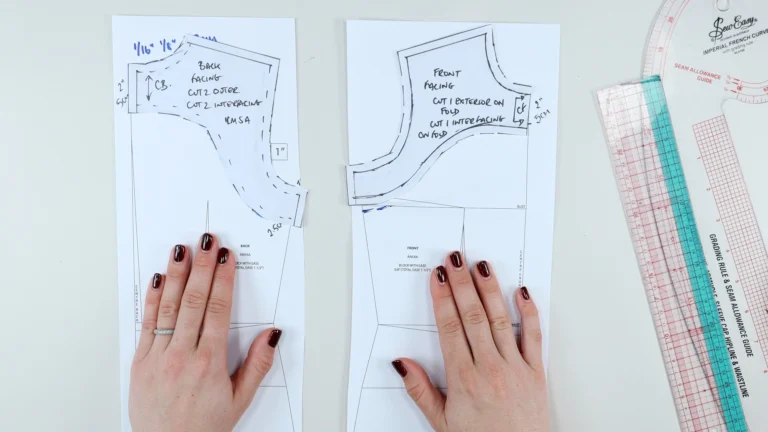
Before sewing the facing:
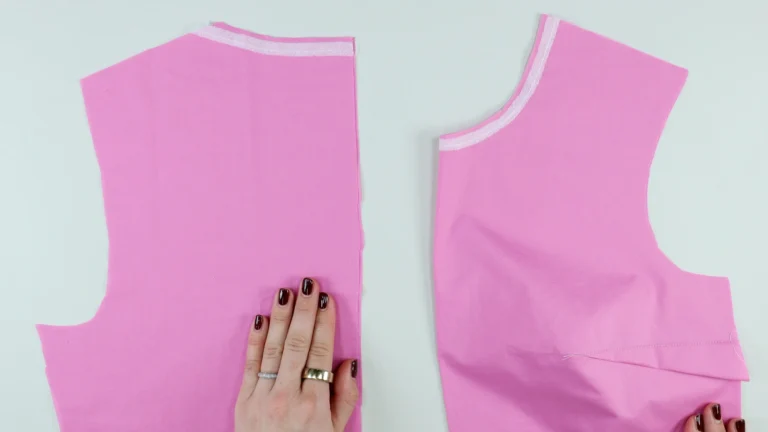
Sew any required seams, e.g. side darts
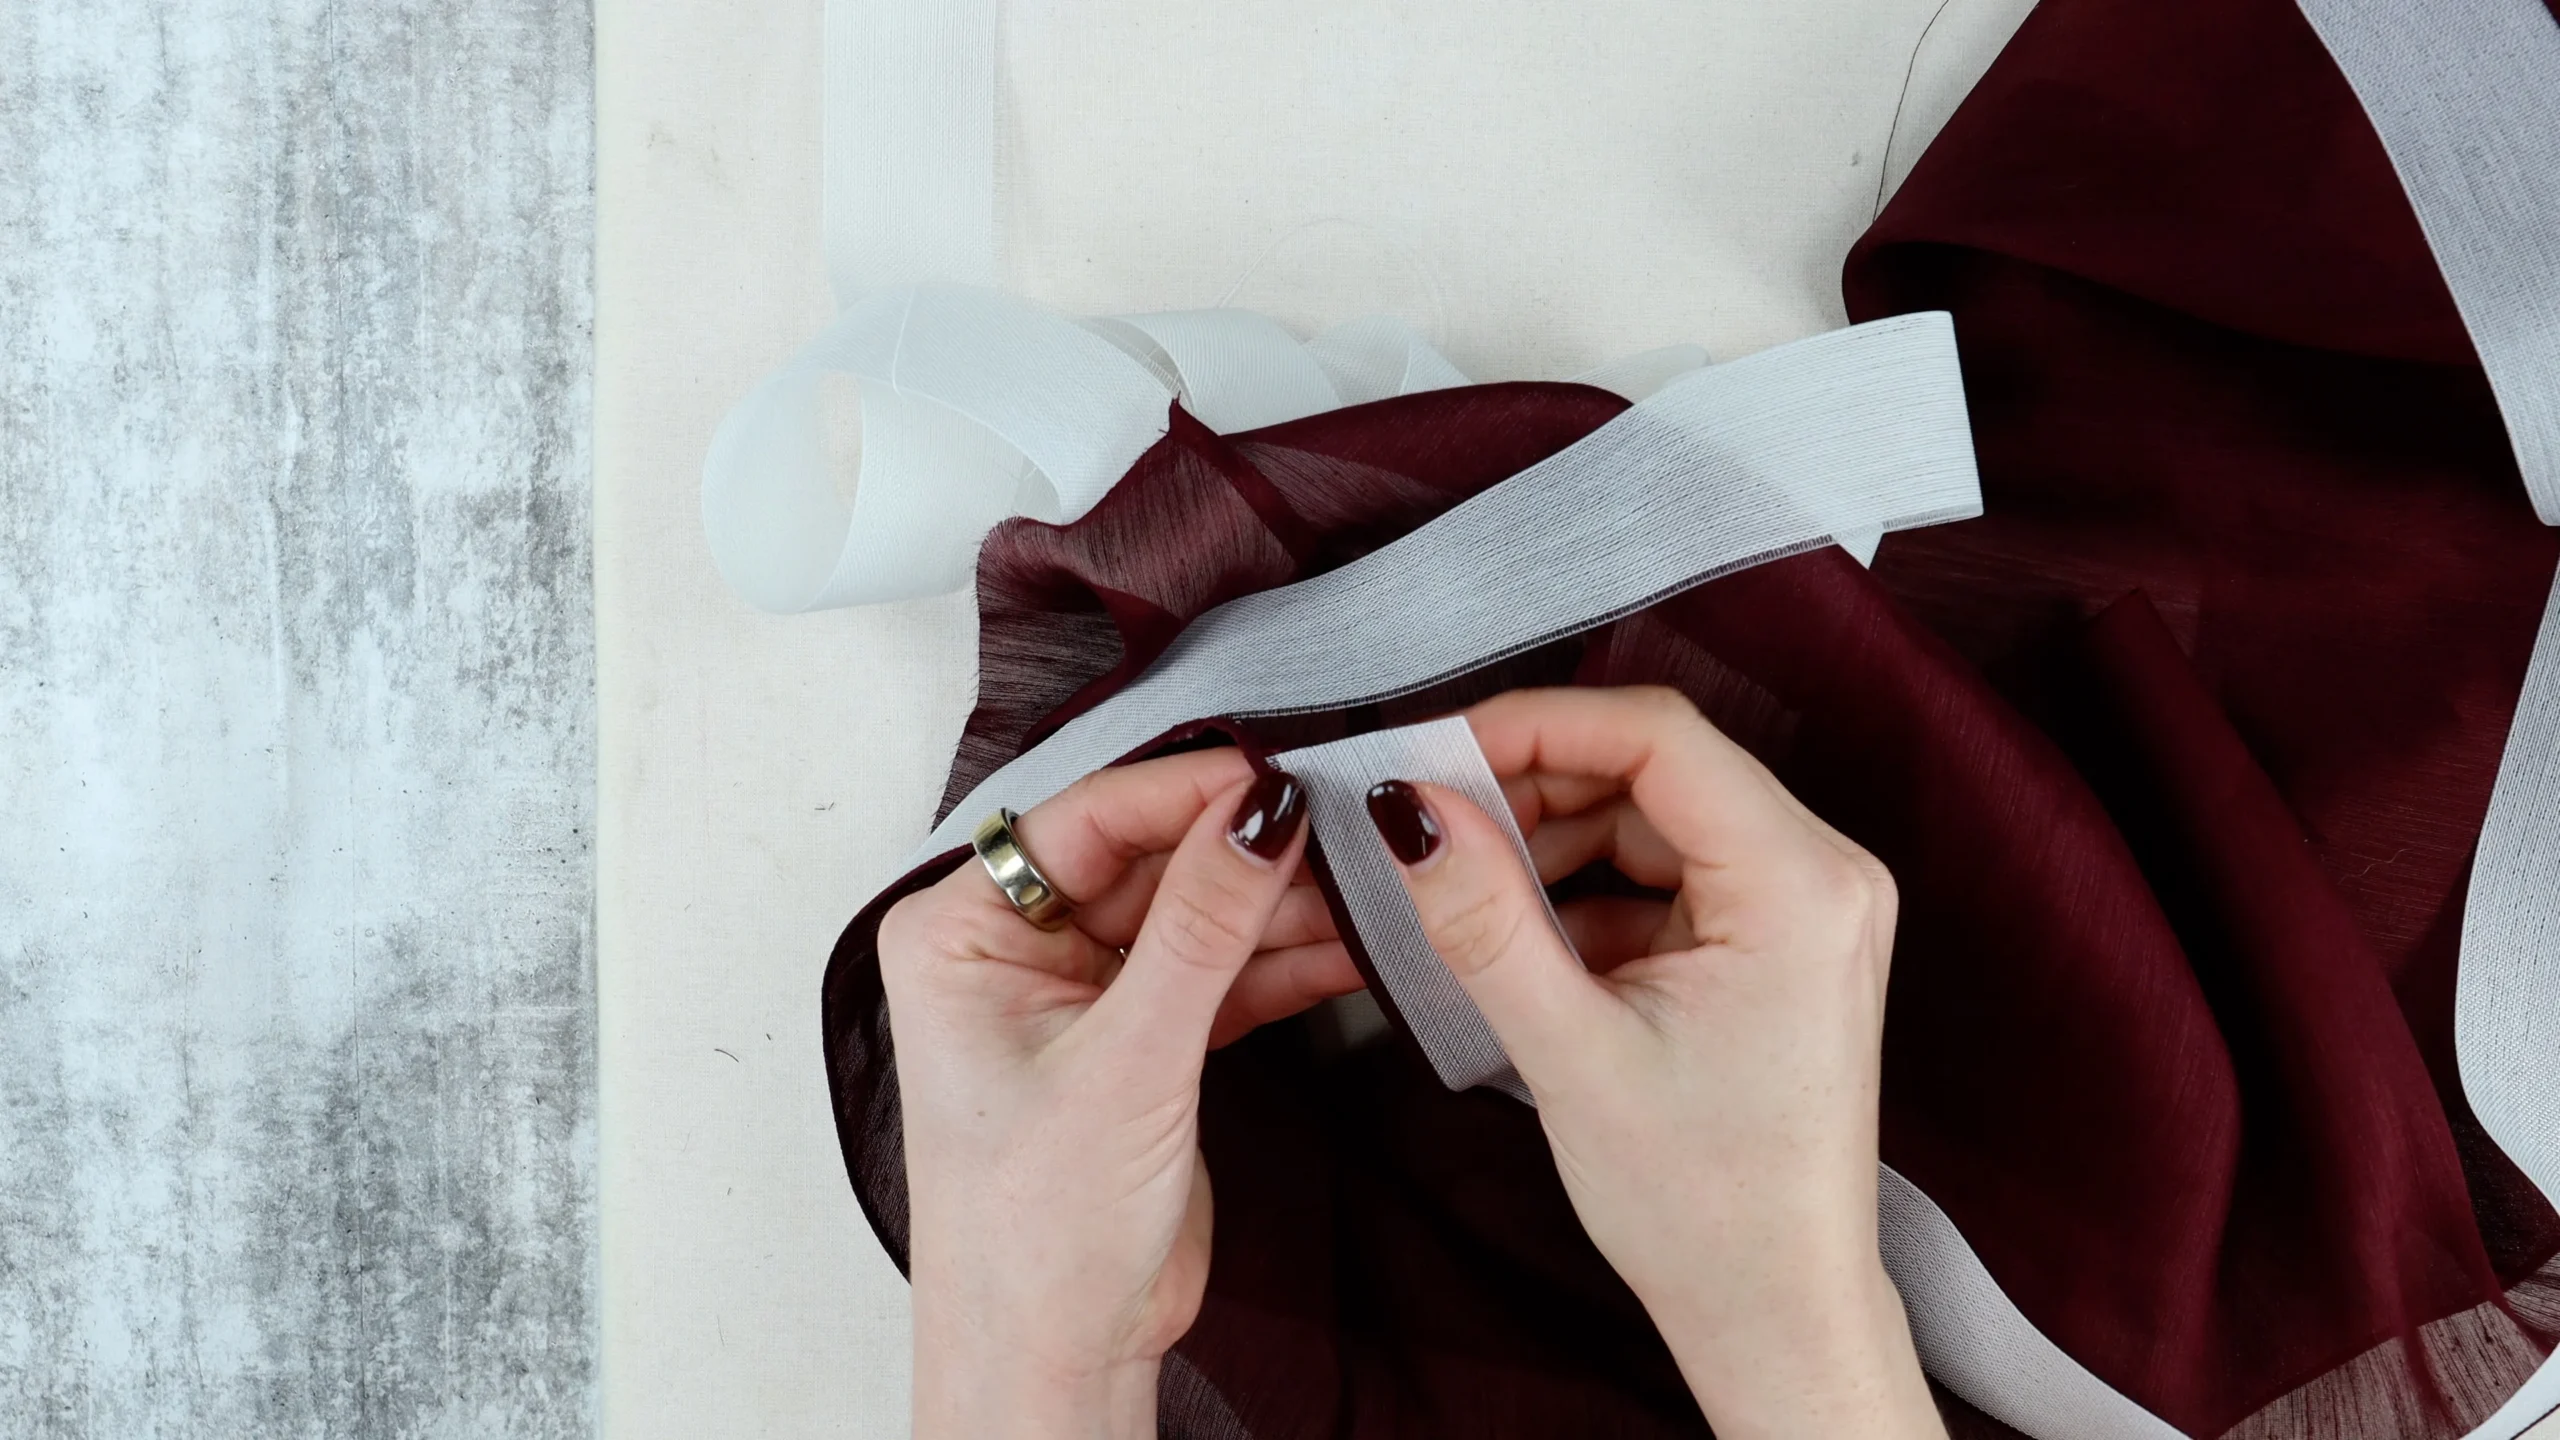
Apply stay tape (or stay stitching) to:
Neckline
Armholes
Sew the shoulder seams for:
The outer garment
The facing
Position right sides of the fabric together. Stitch from neckline to shoulder.
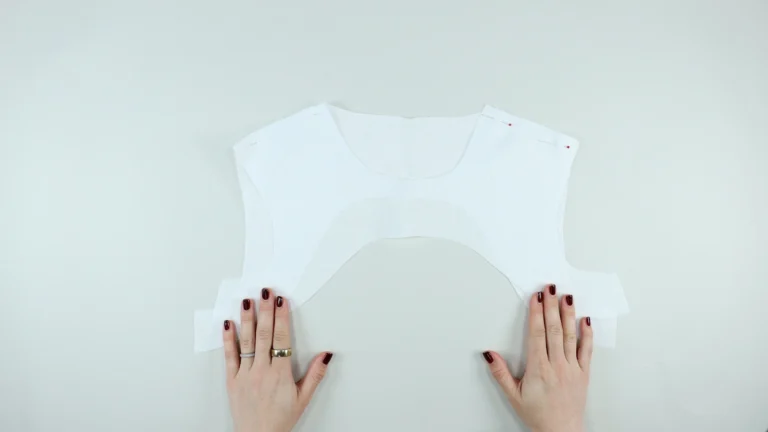
Press seams open (or towards the back).
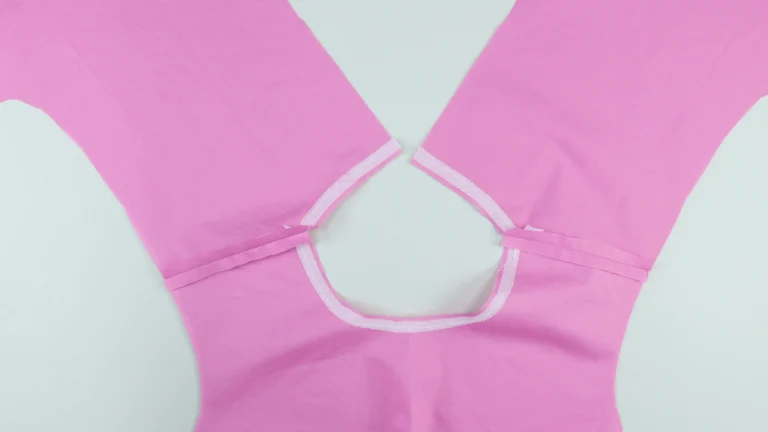
Place the garment with the fabric right side facing up. Position the facing with the right side down. The right sides of the fabric will be facing one another.
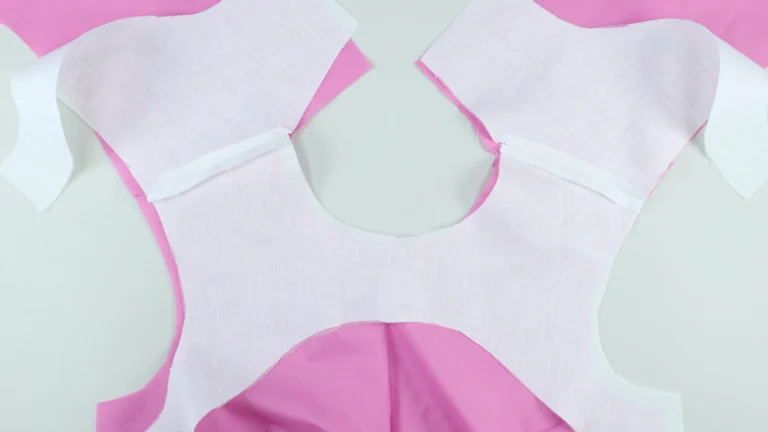
Align neckline edges and shoulder seams. Pin and sew around the neckline.
The same method is completed for a centre back seam, or a centre back cut on the fold.
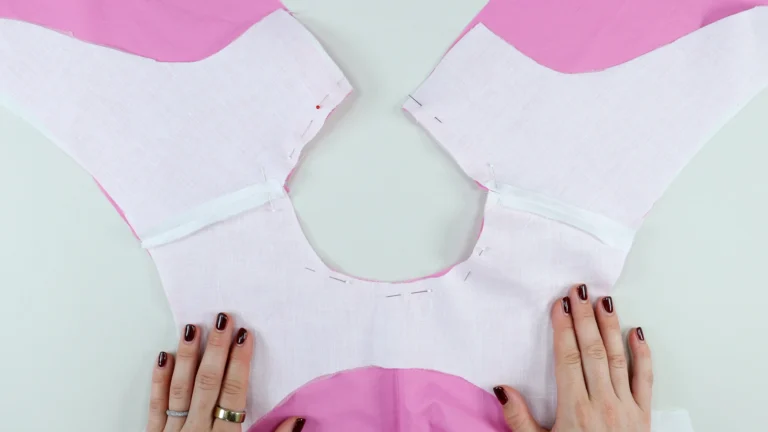
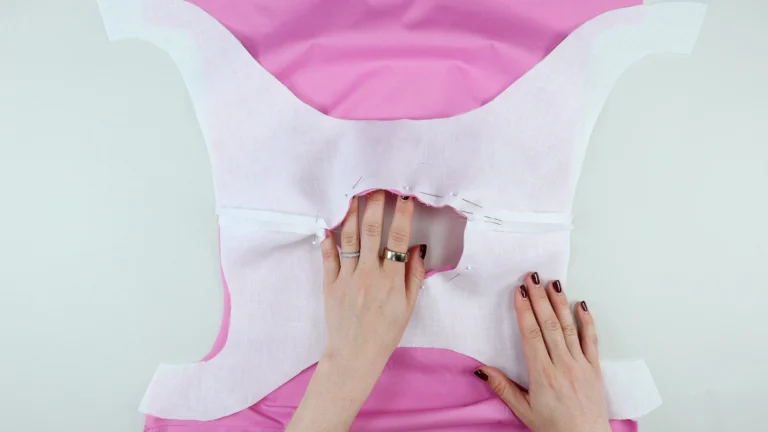
Ensure a perfect match between the shoulder seams of the facing and garment. Use a Clover fork pin if needed.
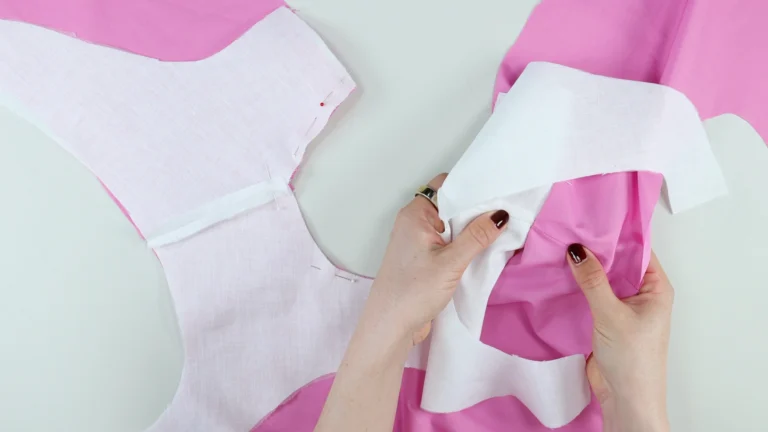
To achieve a smooth neckline:
Clip:
Into curved areas; more clips are required in tighter curves.
Cut close to stitching (but not through it).
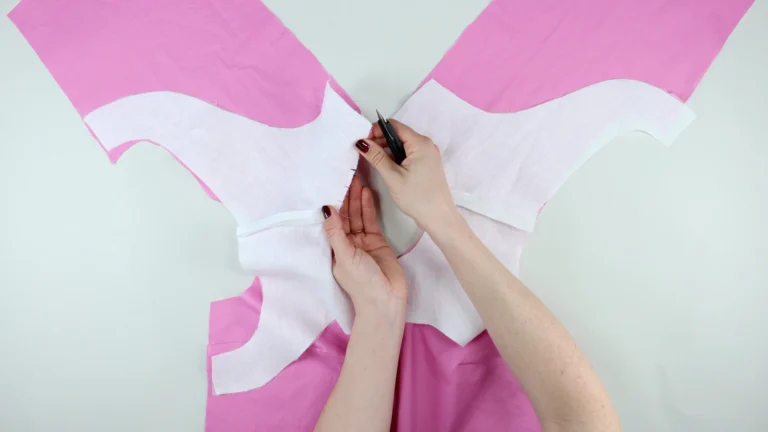
Trim & grade (if needed):
Trim seam allowances if larger than 1 cm (3/8″).
Grade:
Trim the facing layer to approximately half the size of the main seam allowance. Facing seam allowance = smallest.
Outer fabric seam allowance = largest.
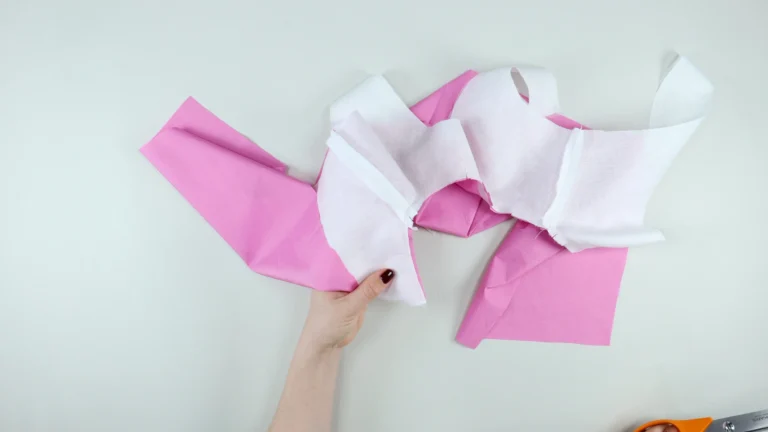
This reduces bulk and keeps the graded/trimmed seam allowances invisible from the right side of the garment.
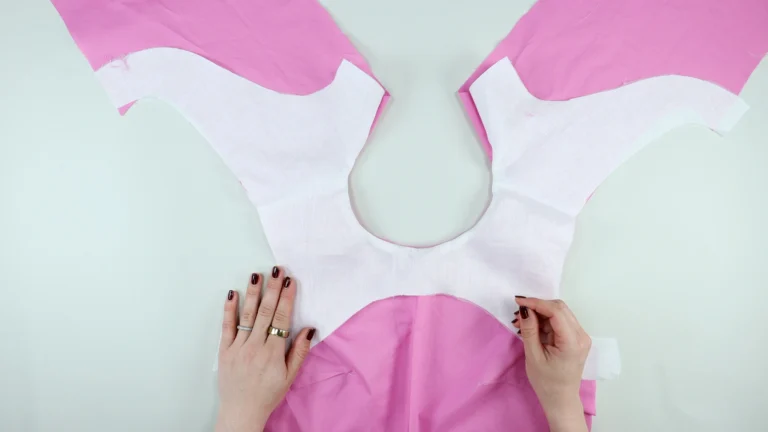
When you sew an all-in-one facing, it’s important to understitch the neckline and armholes for the best finish.
Sew on the facing.
About 2 – 3 mm (1/16”- 1/8”) from the neckline seam.
Push both seam allowances (facing and garment) towards the facing, and catch with understitching.
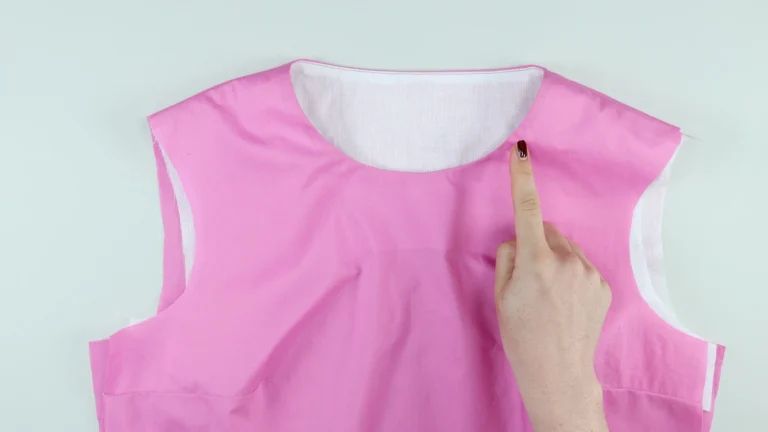
Understitching keeps the facing from rolling to the outside and being visible on the final garment.
Press the understitched neckline, so that from the facing side, the outer material is very slightly visible.
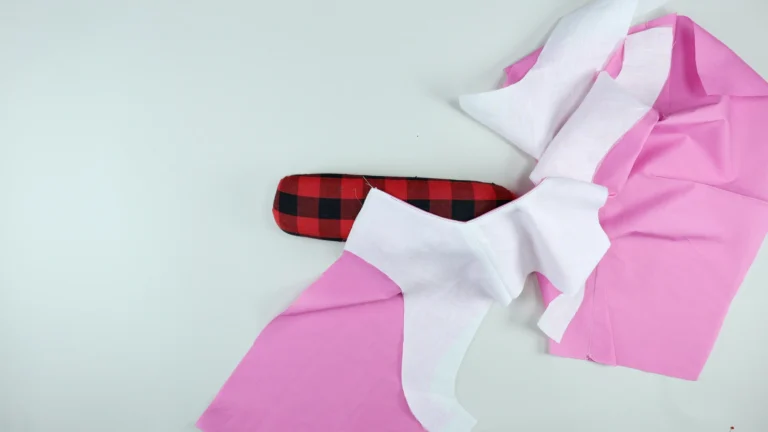
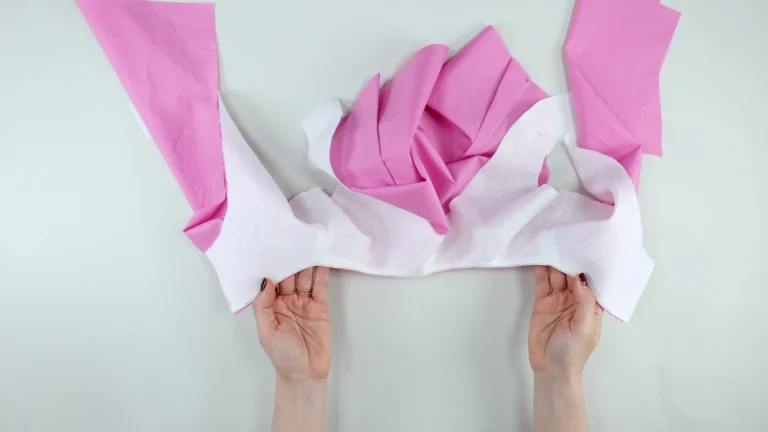
This is where the methods differ:
Position the facing and garment right sides together.
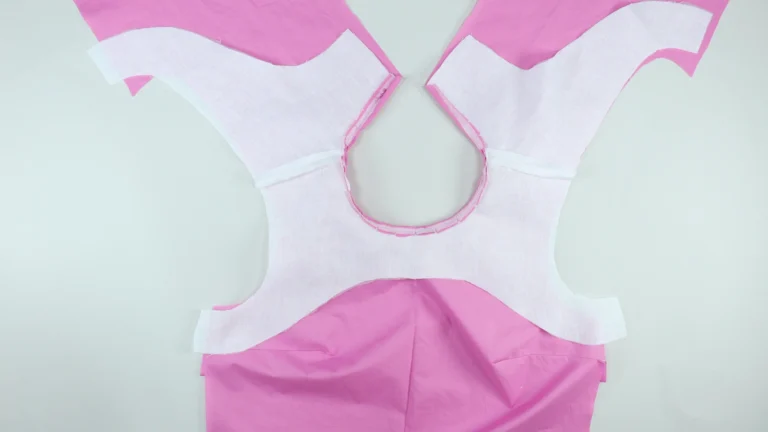
Align the armhole edges. Match the shoulder seams between the facing and the garment.
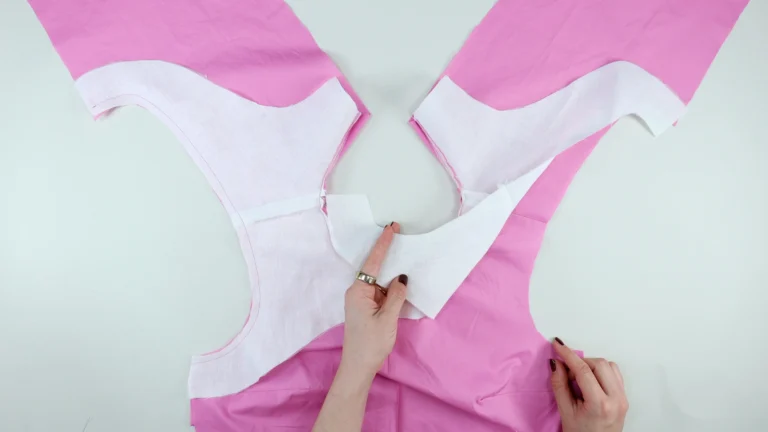
Pin and sew around both armholes.
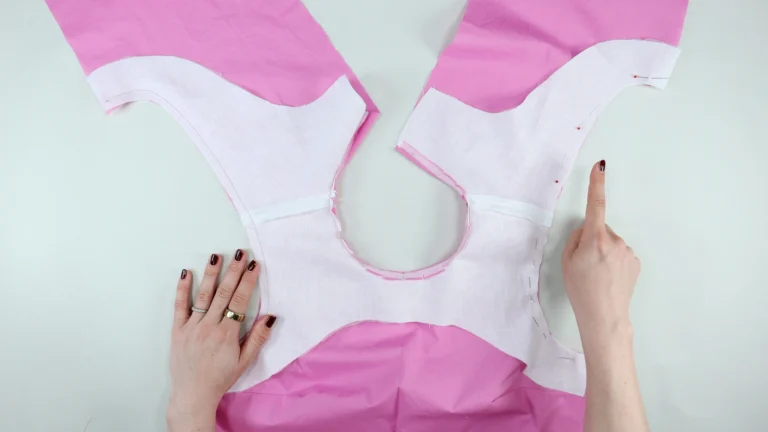
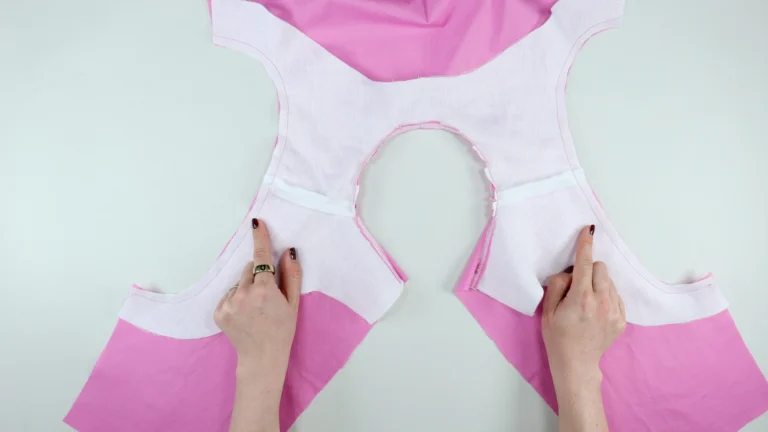
Then:
Trim and grade the seam allowances if needed
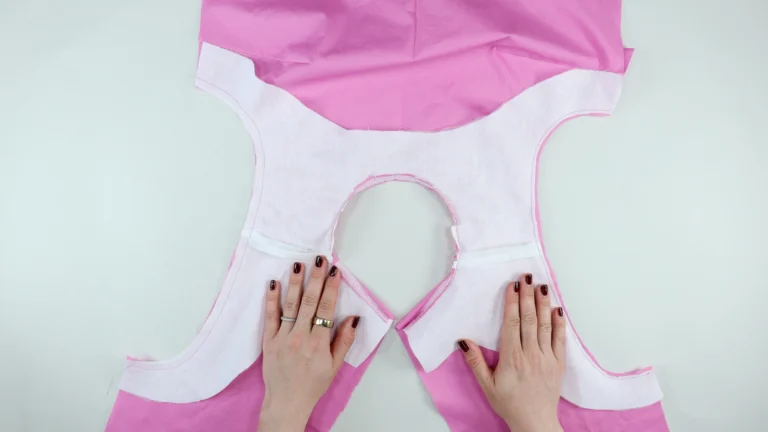
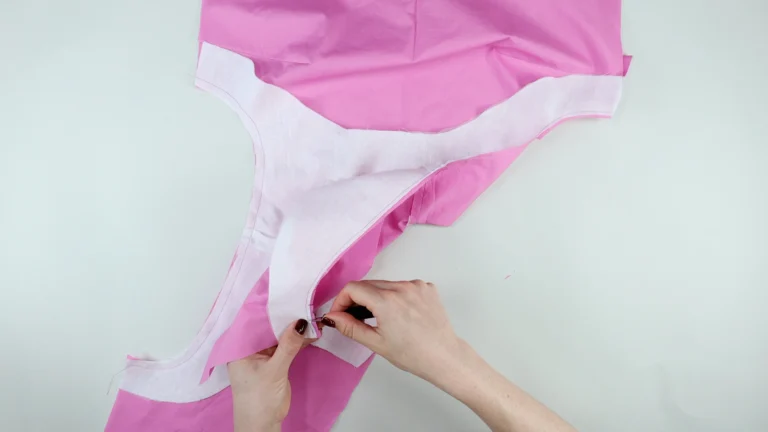
Turn the garment to the right side.
Reach into the shoulder, from the front of the garment.
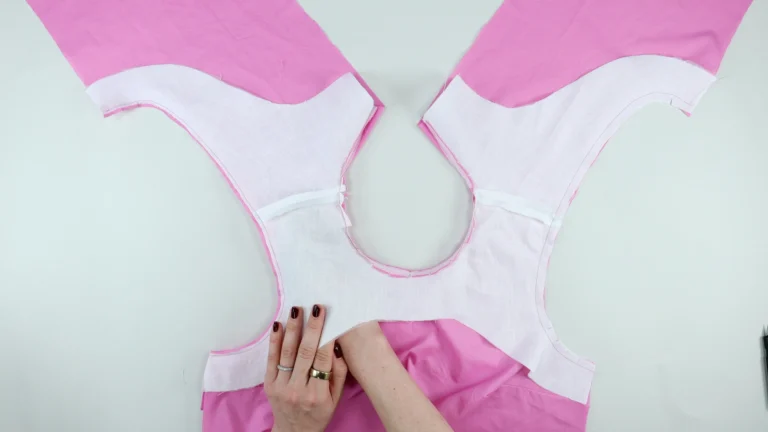
Grab the back of the garment and pull this through the shoulder seam, to turn the work to the right side.
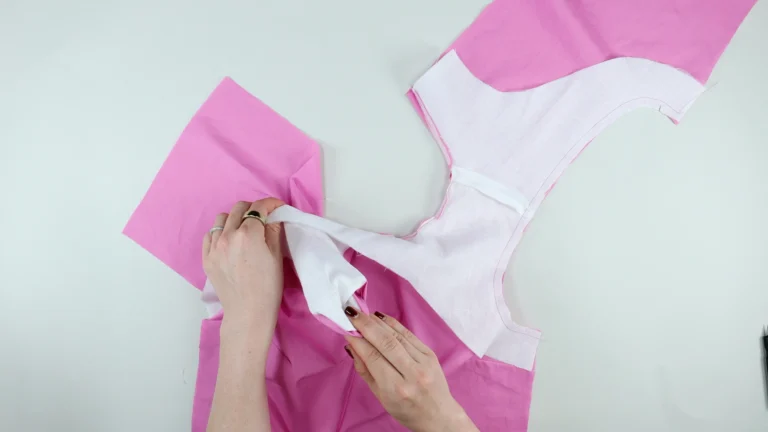
Completed for the second side, in the same manner.
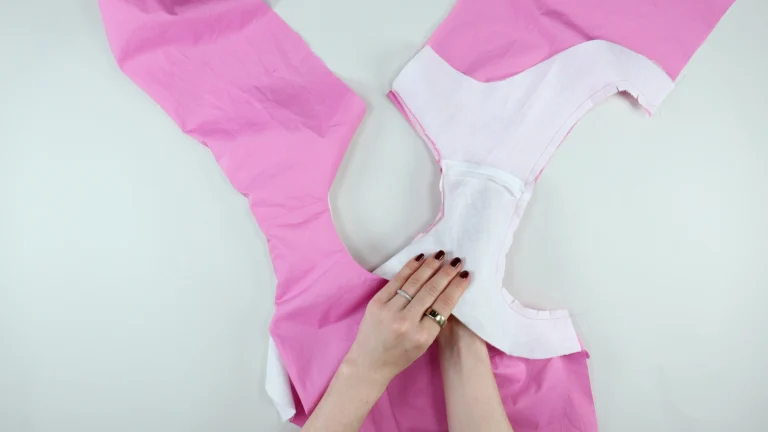
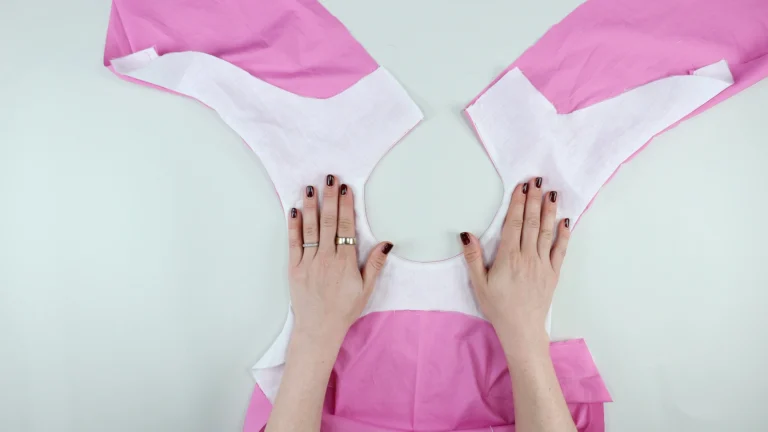
Lay garment flat with the right side up of the outer fabric facing up.
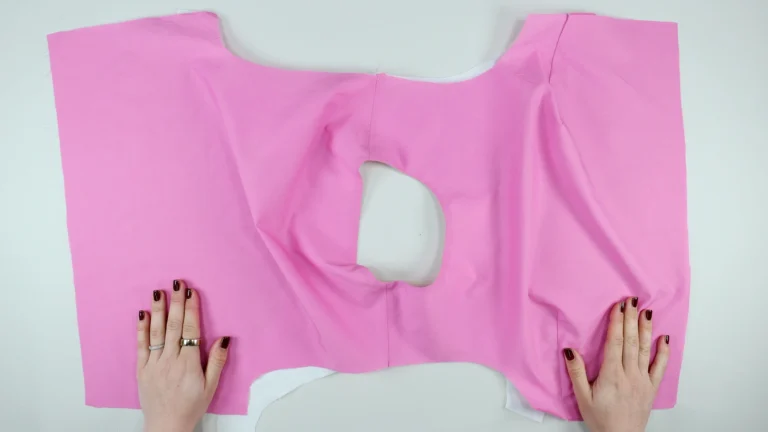
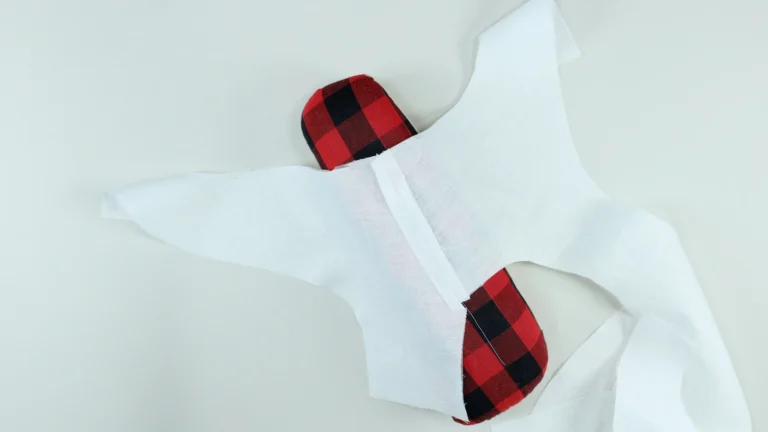
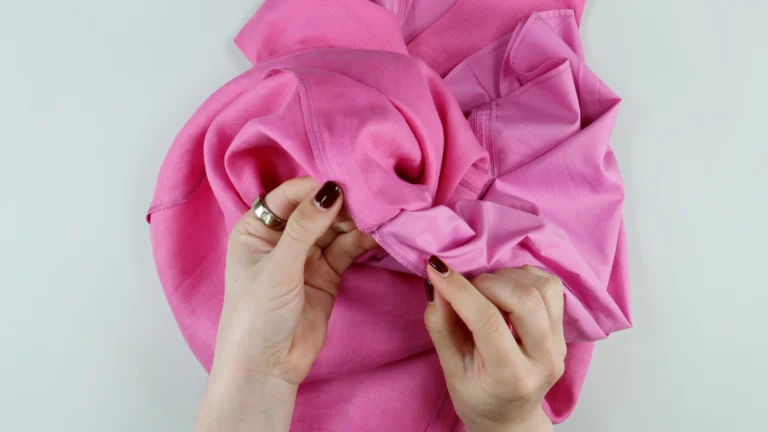
Roll one side of the garment tightly (include the facing and the outer fabric), from the side seam towards the shoulder or armhole that you plan to sew.
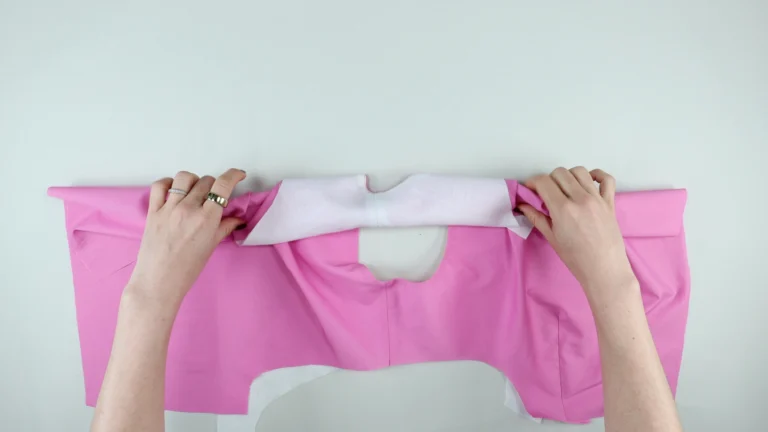
Once the roll of fabric is sitting in the middle of the shoulder, with the armhole you plan to sew.
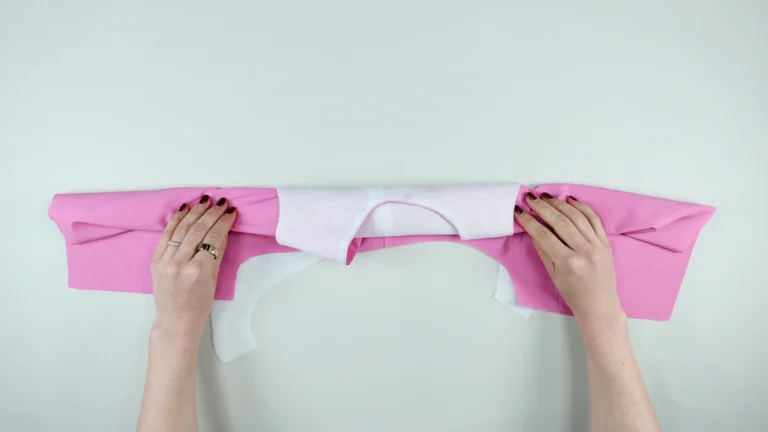
Lift up the fabric to release the facing that is currently at the bottom of the work. Allow the facing to have the right side of the fabric facing up.
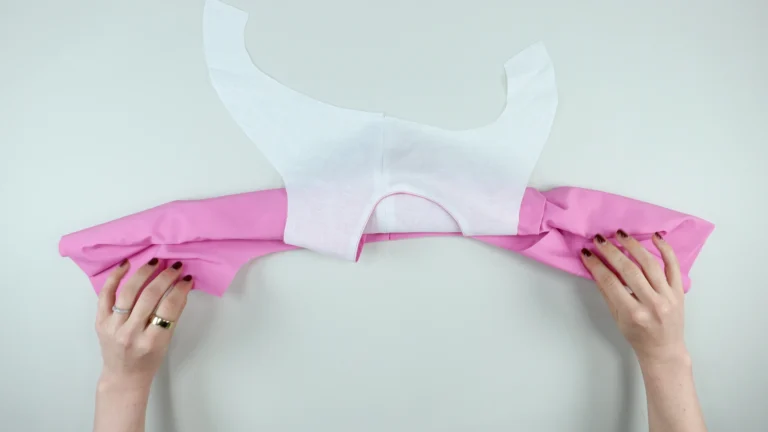
Bring the facing around the roll of the fabric, so that the facing and the outer fabric have the right sides facing one another.
The roll of material will be sandwiched between the outer and the facing in the shoulder of the garment.
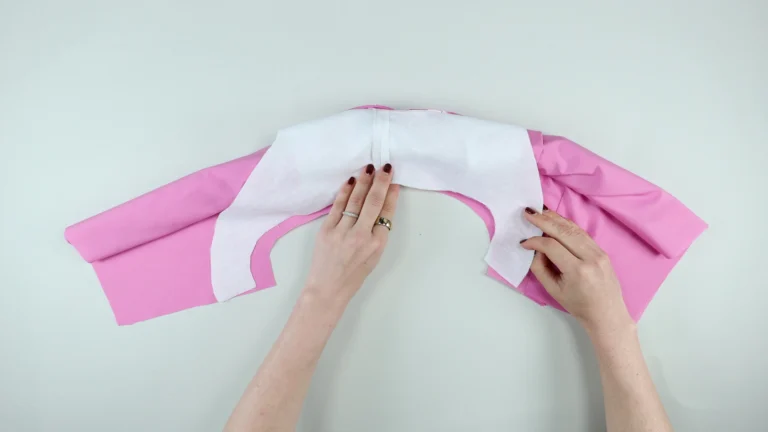
Align the armholes, match the shoulder seams between the facing and outer fabric. Pin in position.
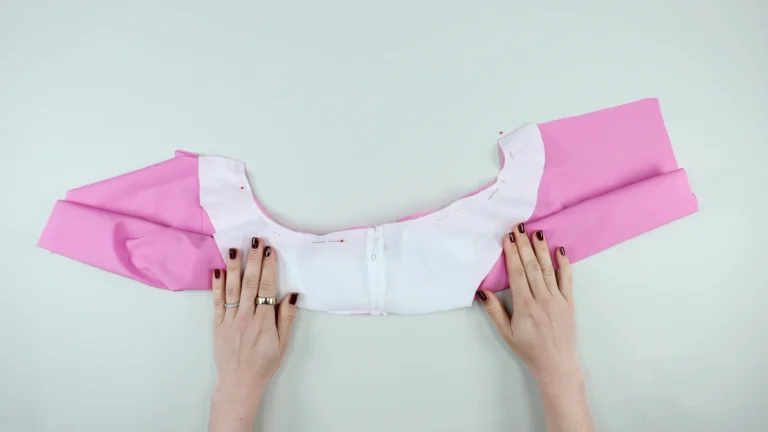
Stitch the armhole, ensuring that you do not catch the rolled up material inside the shoulder.
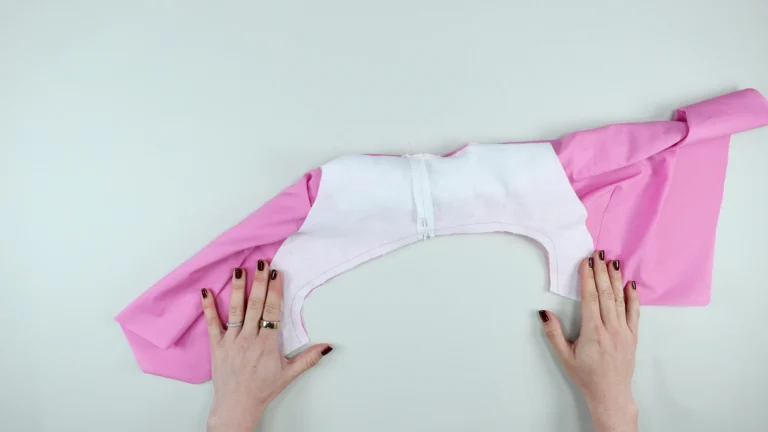
Clip into the curves of the armhole.
Trim and grade the seam allowances as required.
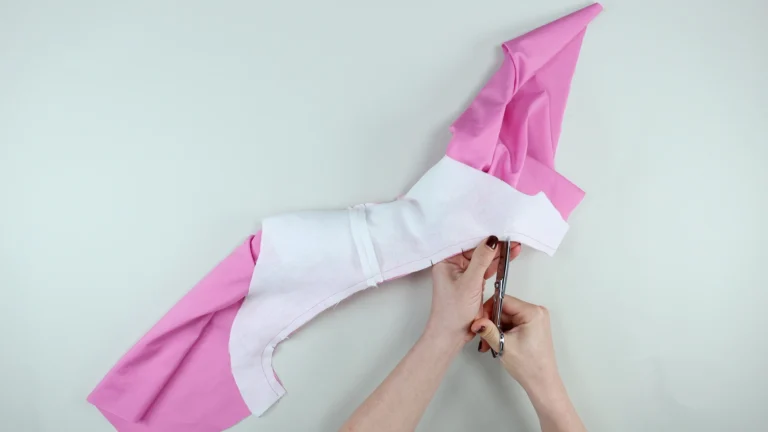
To turn the work to the right side.
Grab the rolled up fabric inside the shoulder. It does not matter if you do this from the front or back of the garment.
Pull to turn the work through to the right side. 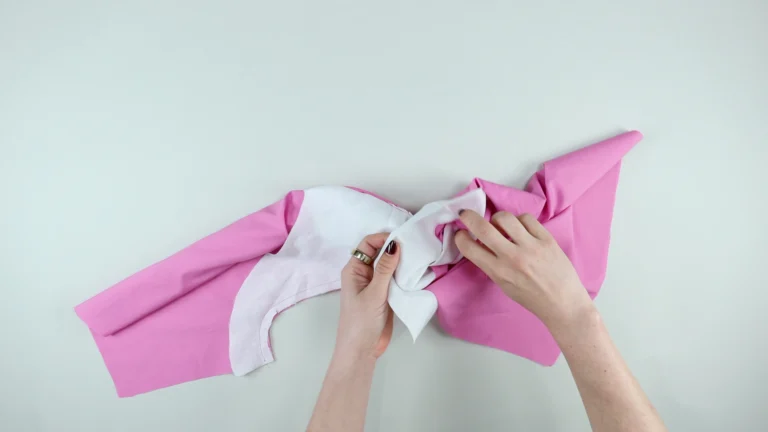
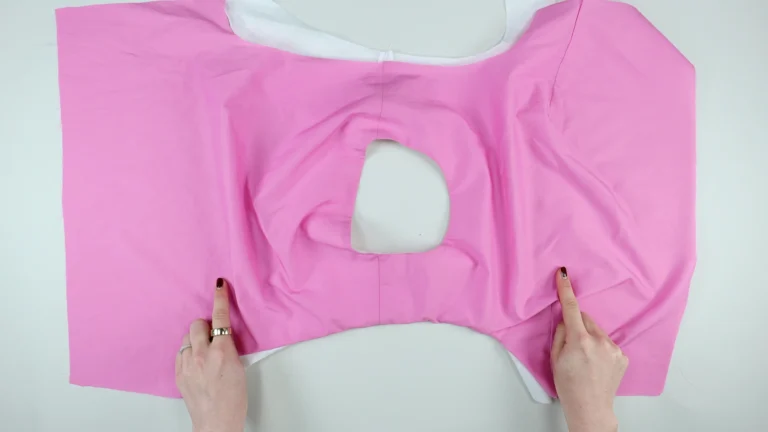
Complete the same steps for the second side of the garment.
Roll the garment from the side seam of the completed armhole (include outer and facing in the roll) towards the shoulder of the non-sewn armhole.
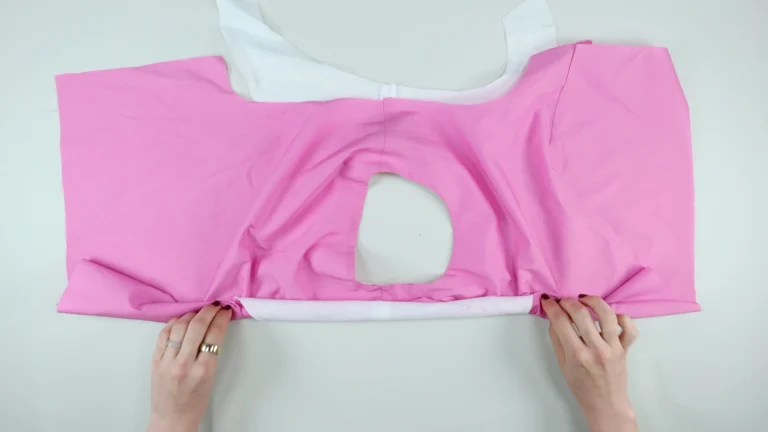
Position the rolled up fabric in the centre of the shoulder, of the non-sewn armhole.
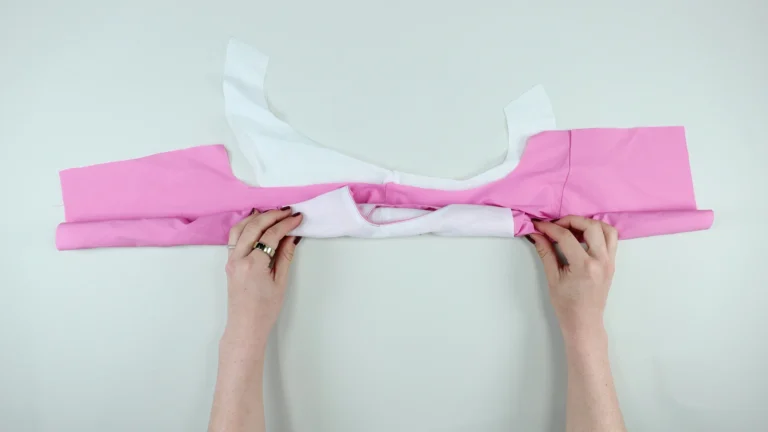
Lift the work to free the facing (of the non-sewn armhole). Allow the facing to sit with the right side of the facing, positioned up.
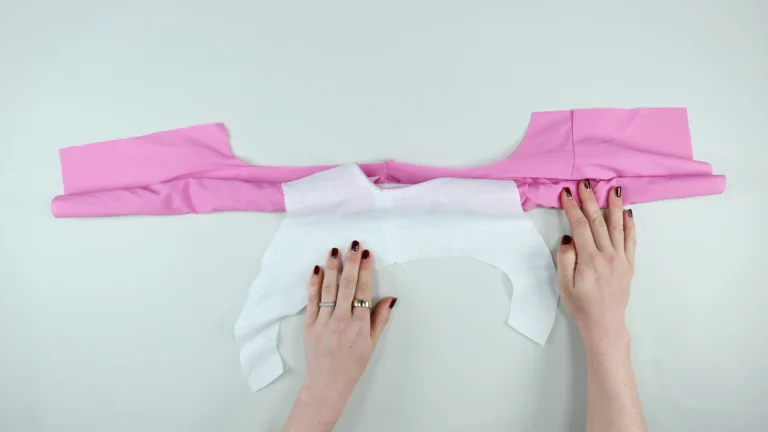
Wrap the facing around the rolled up fabric. Sandwiching the rolled up fabric between the facing and outer material. Positioning the facing and outer with the right sides of the fabric together.
Pin the armhole, and align the shoulder seams between the facing and the outer.
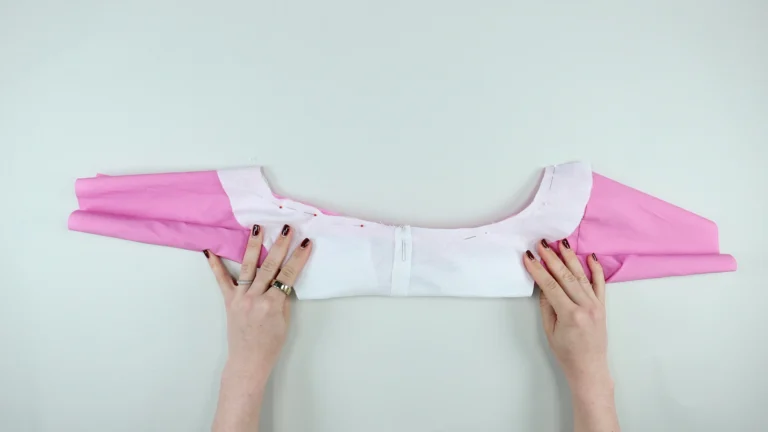
Sew in position. Trim, clip and grade as required.
Pull the rolled up material to turn the work to the right side, as completed for the first armhole.
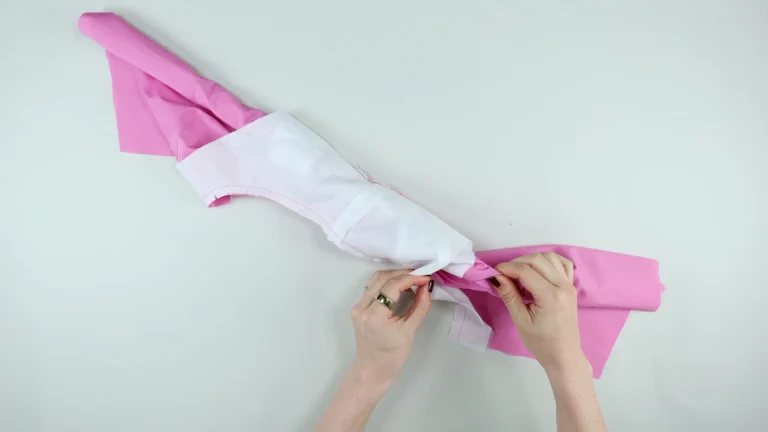
Now that both armholes are complete, my preference is to sew the side seams, before understitching the armholes.
If you are planning on finishing the seam allowances with the overlocker or serger and pressing the seam allowances open. It can be a good idea to finish the seam allowances now.
Align the side seams (right sides of material together), for the outer and facing.
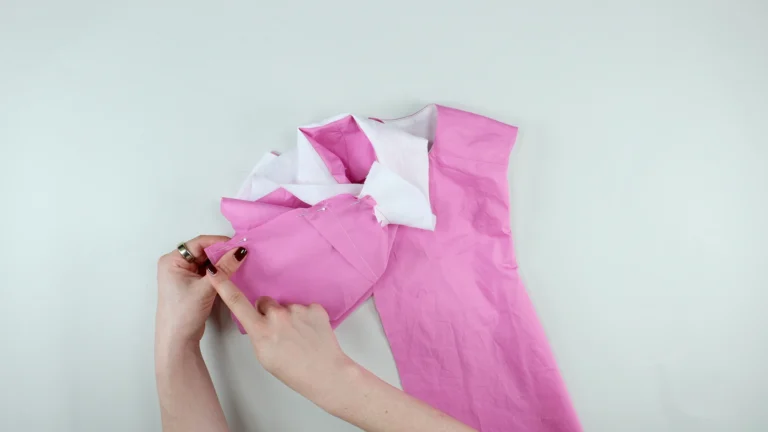
Ensure a perfect match between the facing and outer at the fabric join at base of the underarm. Use a Clover fork pin if needed.
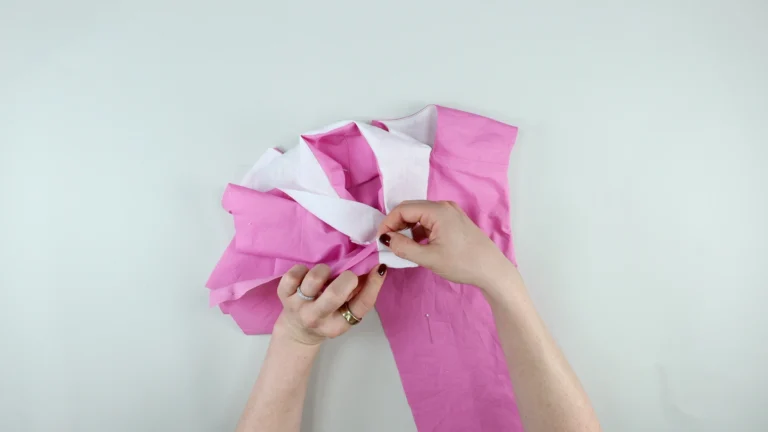
Push the armhole seam allowances towards the facing, as they will be understitched in this direction.
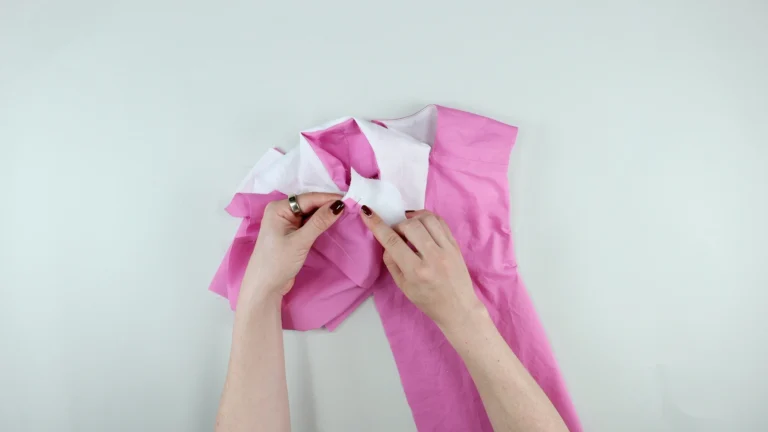
If you are working with a thicker fabric, the armhole seam allowances can be sent in opposite directions, on either side of the seam.
However, the seam allowances will need to be pushed towards the facing for understitching, as quickly as possible after the sewn side seam.
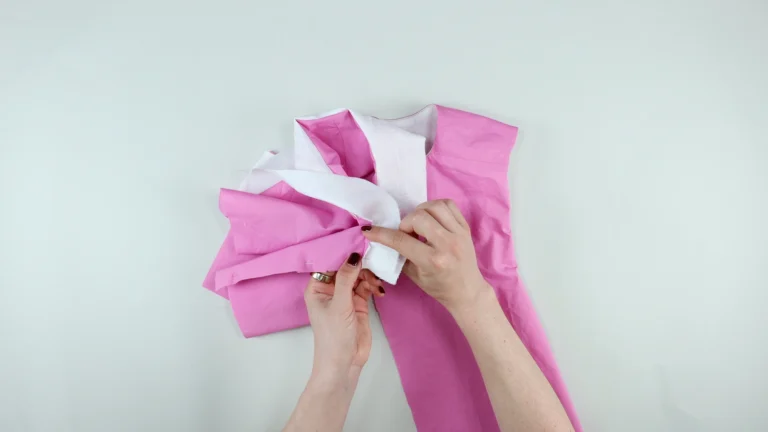
Press the side seam allowances open, or towards the back of the garment.
Finish the seam allowances using your preferred method.
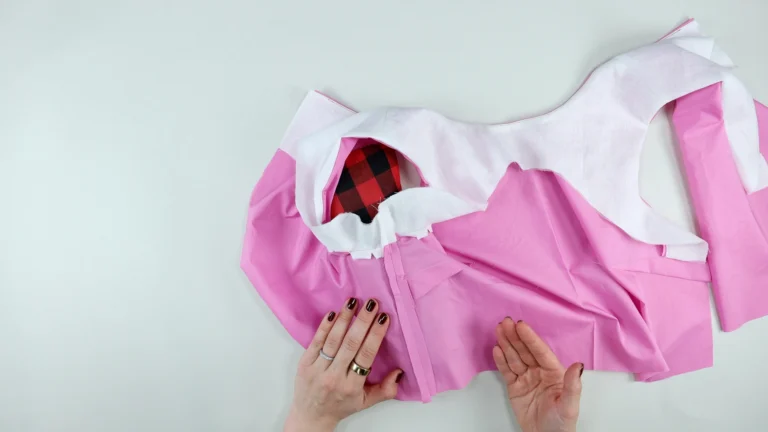
Here is an example of seam allowances pressed towards the back of the garment and finished with the overlocker or serger. This garment is fully lined.
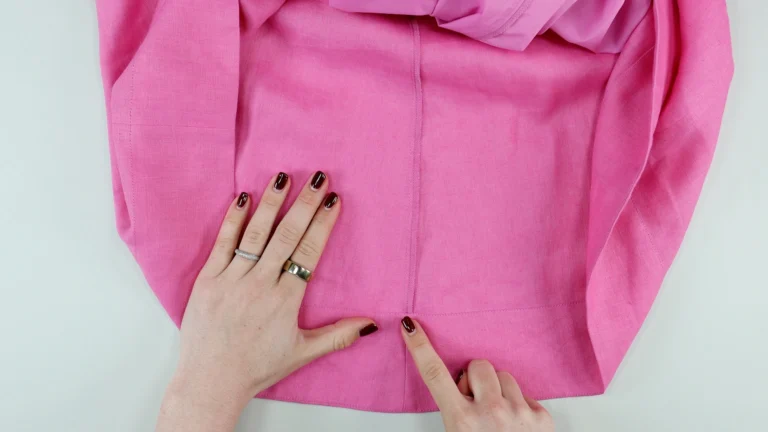
Repeat the understitching process on the armholes:
Sew on the facing; 2 – 3 mm (1/16”- 1/8”) from the armhole seam. Use the same distance as the neckline for consistency.
Keep the seam allowances pushed toward the facing, so that they are caught with the understitching.
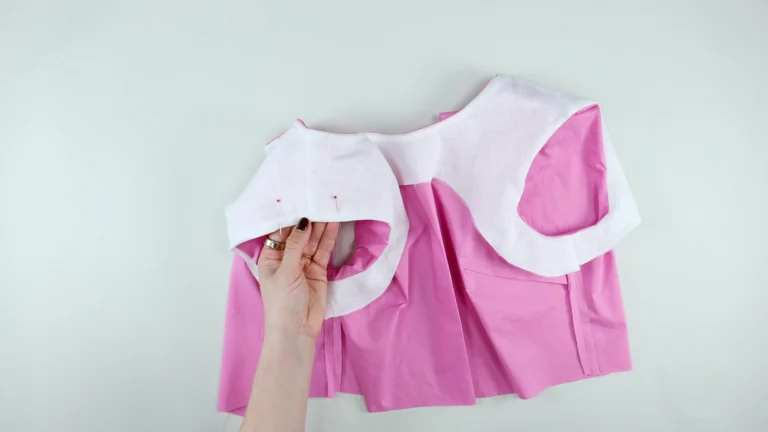
You will probably not be able to understitch all the way around the armhole. Garments with narrower shoulders will make this harder.
Understitch to be consistent on both sides. I usually work to sew to approximately 5 cm (2″) away from the shoulder seam. Mark with pins or chalk before sewing for consistency.
Press the understitched seam ensuring that you can see a small amount of the outer fabric from the facing side.
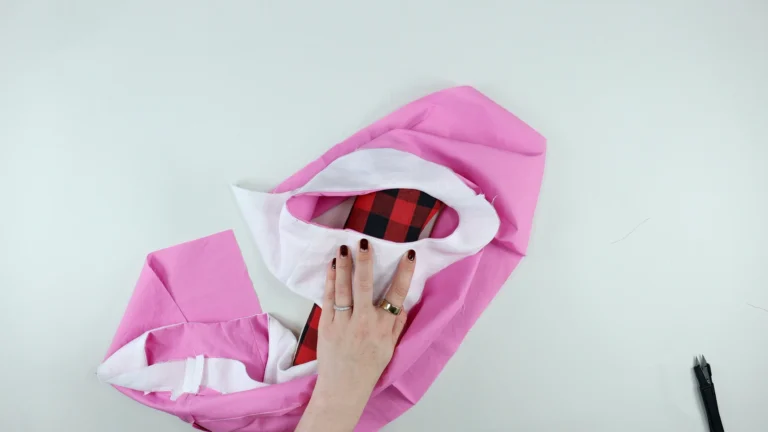
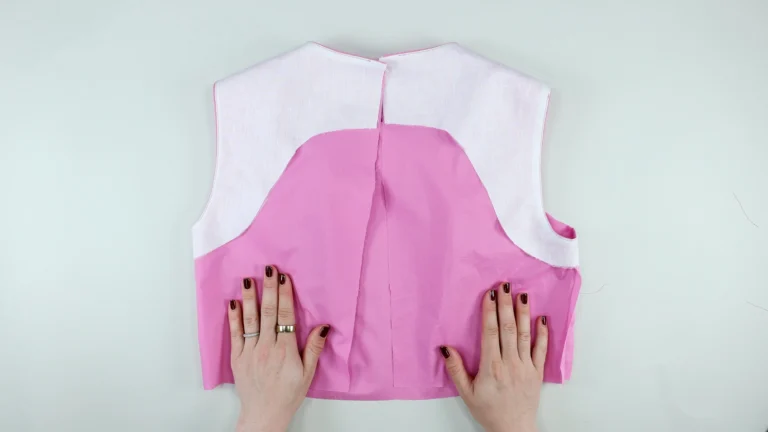
You have several options:
Overlock or serge
Overlock or serge, and then turn, press and edgestitch
Rolled (baby) hem
Apply binding
Attach a lining to the bottom of the facing
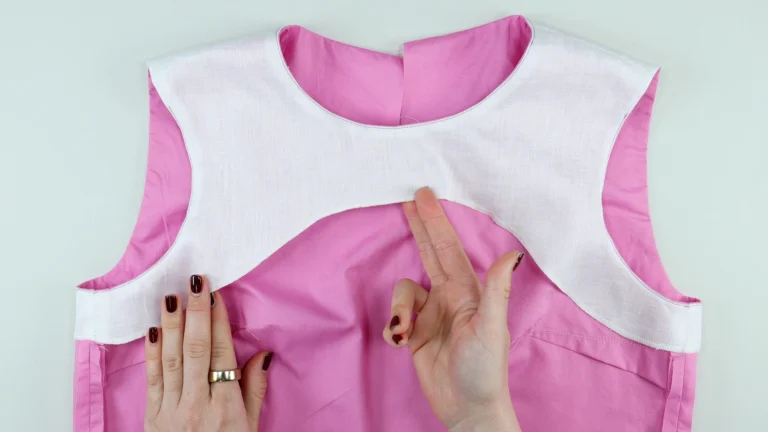
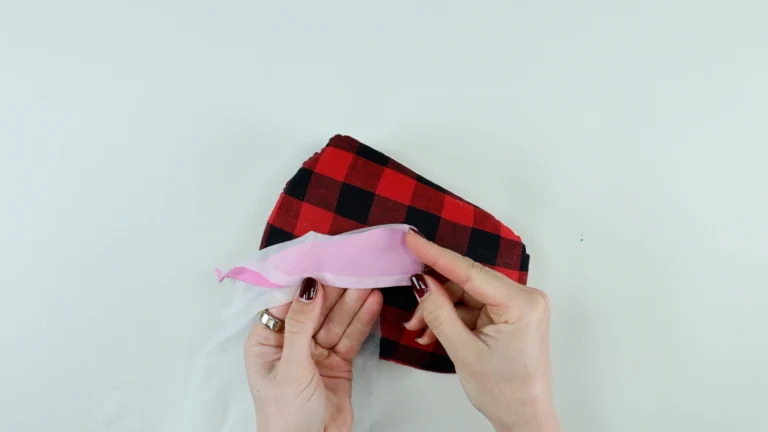
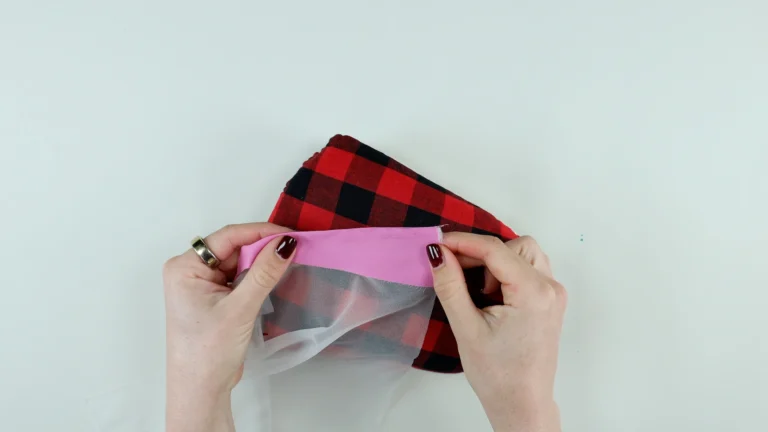
Another option is to sew the bottom edge of the facing to the interfacing, prior to construction.
This can be completed with sew-in or fusible interfacing.
Here is an example with a scrap of fabric.
Start by sewing the interfacing and facing, right sides of the fabric together (non-sticky side of fusible interfacing).
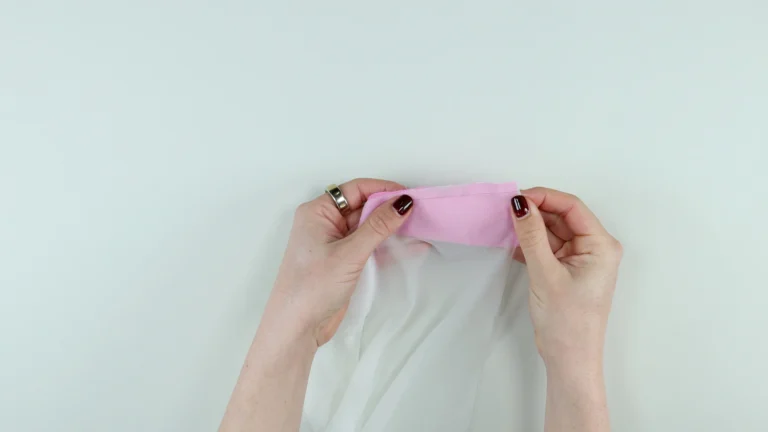
Turn the material, so that the wrong sides of fabric are now together, and press; ensuring a neat finish along the bottom edge.
Working with fusible interfacing you will want to fuse the facing as normal.
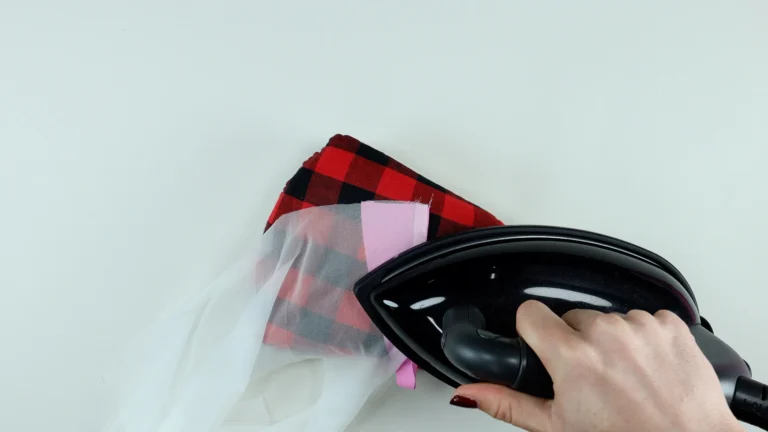
This method gives a clean finish along the bottom edge of the facing. It is perfect for sew-in interfacing.
Be cautious and test if using a fusible interfacing; incase the interfacing shrinks slightly and distorts the facing shape/size.
To stop the facing moving inside the garment:
Sew the facing to the side seam allowances
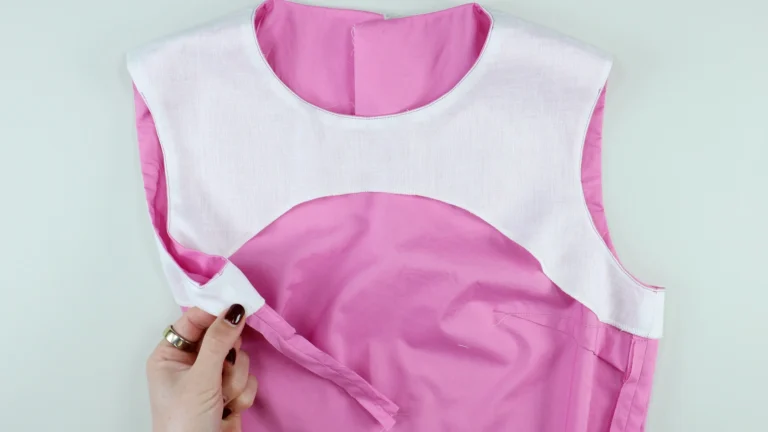
Use a small bar tack or a simple backwards and forwards stitch
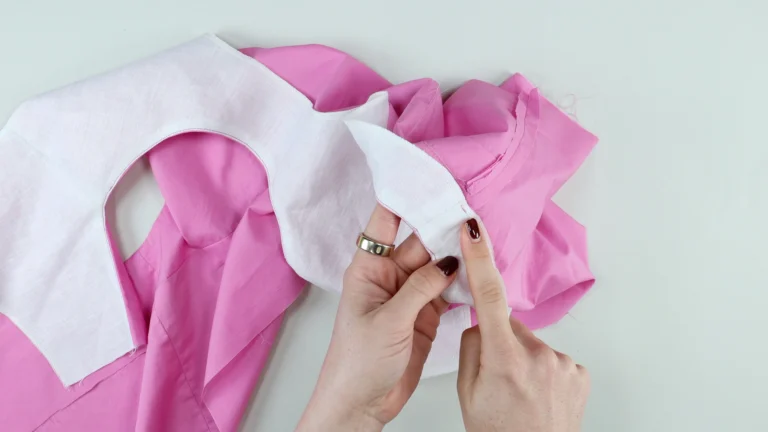
Do not sew through to the right side.
Here is an example of two seam allowances sewn together, if the seam allowances are pressed towards the back of the garment. This garment has a full lining, sewn in the same method as the all-in-one facing.
You have:
A clean neckline
Clean armholes
Fully enclosed seams
A beautiful, professional finish both inside and out.
What is the burrito method in sewing?
The burrito method with a facing is a technique used to sew enclosed seams, allowing you to finish armholes and necklines cleanly in an all-in-one facing.
Can beginners sew an all-in-one facing?
Yes, with step-by-step guidance, beginners can successfully sew an all-in-one facing using simple techniques.