A thread chain is a couture hand sewing technique used to anchor two layers of fabric together while still allowing movement between them.
In this tutorial, I’ll show you step-by-step how to sew a thread chain by hand, how long it should be, where to position it inside a garment, and how to achieve a clean, professional finish.
This technique is especially useful for garments with loose linings, pocket bags, or areas where you need to control movement without visible stitching on the outside.

A thread chain (sometimes called a swing tack or French tack) is a series of looped knots worked by hand to create a small chain of thread.
It connects:
A lining to the outer garment
A pocket bag to a seam allowance
Two internal layers that need light anchoring
Unlike stitching the layers directly together, a thread chain:
Allows movement
Prevents pulling and distortion
Remains invisible from the outside
Creates a couture-level finish
Thread chains are commonly used in tailored garments, dresses with loose linings, and high-end sewing.
You should use a thread chain when:
Sewing a loose lining
Preventing lining twist or ride-up
Securing pocket bags internally
Anchoring layers without visible topstitching
Working on couture or tailored garments
This technique is ideal when you want stability without restriction.
You only need:
Hand sewing needle
Thread (matching your fabric colour)
Scissors
Ruler (optional, for measuring chain length)
That’s it, no sewing machine required.
Correct placement is essential for a professional result.
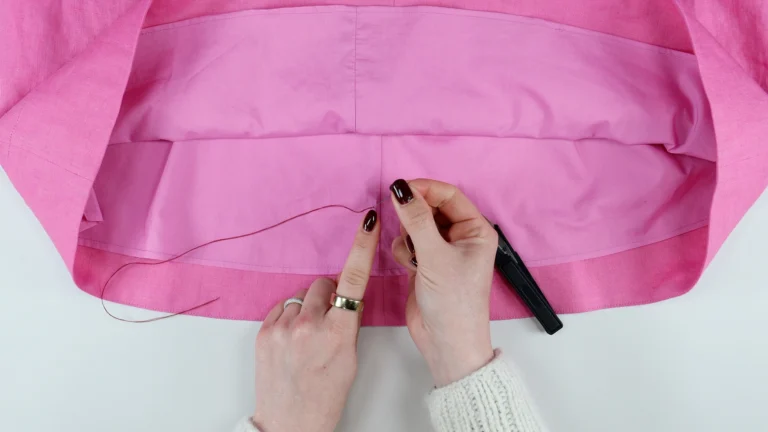
In this example, the thread chain is positioned:
Approximately 1.5cm (5/8″) down from the top inside edge of the hem
On the side seam
Hidden underneath the lining
You should:
Turn your garment inside out
Ensure the lining is hanging naturally
Position the chain where it will not be visible
Sew only through seam allowances, never through to the right side
Tip: Hang the garment or place it on a mannequin before attaching the second side of the thread chain. This ensures the lining sits correctly.
Step 1: Prepare Your Thread
You can use:
A single thread
A double thread (for a thicker chain)
If using double thread, I recommend passing both ends through the eye of the needle and securing with a loop to prevent uneven thread lengths – How to Thread: Double Thread
You can either:
Tie a knot at the end
Or anchor by sewing over yourself several times
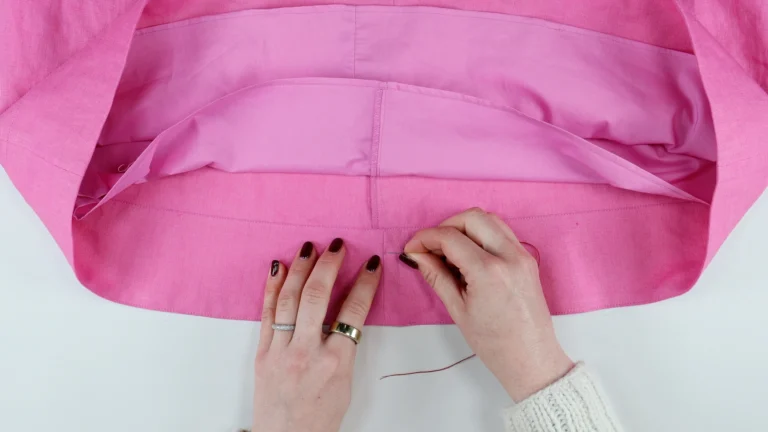
Step 2: Anchor the First End
Choose your starting point (usually the outer garment seam allowance).
Sew through the seam allowance only.
Sew over yourself a few times to secure.
Trim any thread tails.
Make sure nothing is visible on the outside of the garment.
Step 3: Create the Thread Chain
This is where the technique begins.
1. Hold the needle in your dominant hand.
2. With your other hand, form a loop in the thread.
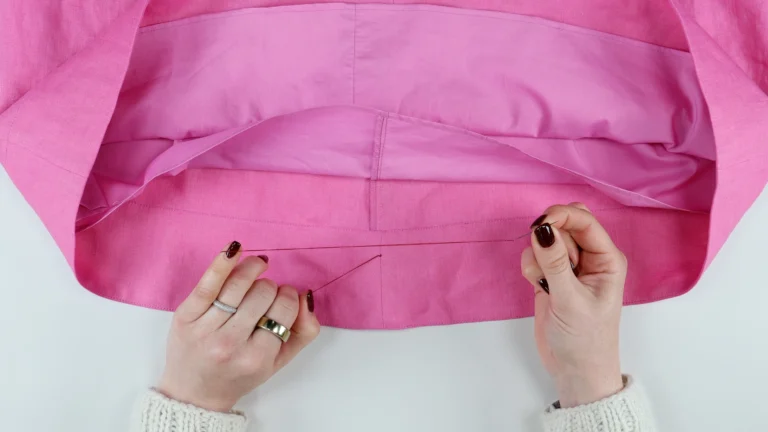
3. Twist the loop slightly to lock the thread near the fabric.

4. Reach through the loop and grab the working thread.
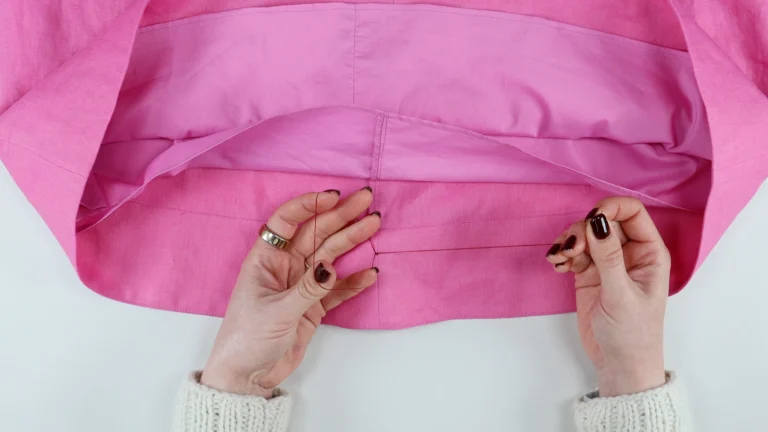
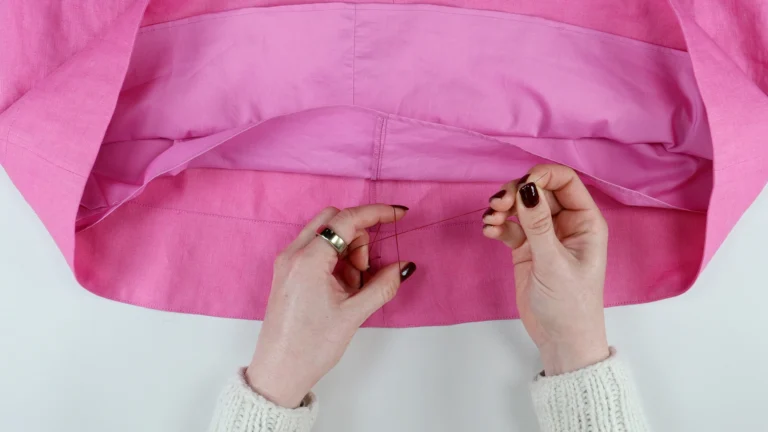
5. Pull to form a knot.
6. Wiggle the knot down to sit tightly at the base.
The first 1-3 knots are usually the trickiest, take your time.
Continue repeating this process:
Create loop
Grab working thread
Pull
Wiggle knot into position
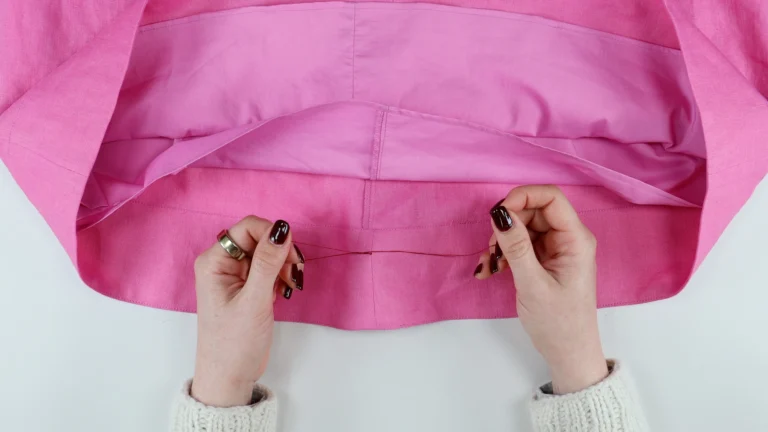
You want the knots to sit neatly on top of each other to form a tidy chain.
Step 4: Measure the Length
Your thread chain length will depend on the garment.
For this example:
Approximately 4cm (1½”)
You can measure with a ruler before attaching the second side.
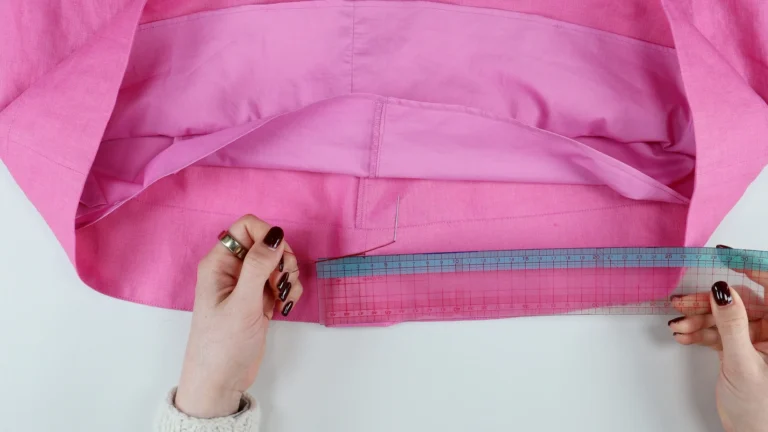
The chain should:
Allow movement
Not pull
Not sag excessively
Step 5: Secure to the Second Layer
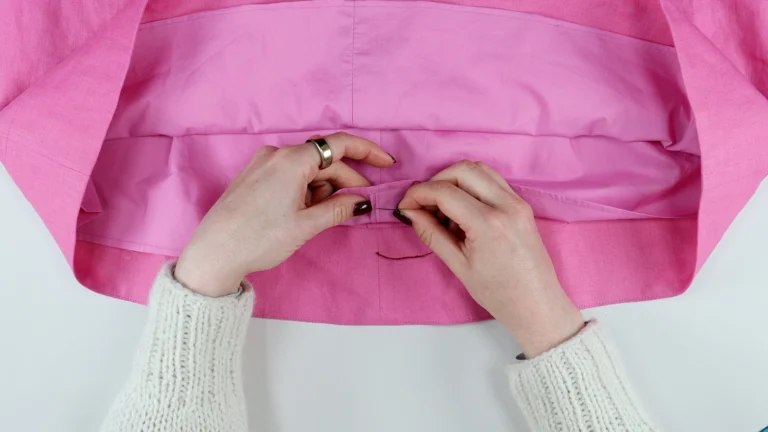
Position the lining correctly (hang garment if needed).
Insert the needle into the lining seam allowance.
Sew over yourself several times.
Secure with a knot or by backstitching.
Trim thread.
Again, nothing should show on the right side.
There is no universal length.
It depends on:
Garment weight
Lining fullness
Desired movement
As a general guideline:
3-5cm (1-2 inches) works for most garments
Always test by gently moving the lining before securing permanently.
Yes.
The exact same technique can be used to create:
Thread button loops
Decorative thread loops
Closure loops on lightweight garments
Simply work the chain to the desired length and anchor both ends.
Sewing through to the right side
Making the chain too tight (causes pulling)
Making the chain too long
Not positioning lining correctly before attaching
Take your time, especially with the first few knots.
Thread chains are widely used in:
Tailoring
Evening wear
Bridal garments
High-end ready-to-wear
They allow garments to hang beautifully while maintaining internal structure, something machine stitching alone cannot achieve.
Adding this technique to your sewing repertoire instantly elevates your finish.
If you prefer to see the movement of the hands and looping technique in real time, watch the full tutorial above.
The Neve Dress Sewing Pattern uses thread chains to anchor the loose lining to the outer dress while allowing the layers to move naturally.
Shop the Neve Dress Sewing Pattern